Screen recorders for PCs come in handy when you want to save live streaming, film a tutorial, or share what you’re looking at with your friends. Fortunately, Windows comes built-in with several ways to record the screen natively so that you don’t have to rely on third-party apps. On that note, here’s how to record the screen of your Windows 10 or 11 laptop using the Xbox Game Bar and Snipping Tool.
Table of Contents
Screen record in Windows with Xbox Game Bar
Xbox Game Bar tool was designed for gamers to capture screenshots and videos, and broadcast their gameplay online. But it can also be used by anyone to take record their laptop’s on-screen content.
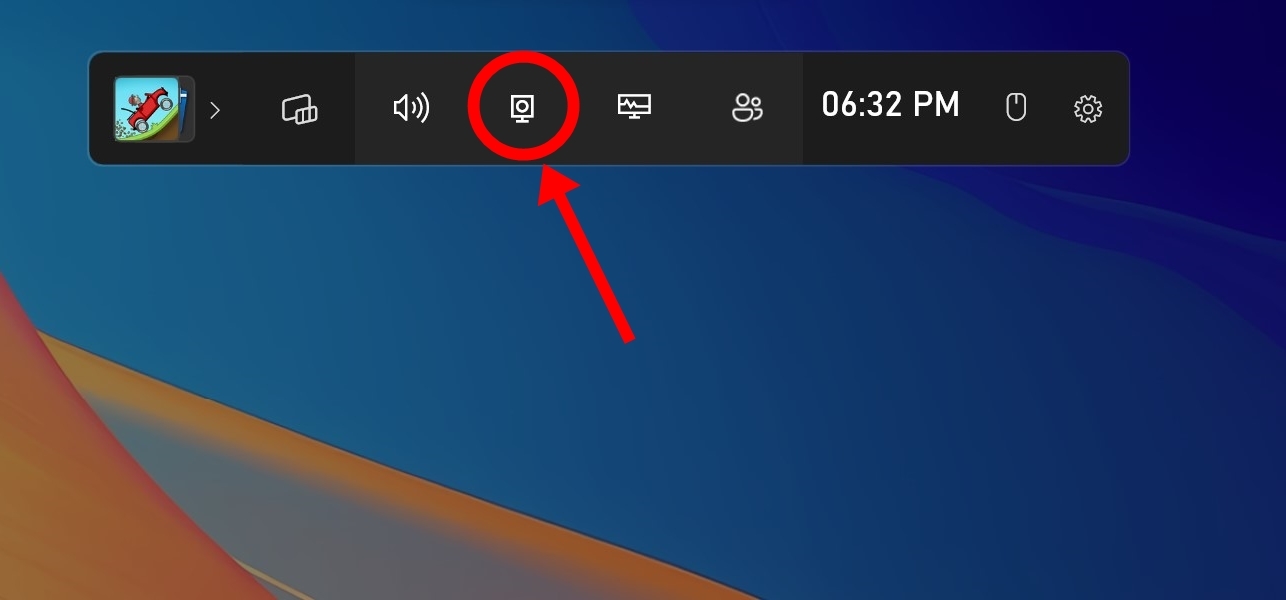
Step 1: Press Windows key + G to run the Xbox Game Bar
Step 2: Choose the “Yes, this is a game” checkbox to load the Game Bar
Step 3: Open the app whose screen you wish to record. We’ll be using Chrome for explanation purposes
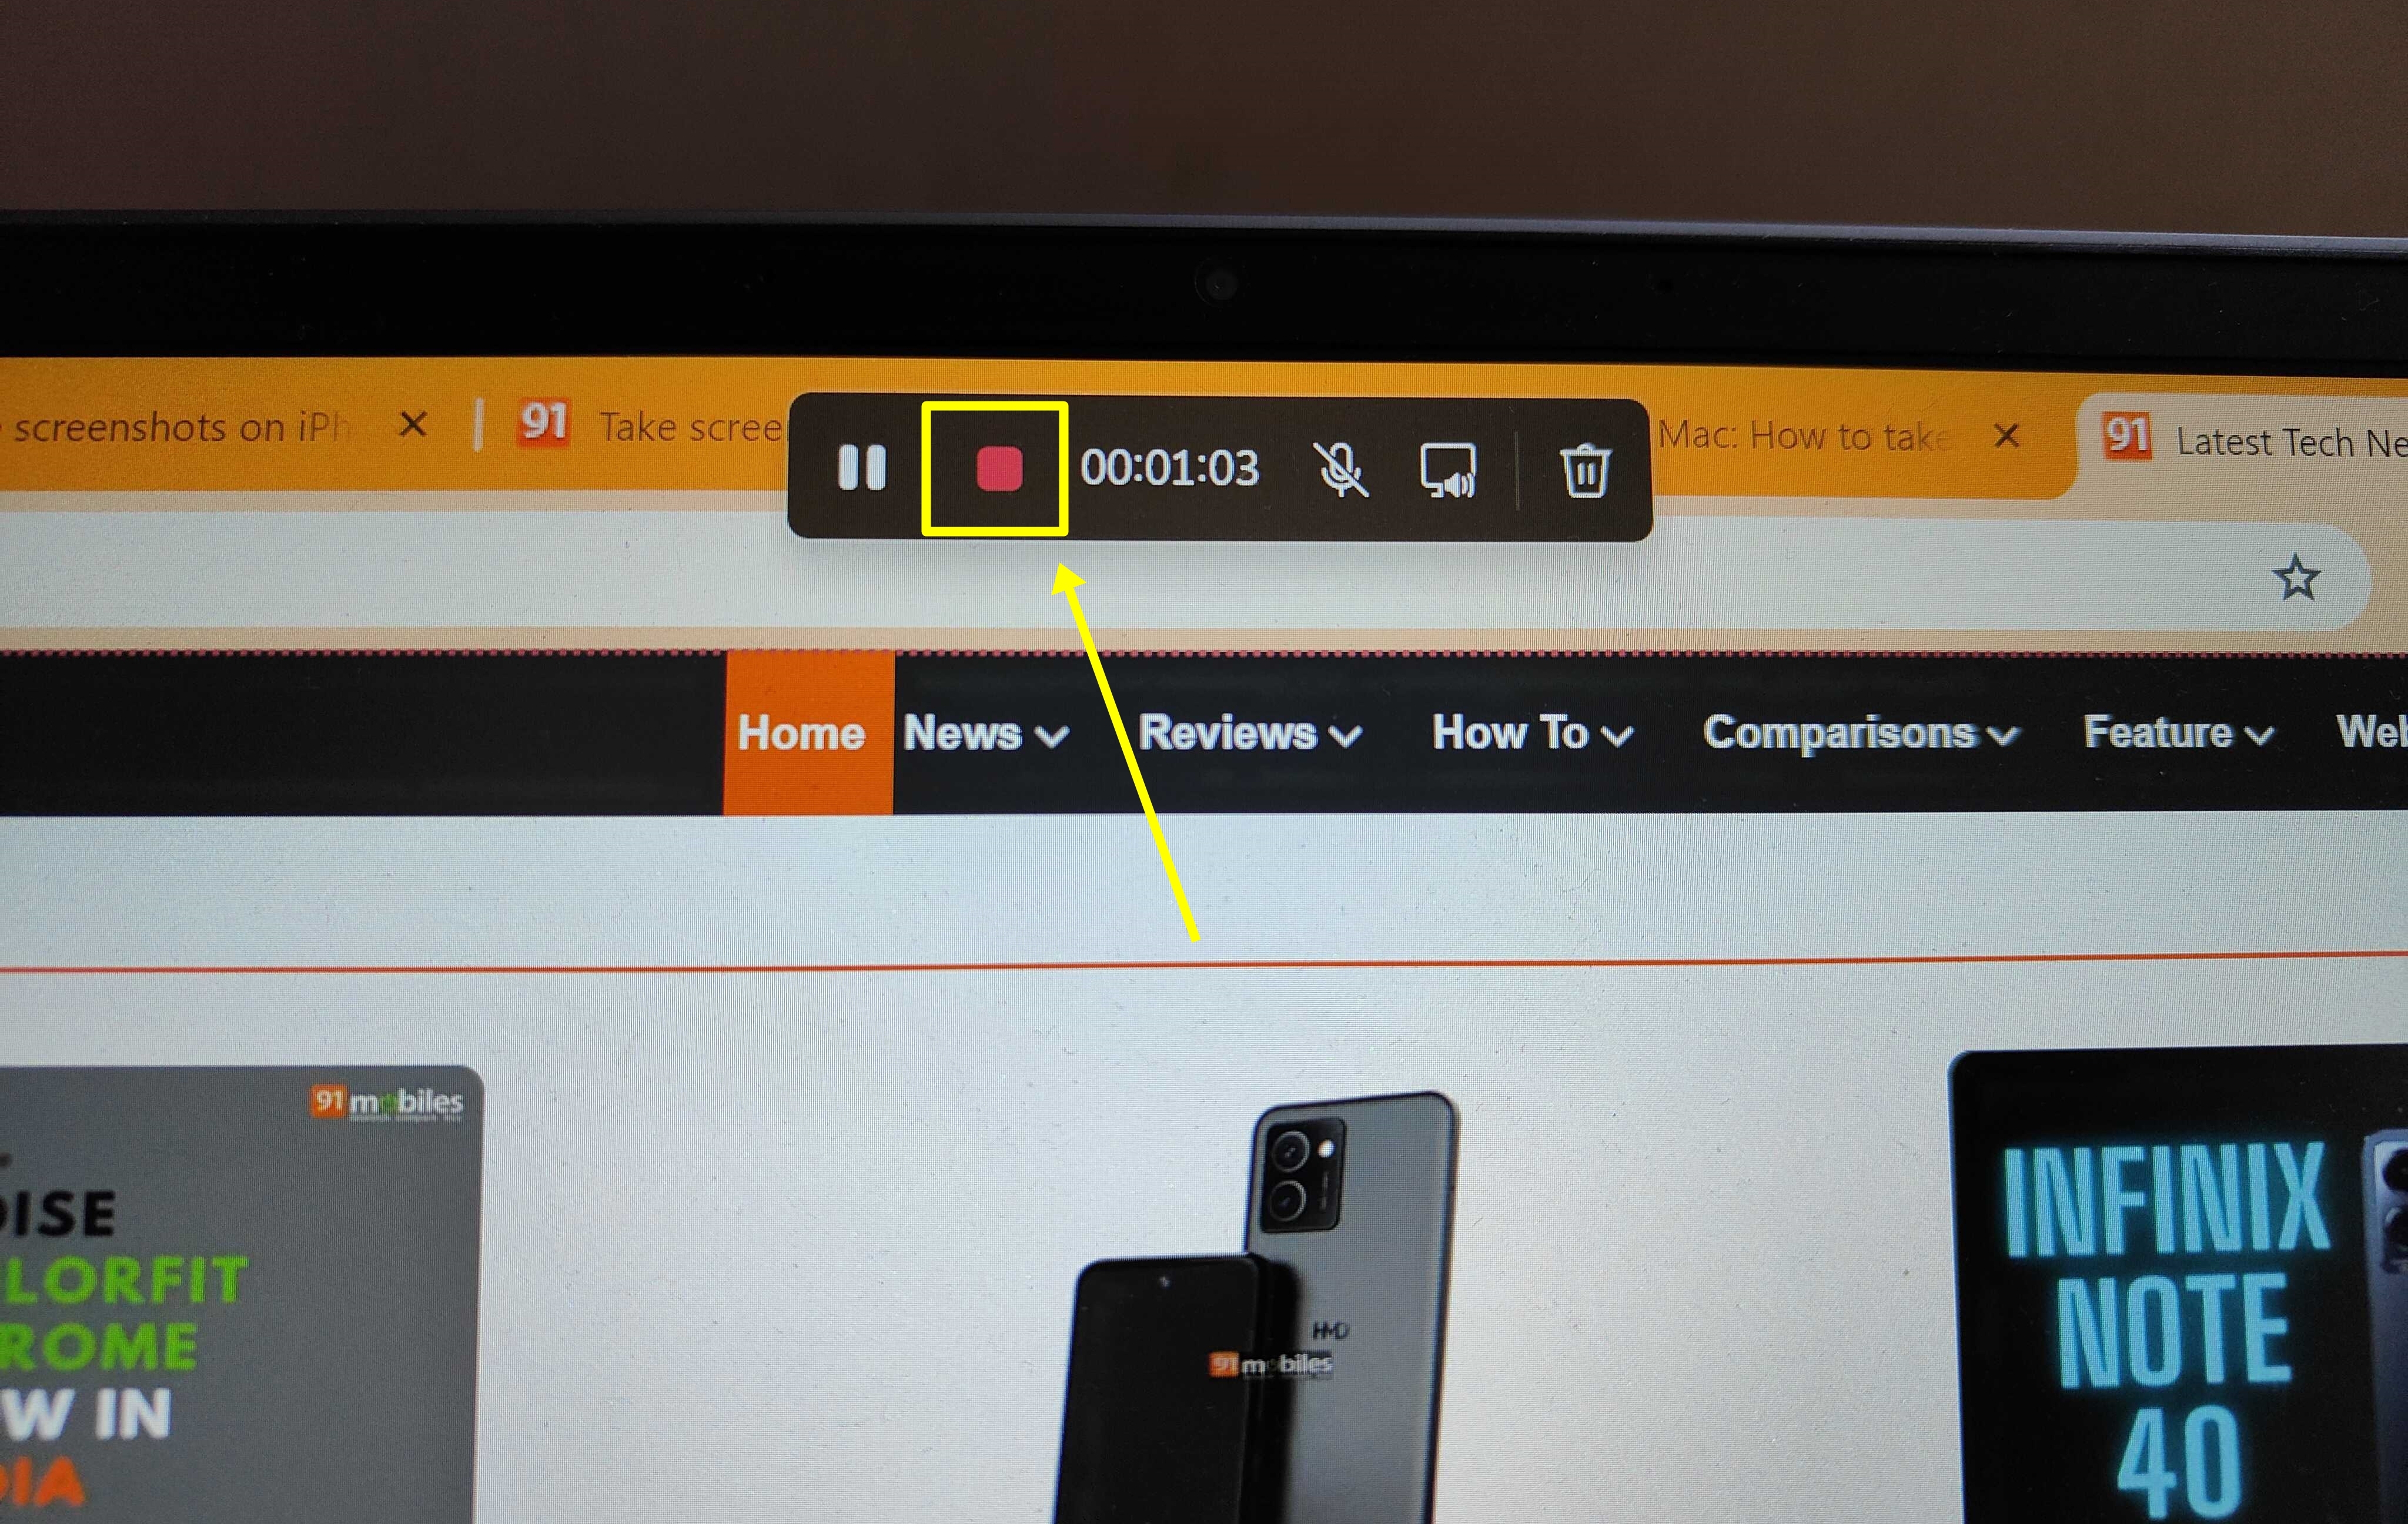
Step 4: Click on the Start recording button or press Win + Alt + R to record the screen.
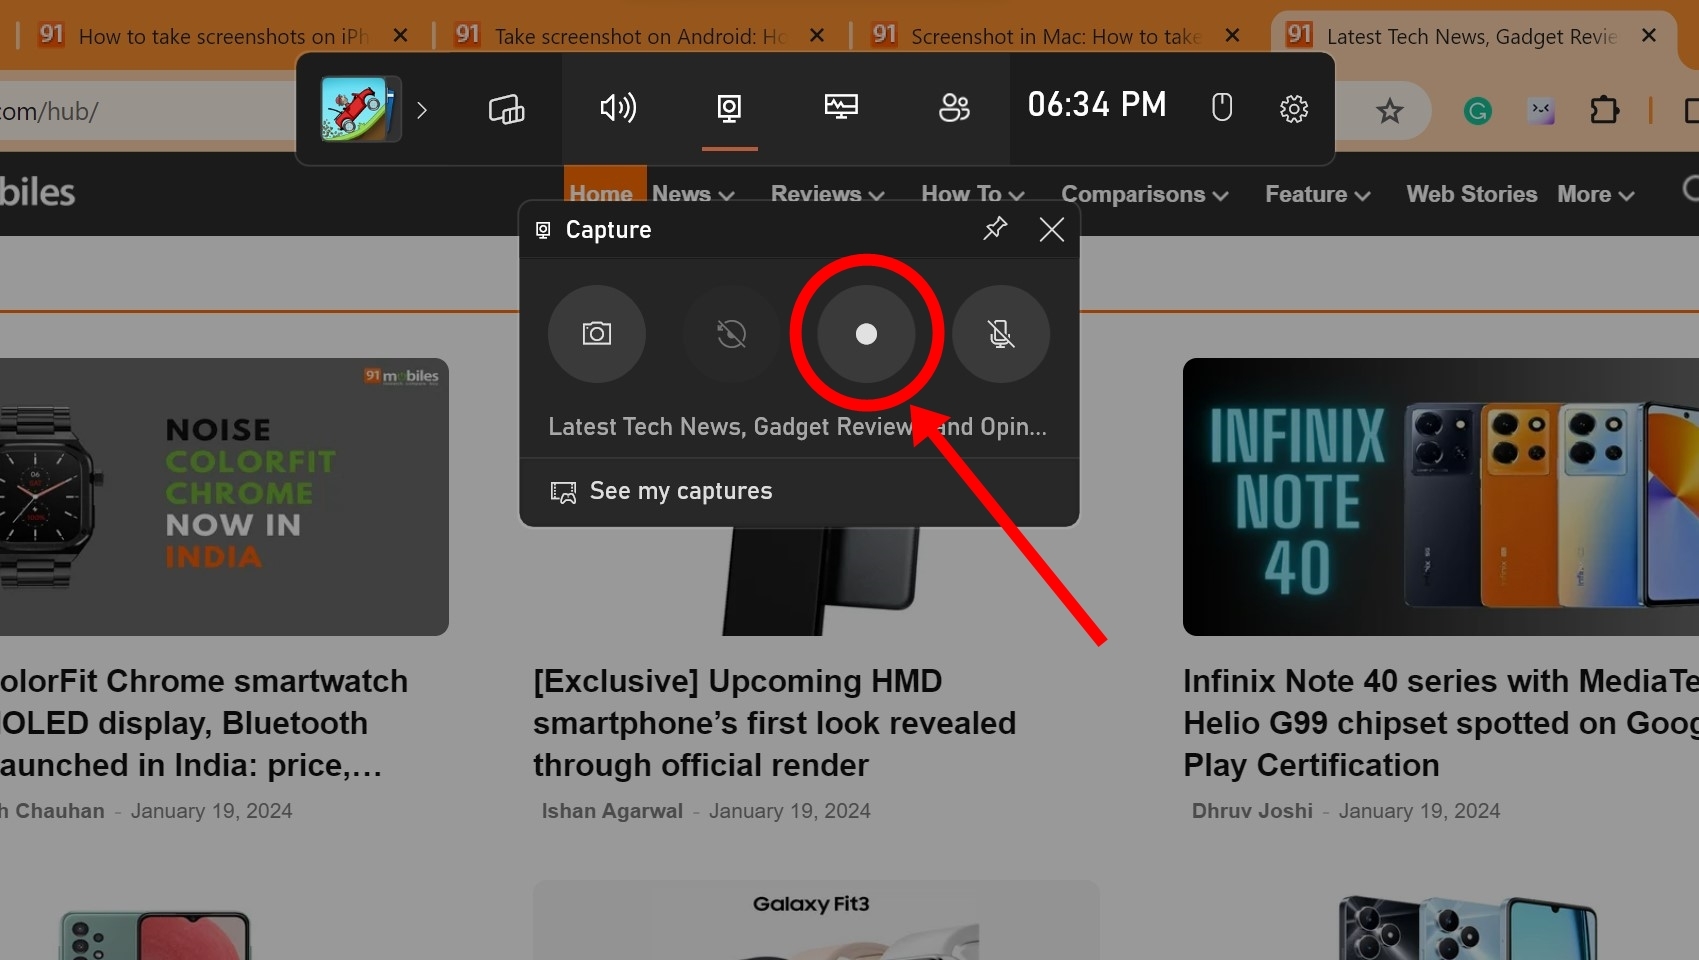
Step 5: Enable the microphone from the game bar, if you want to record audio as well
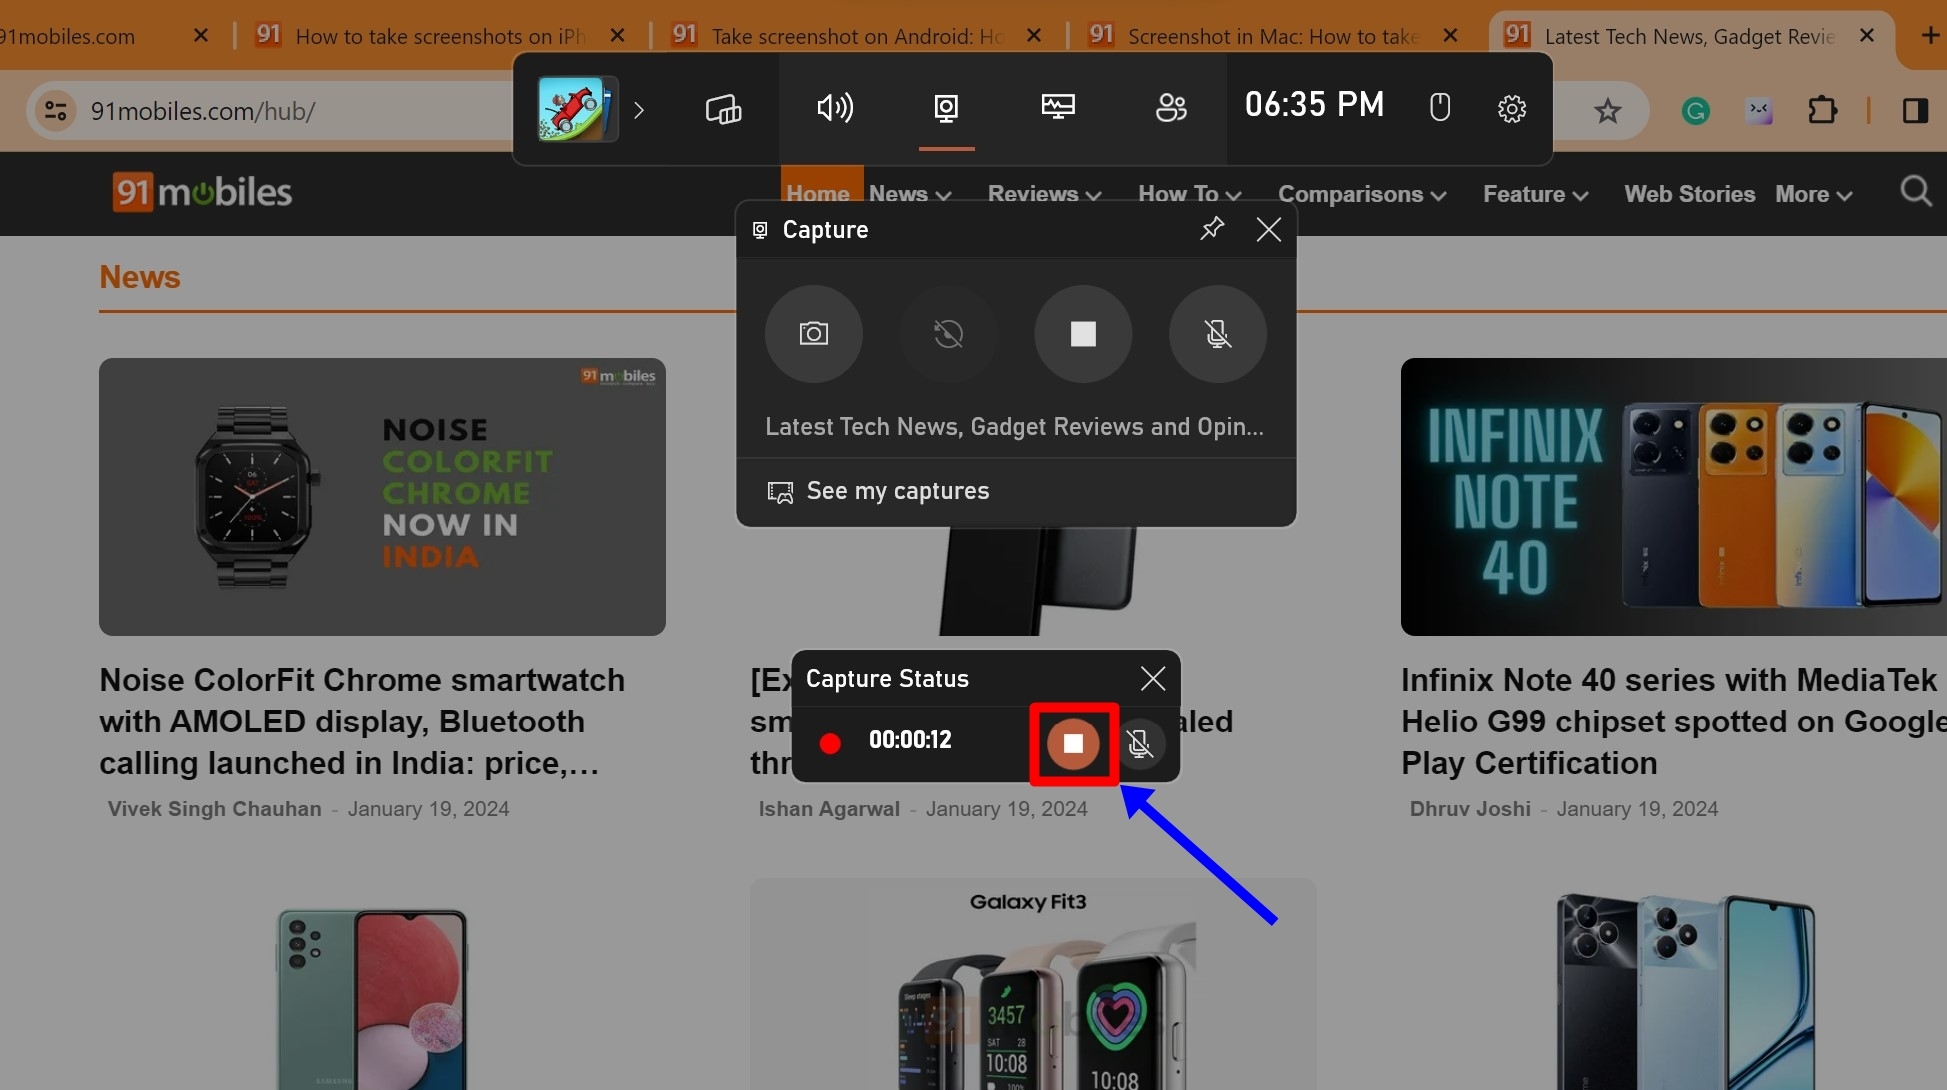
Step 6: Stop the recording by clicking on the red button
Step 7: That’s it! The screen recording in Windows 10 will be saved as MP4 on your device under the Videos folder in a subfolder called Captures. You can also access the recording from the Xbox app under the Game DVR menu
It’s worth mentioning that this screen recorder for Windows 10 laptops/ PCs only works on a handful of apps. Xbox Game Bar can’t capture the entire desktop and programs such as File Manager.
Record your screen in Windows 11 using Snipping Tool
The Snipping Tool, which comes in handy to capture screenshots now comes with a built-in screen recorder. This allows you to quickly record the screen without the hassle of installing any third-party apps or software.
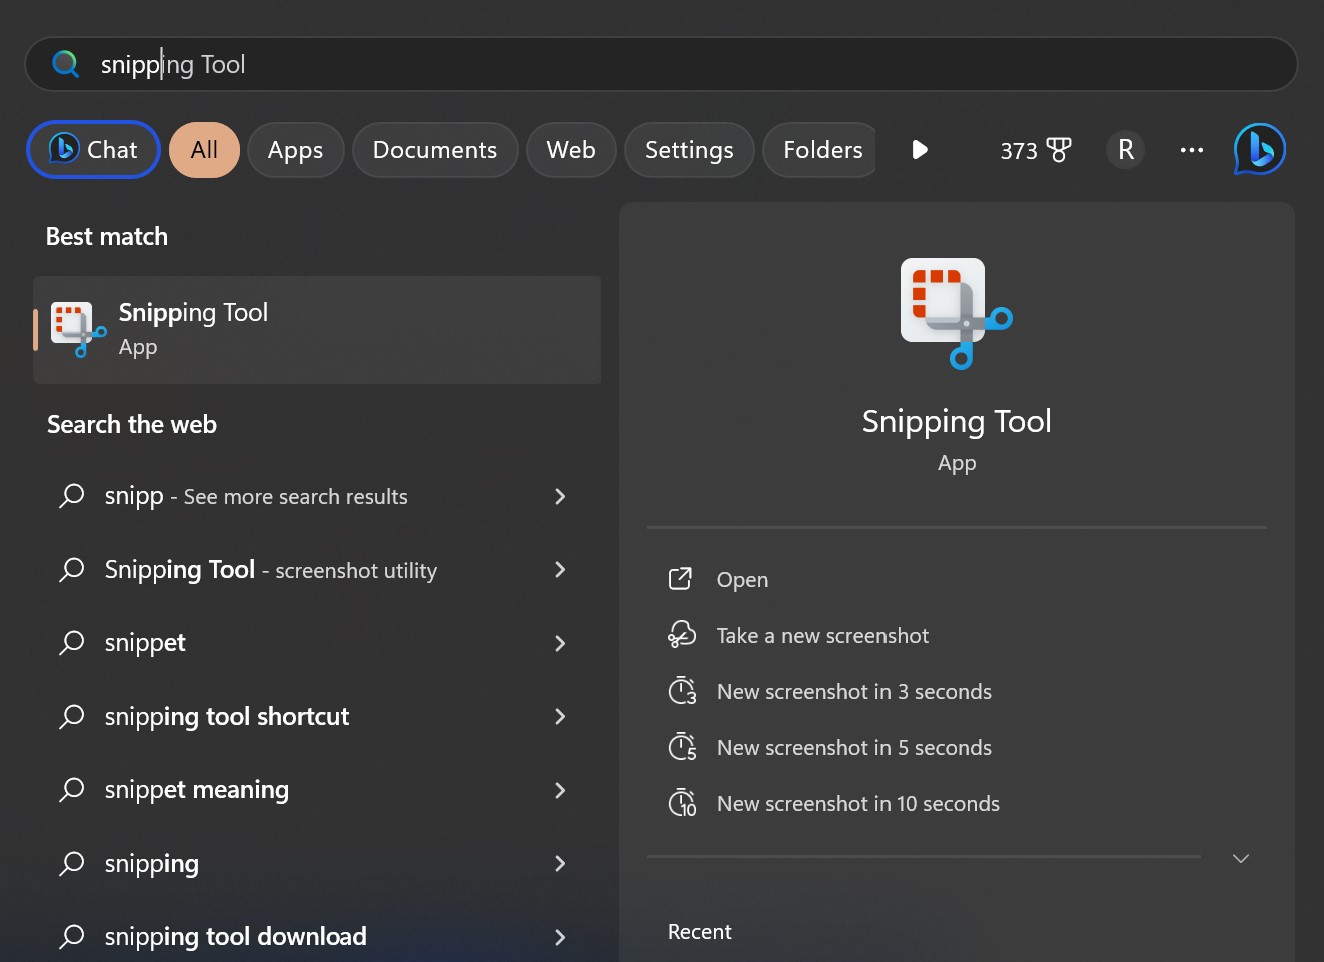
Step 1: Open the Snipping Tool on your Windows 11 laptop/ PC from the search bar
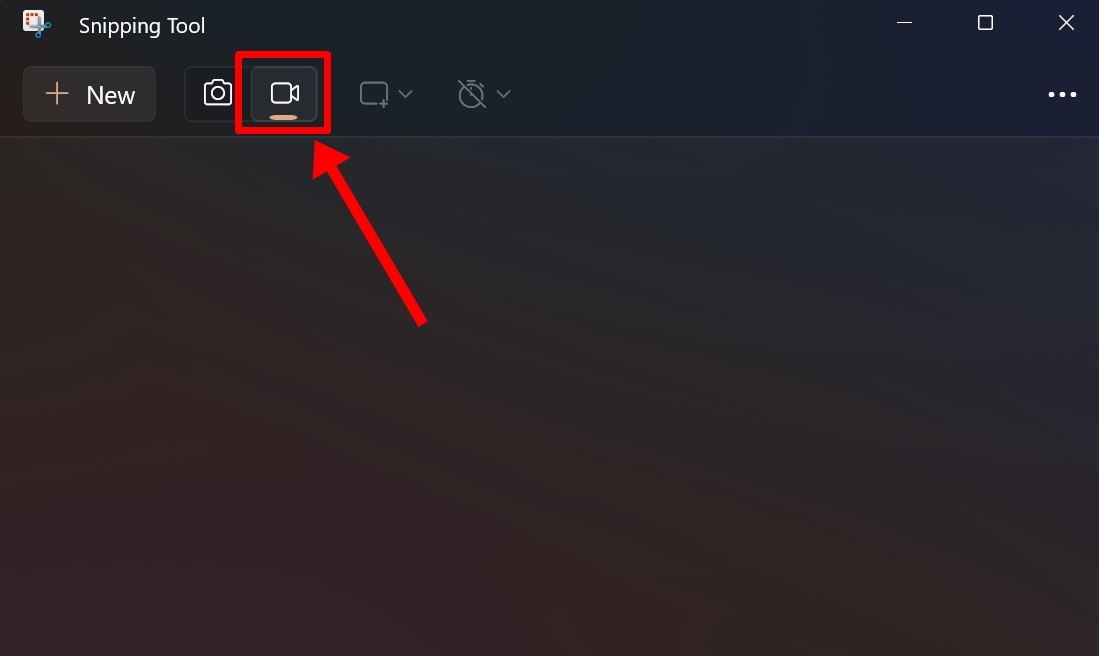
Step 2: A small window will open. Press the Video recorder icon present at the top
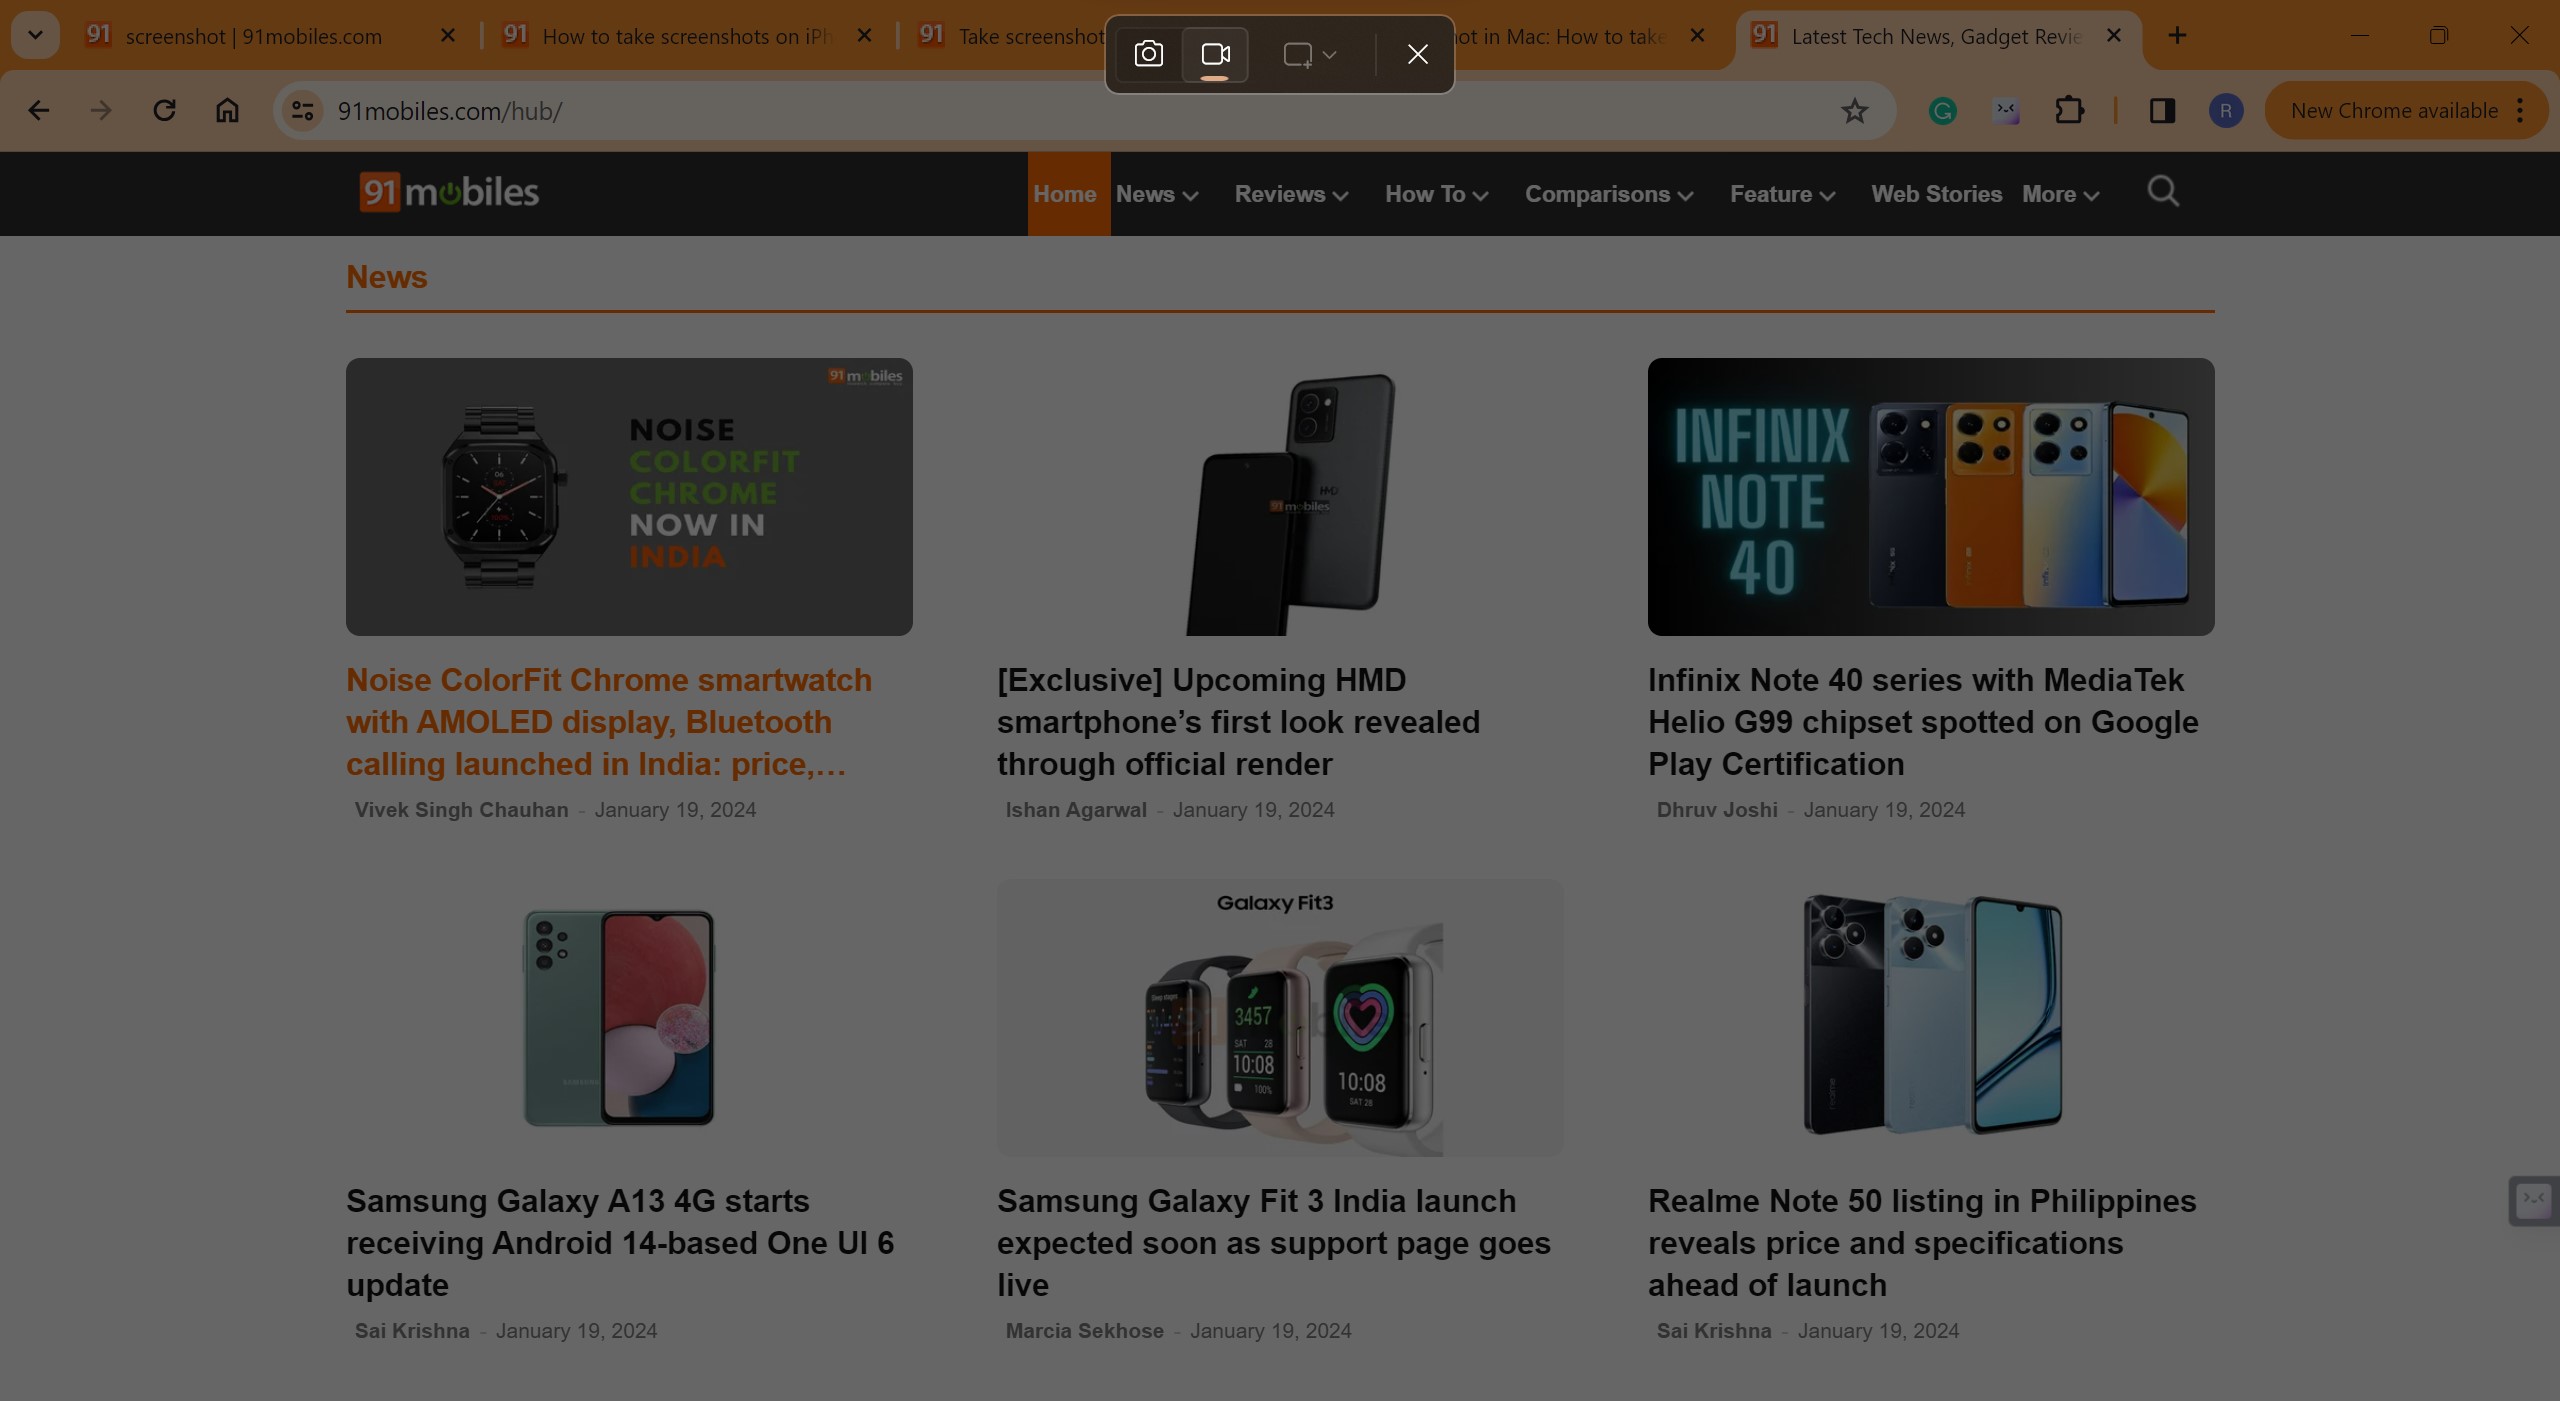
Step 3: Once done, hit the ‘New’ button
Step 4: The screen will dim on its own. Now select the desired area of the screen you wish to record. You can cover the whole screen as well
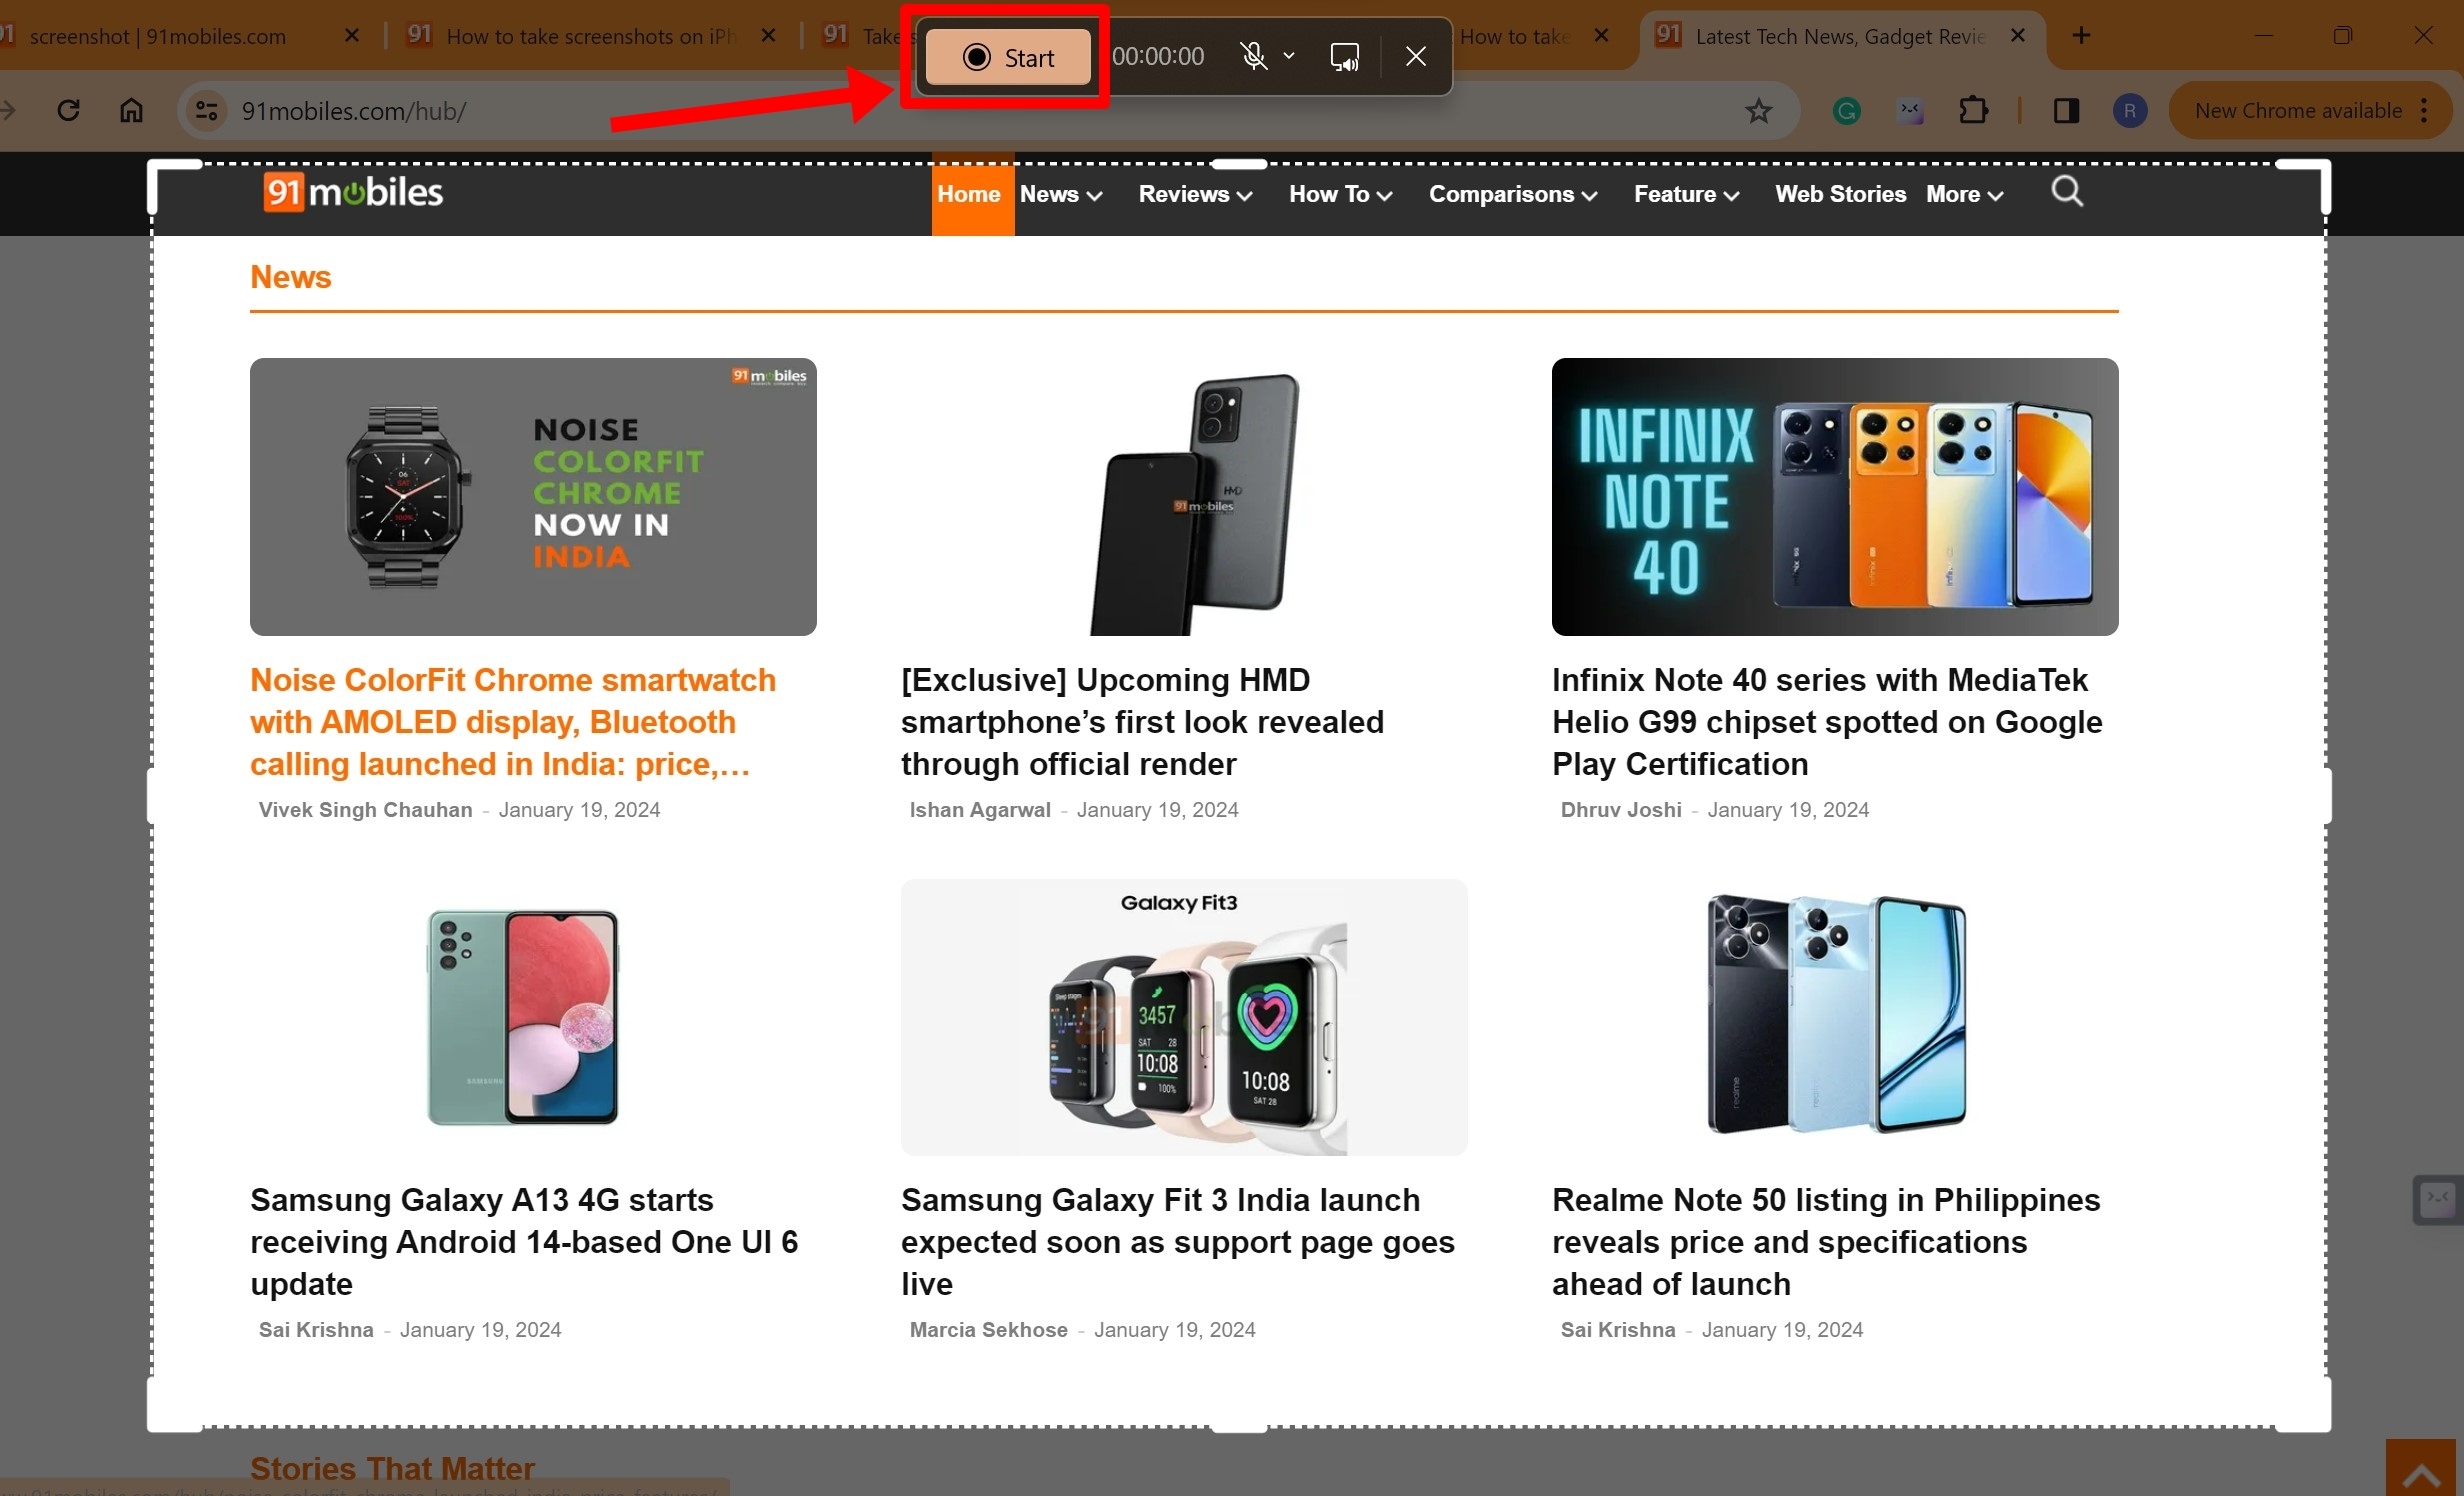
Step 5: Once done, a small toolbar will appear at the top which will contain the ‘Start’, ‘Microphone’ and ‘Mute audio’ buttons
Step 6: Now press ‘Start’ and the select portion of the screen will be recorded
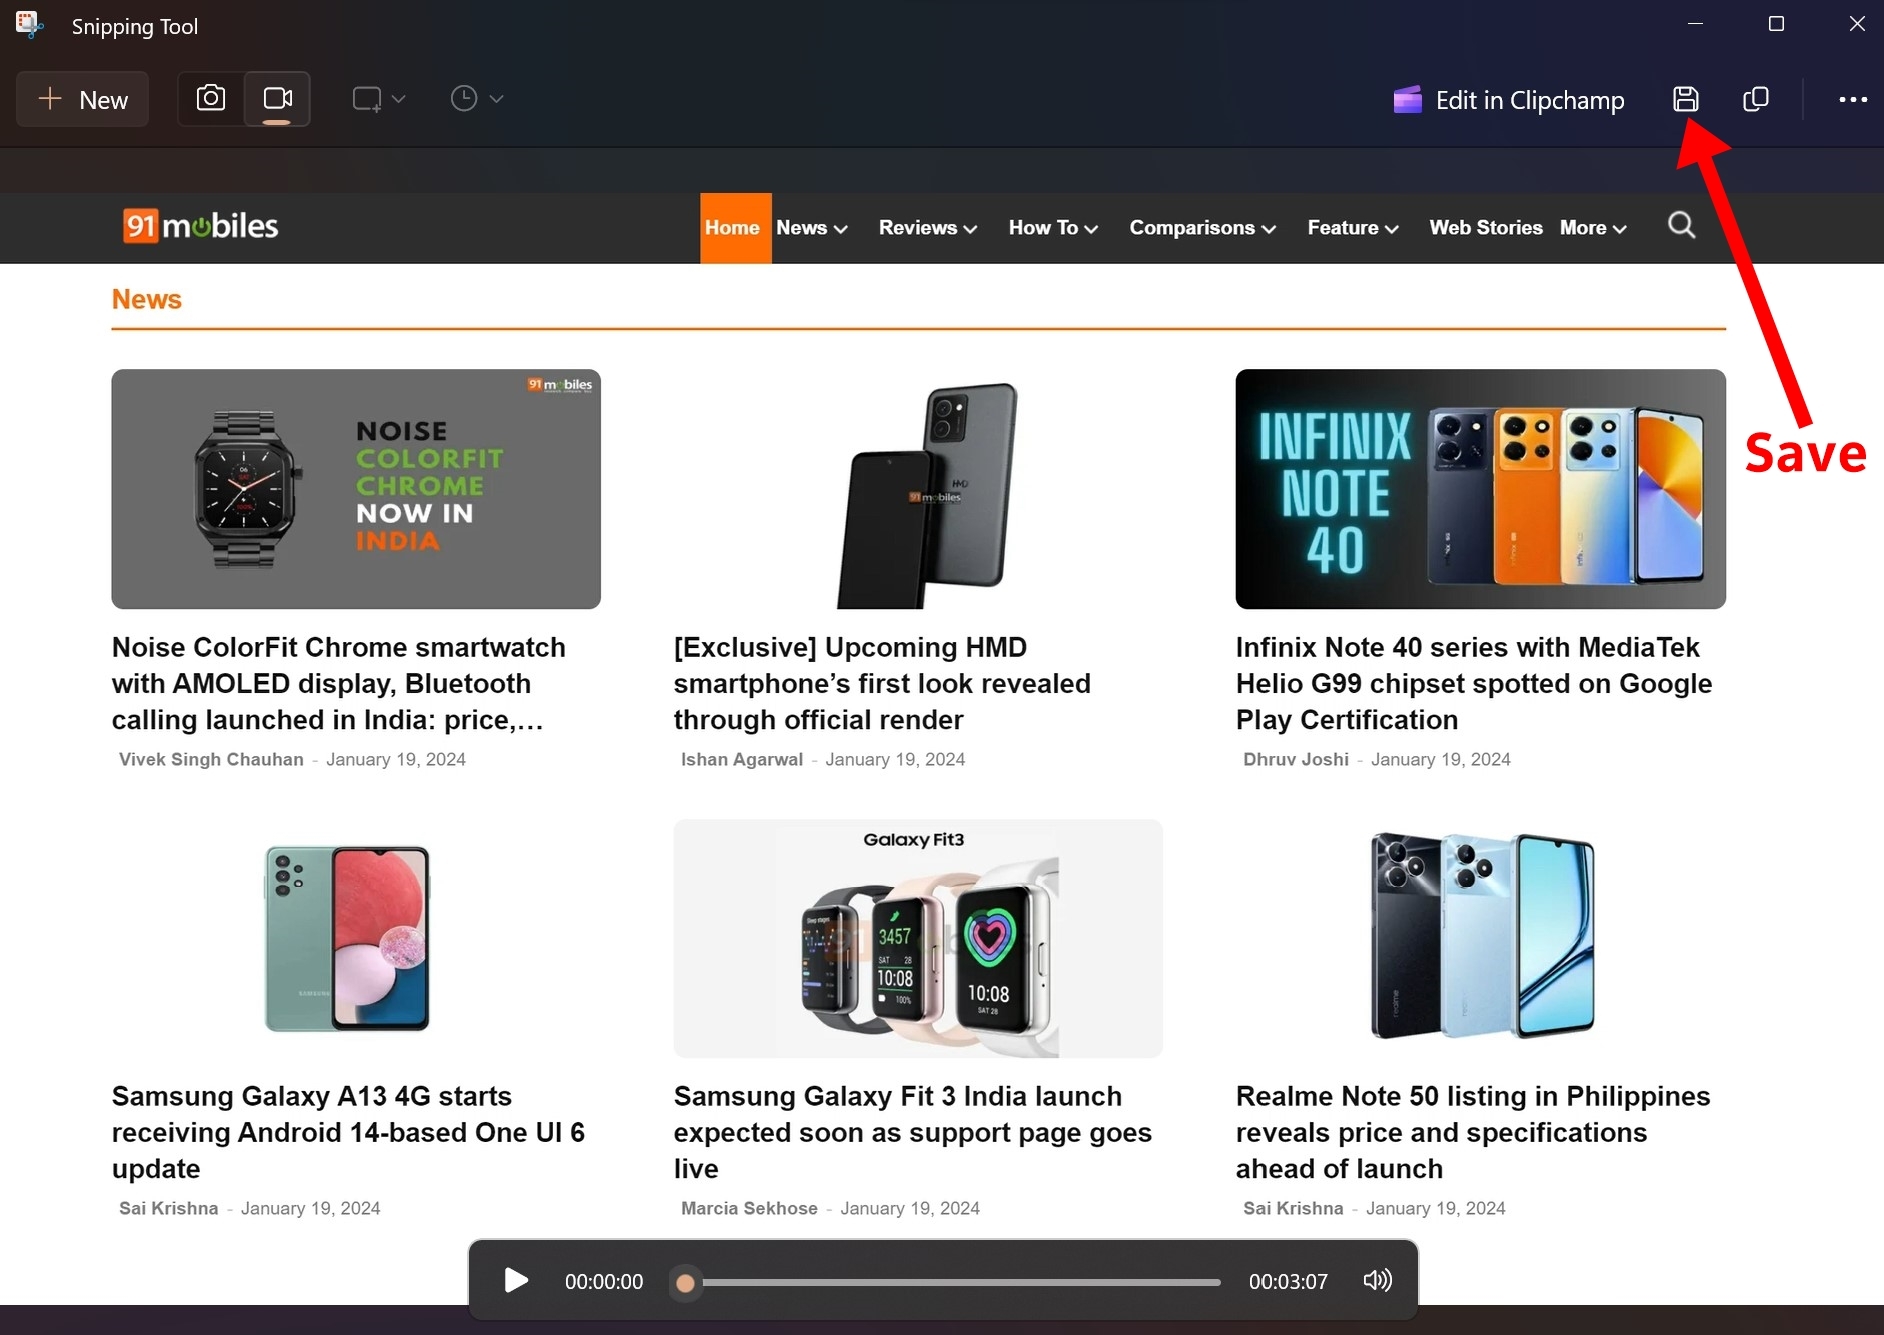
Step 7: Once you’re done recording, press the Red dot icon
Step 8: Now the recorded video will be played in a new window through which you can save it to the desired location, edit it, and even copy
Unlike the Xbox Game Bar, Snipping Tool can screen capture any app or window of your PC/ laptop.


FAQs
Can I use third-party apps to take screen recordings of my laptop?
Yes, there are a bunch of screen recording apps available out there for Windows 10 and 11 such as Movavi, Audacity, and OBS Studio. All you have to do is install them and understand how they work. Alternatively, there are various screen recording Chrome extensions as well that allow you to capture the screen of any window on your laptop.
Are there any shortcuts on Windows to start recording the screen?
You can use the Windows + G keys to open the Xbox Game Bar and press the ‘Capture’ button to start the screen recording. After recording the desired task on your screen, you can press the Windows + Alt + R keys to instantly stop and save the recording.


