
Table of Contents
Turn on Airplane mode
Step 1: From the bottom taskbar, select the ‘WiFi, volume and battery area‘. This will open the quick settings menu
Step 2: Simply select the ‘Flight mode‘ option

Step 3: Now wait for a couple of seconds and press it again to turn it off.
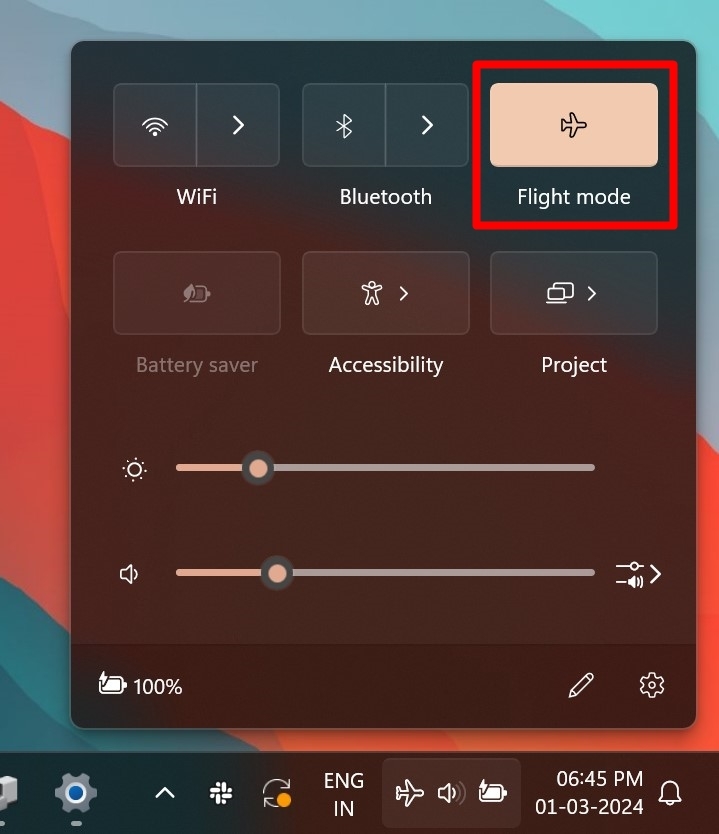
This process will disconnect and re-connect the internet on your Windows device.
Restart your device or WiFi router
Restarting your Windows laptop or WiFi router helps eliminate any inconsistencies with the internet as it clears the memory and re-establishes a connection. Here’s how to restart a Windows laptop and WiFi router.
Step 1: Press the ‘Windows‘ icon from the taskbar on your laptop
Step 2: Now select the ‘Power‘ icon present at the bottom
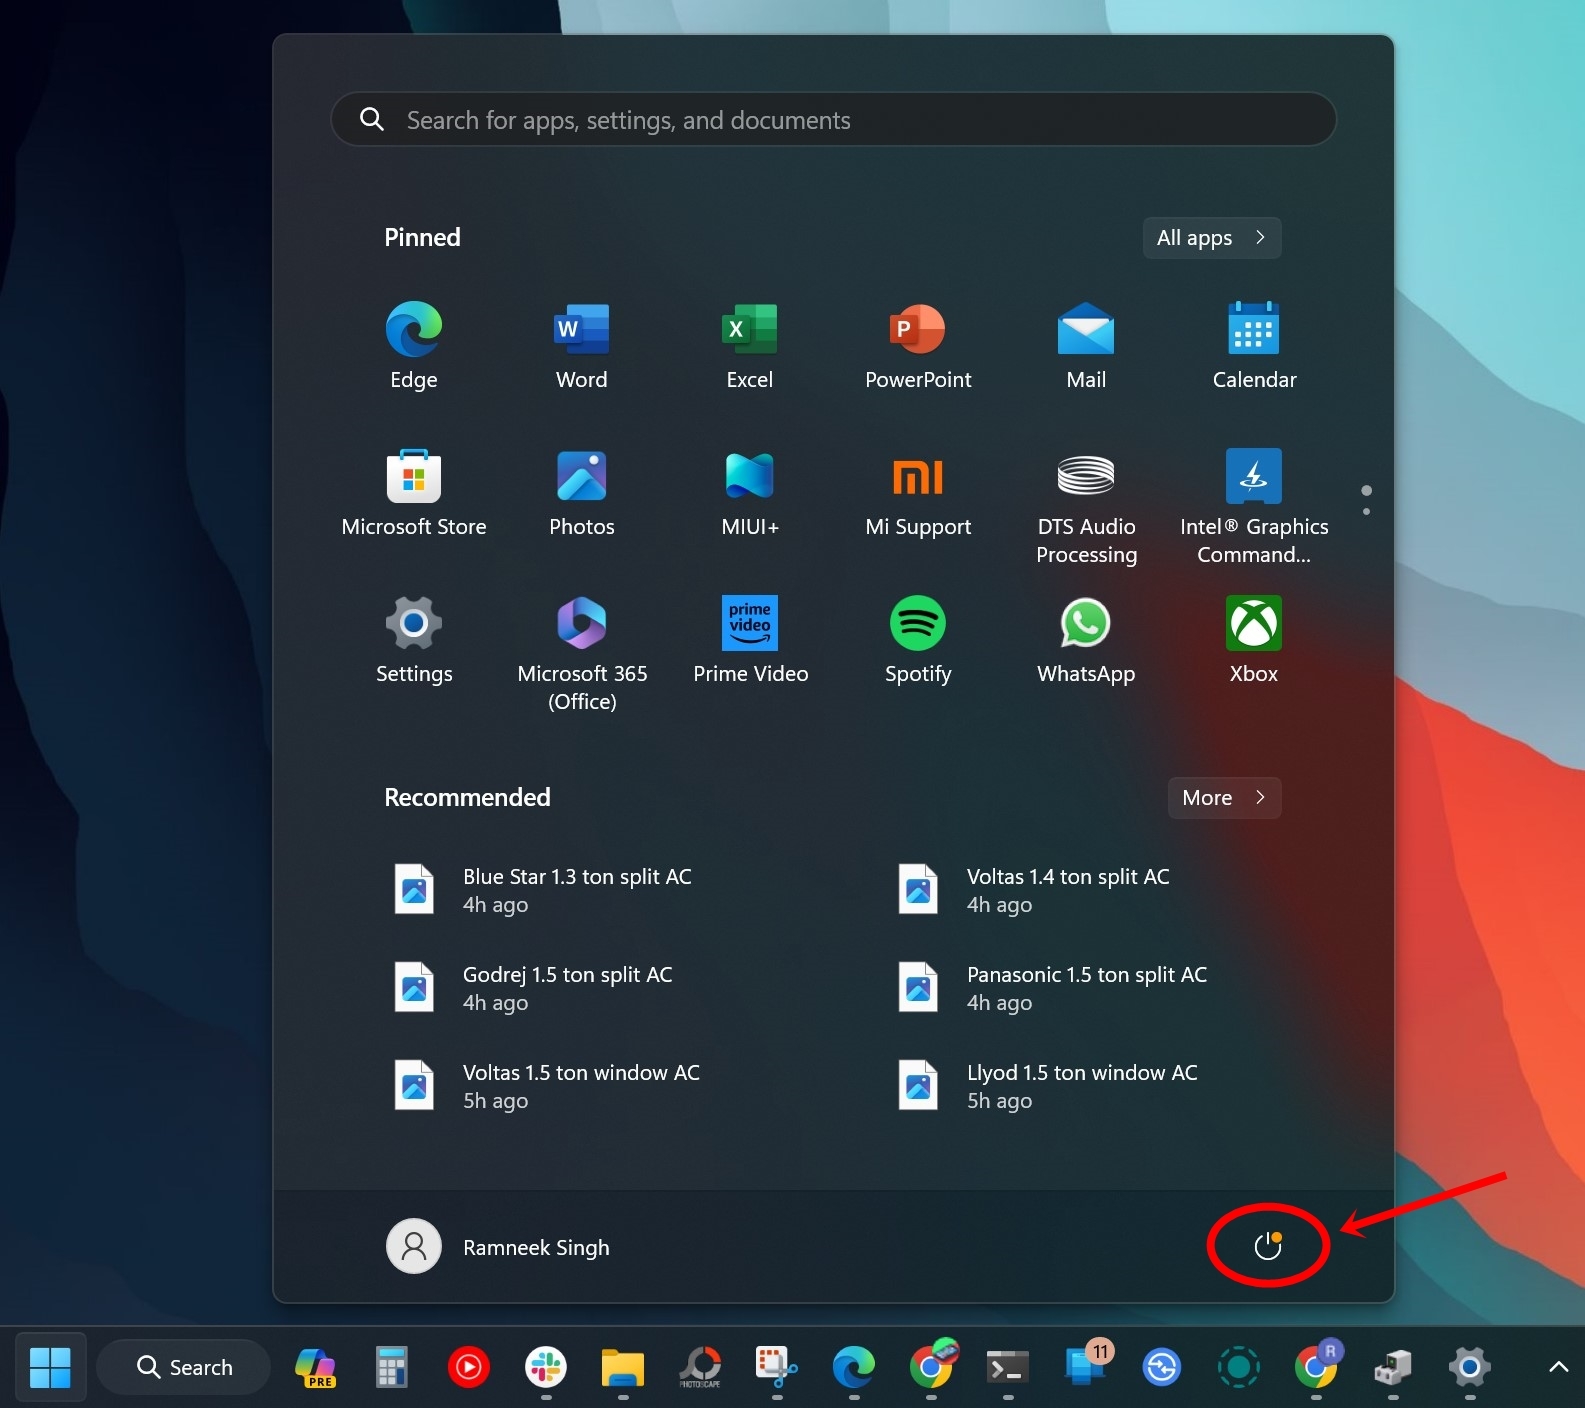
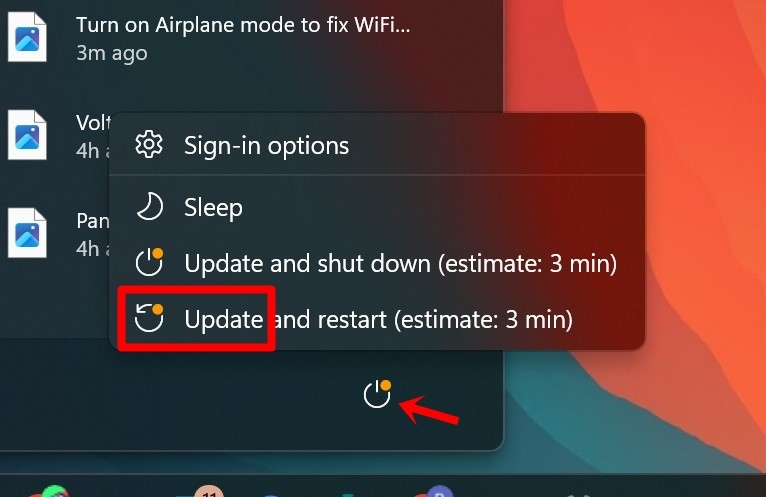
Step 3: Select the ‘Restart‘ option and the laptop will reboot in a few minutes
Step 4: To restart a router, turn off the switch and power it back on. Wait for it to connect to the internet before trying whether the issue has been fixed
You can also press the ‘Windows’ key from the keyboard to summon the power menu. If this method doesn’t help, proceed with the other methods mentioned below.
Switch to a different WiFi frequency band
If your WiFi modem supports dual frequency bands such as 2.4Ghz and 5Ghz, try connecting to the alternate frequency band and see if that solves the internet issue.
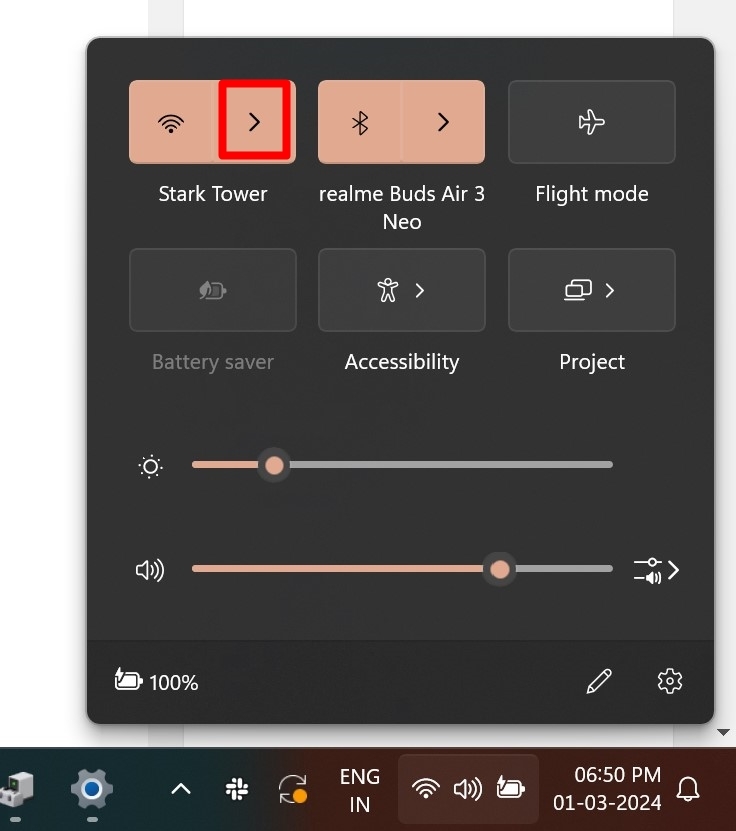
Step 1: From the bottom taskbar, select the ‘WiFi, volume and battery area‘. This will open the quick settings menu
Step 2: Simply select the ‘Arrow‘ icon beside the WiFi name
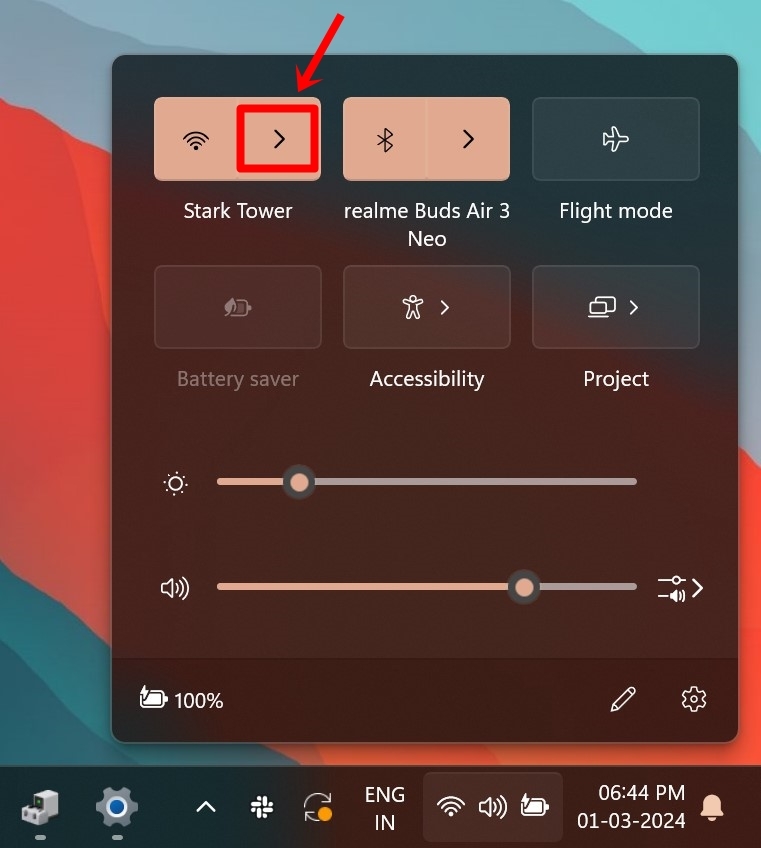
Step 3: From here, connect to a different frequency band.
5Ghz band delivers the maximum speeds available on your internet plan while 2.4Ghz ensures a longer internet connection range.
Forget WiFi network
Another way which can be used to fix internet errors possibly is by disconnecting and forgetting the WiFi network you’re currently connected with. Upon doing that, re-connect the network by entering the WiFi’s password.
Step 1: Select the ‘WiFi, volume and battery area‘ from the taskbar. This will open the quick settings menu
Step 2: Now select the ‘Arrow‘ icon beside the WiFi name
Step 3: Right-click on the WiFi network you’re connected to
Step 4: Hit ‘Forget‘
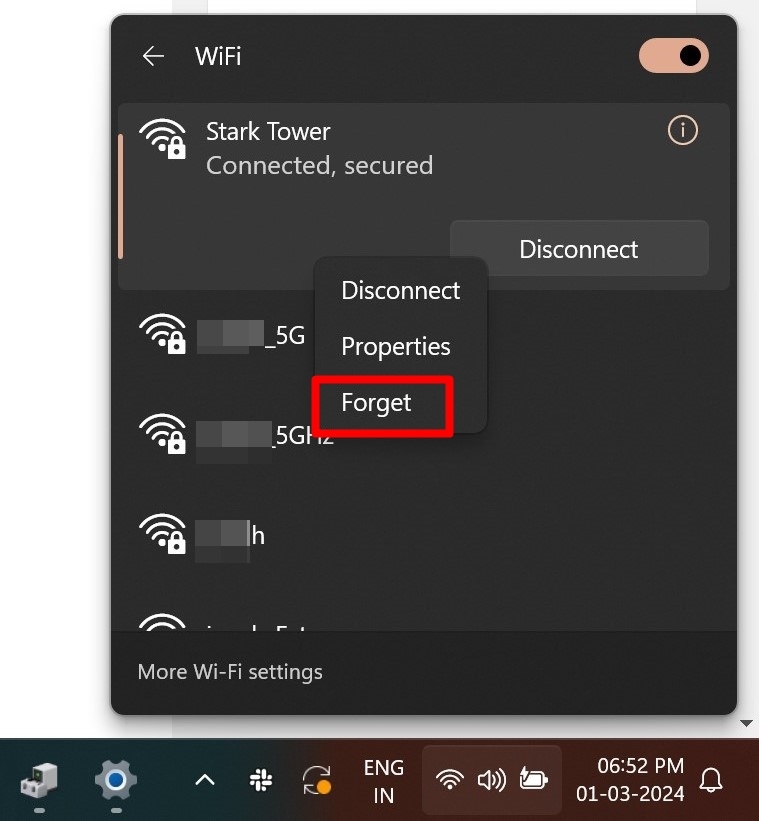
Step 5: Now again go to the WiFi option and connect to the same network by entering the SSID’s password
Run network troubleshooter
As the name suggests, the network troubleshooter on Windows troubleshoots and identifies any network or internet issues. Here’s how to access it.
Step 1: Go to the Settings on your Windows laptop/ PC
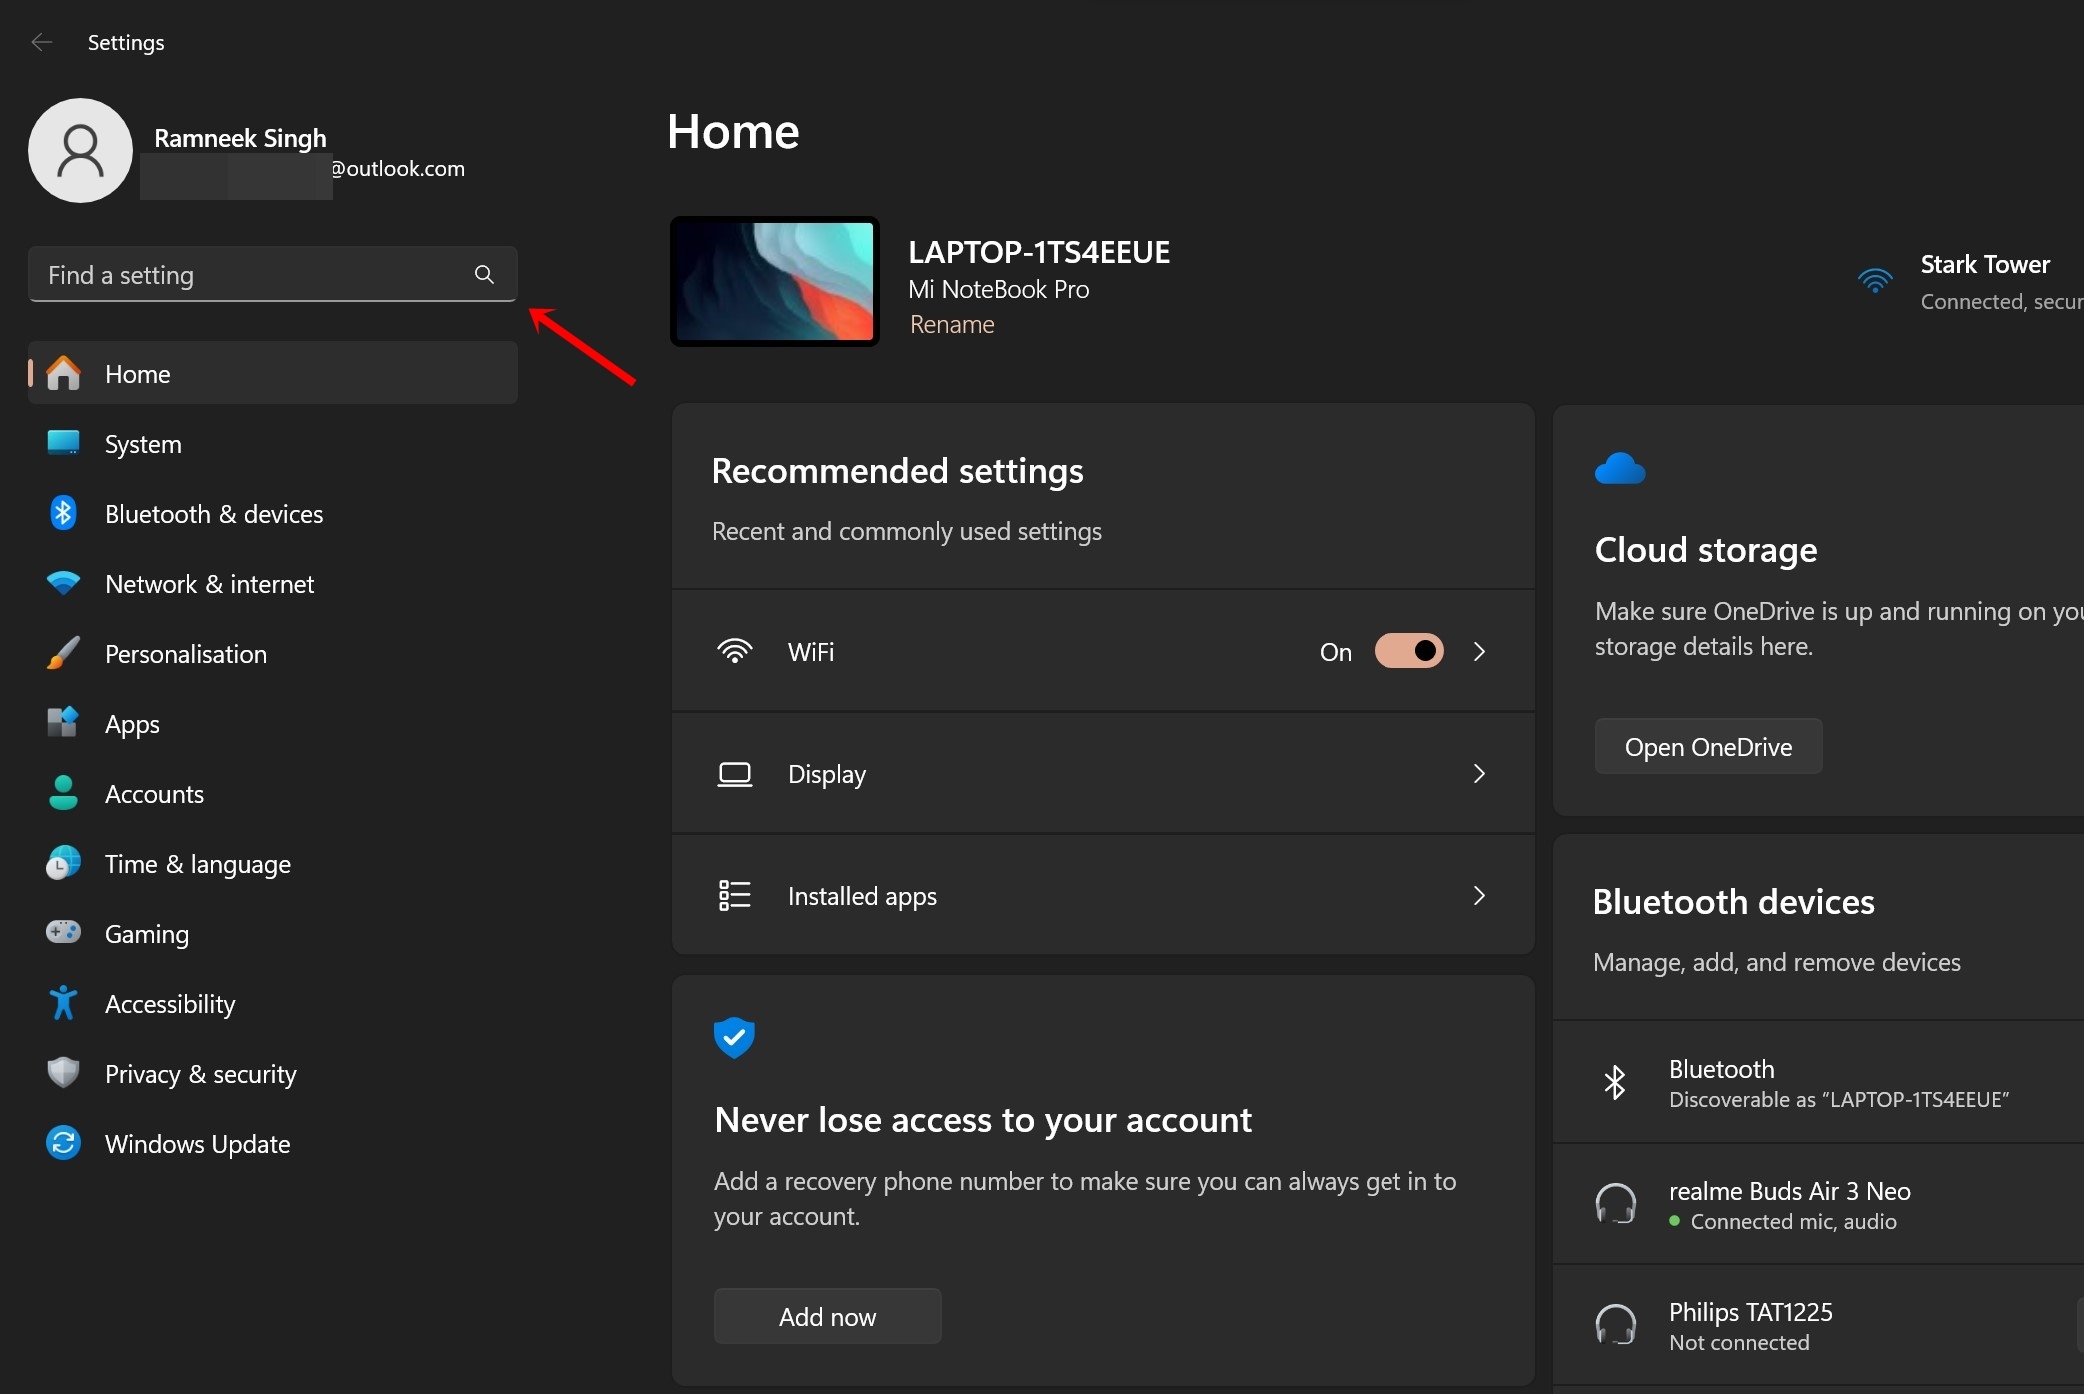
Step 2: Once you’re in the Settings, search for “network troubleshooter” in the search bar
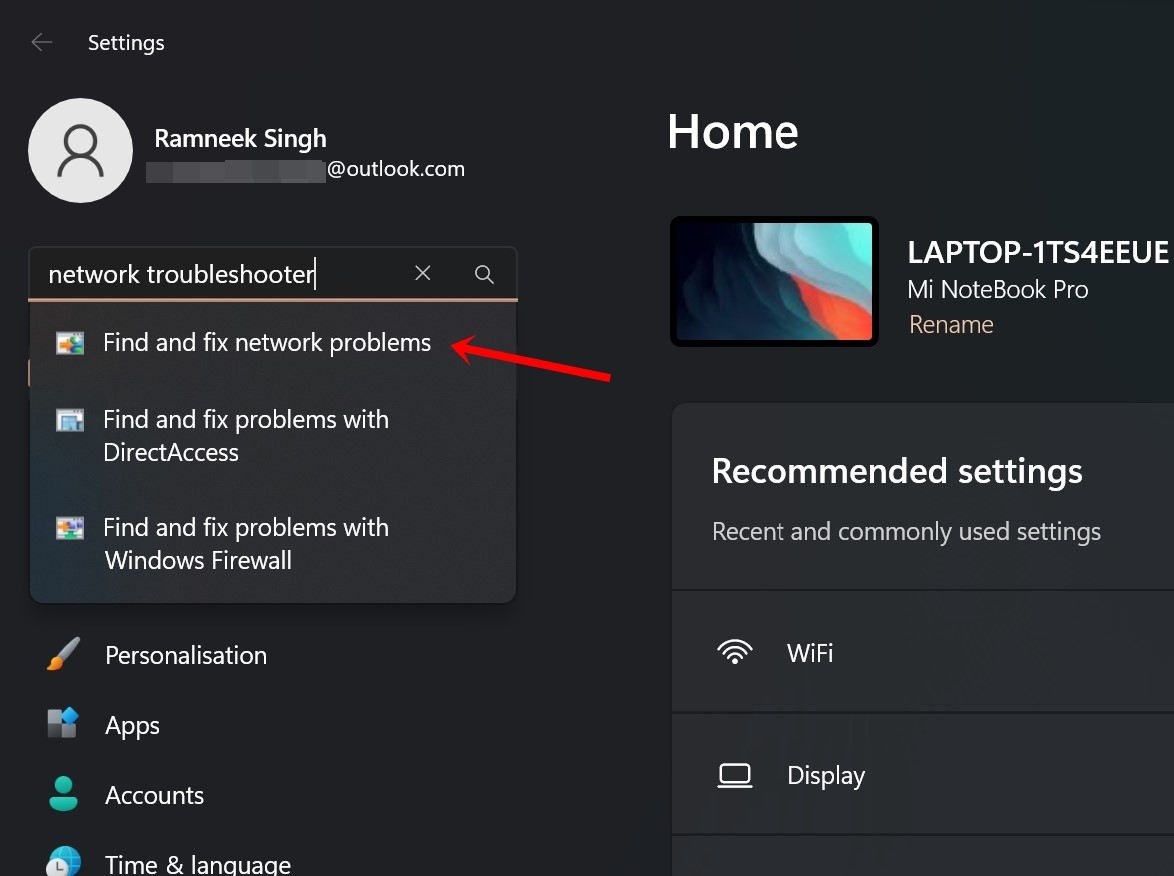
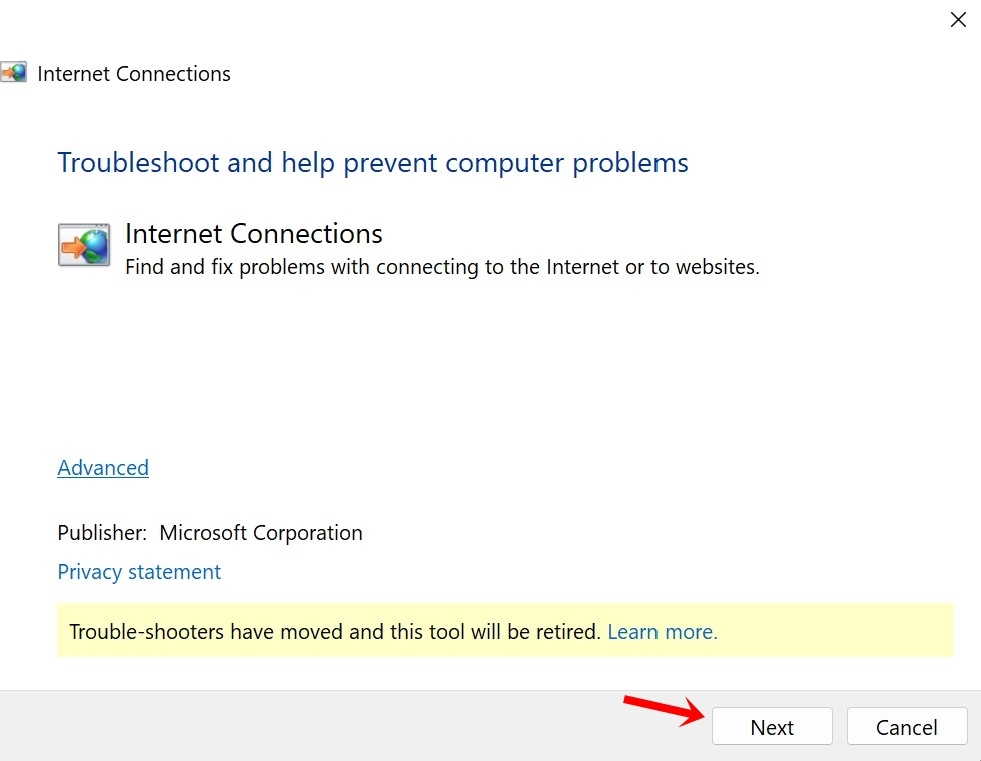
Step 3: Now select the ‘Find and fix problems‘ option
Step 4: A new window will appear. Select ‘Next‘ to run the troubleshooting process
Update network adapter’s driver
Outdated network adapters of your Windows device may result in connectivity issues. Here’s how to update them to the latest version to iron out network glitches, if any.
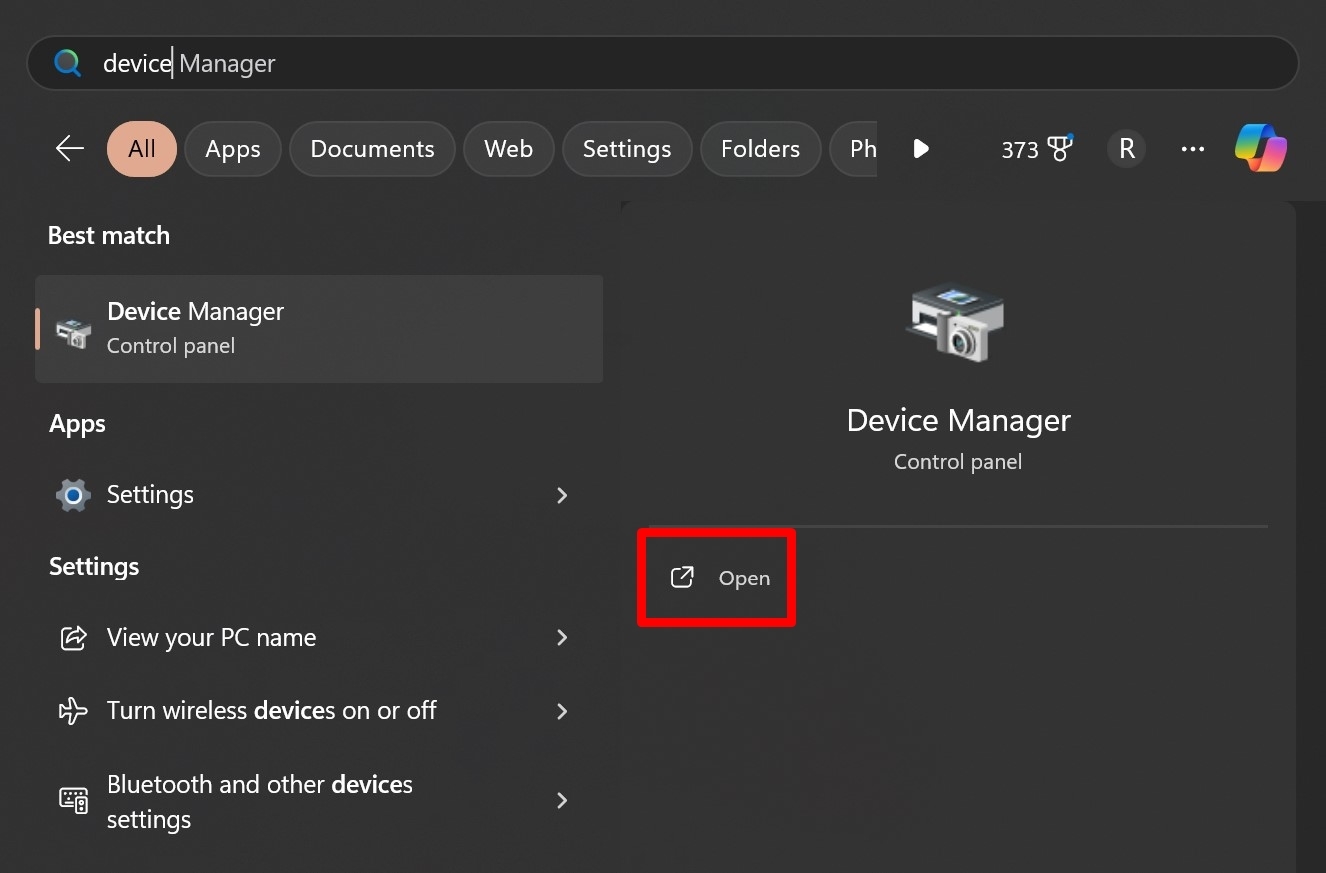
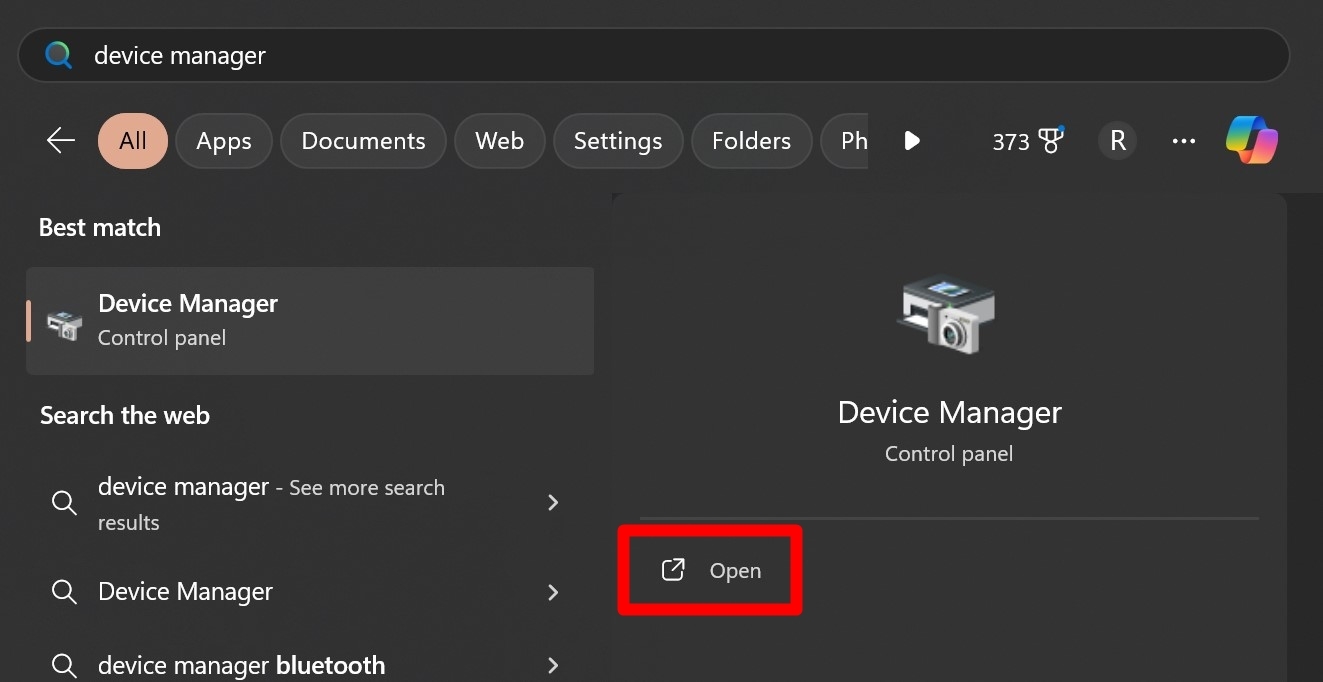
Step 1: From the ‘search bar‘ present in the taskbar, search for ‘Device Manager‘
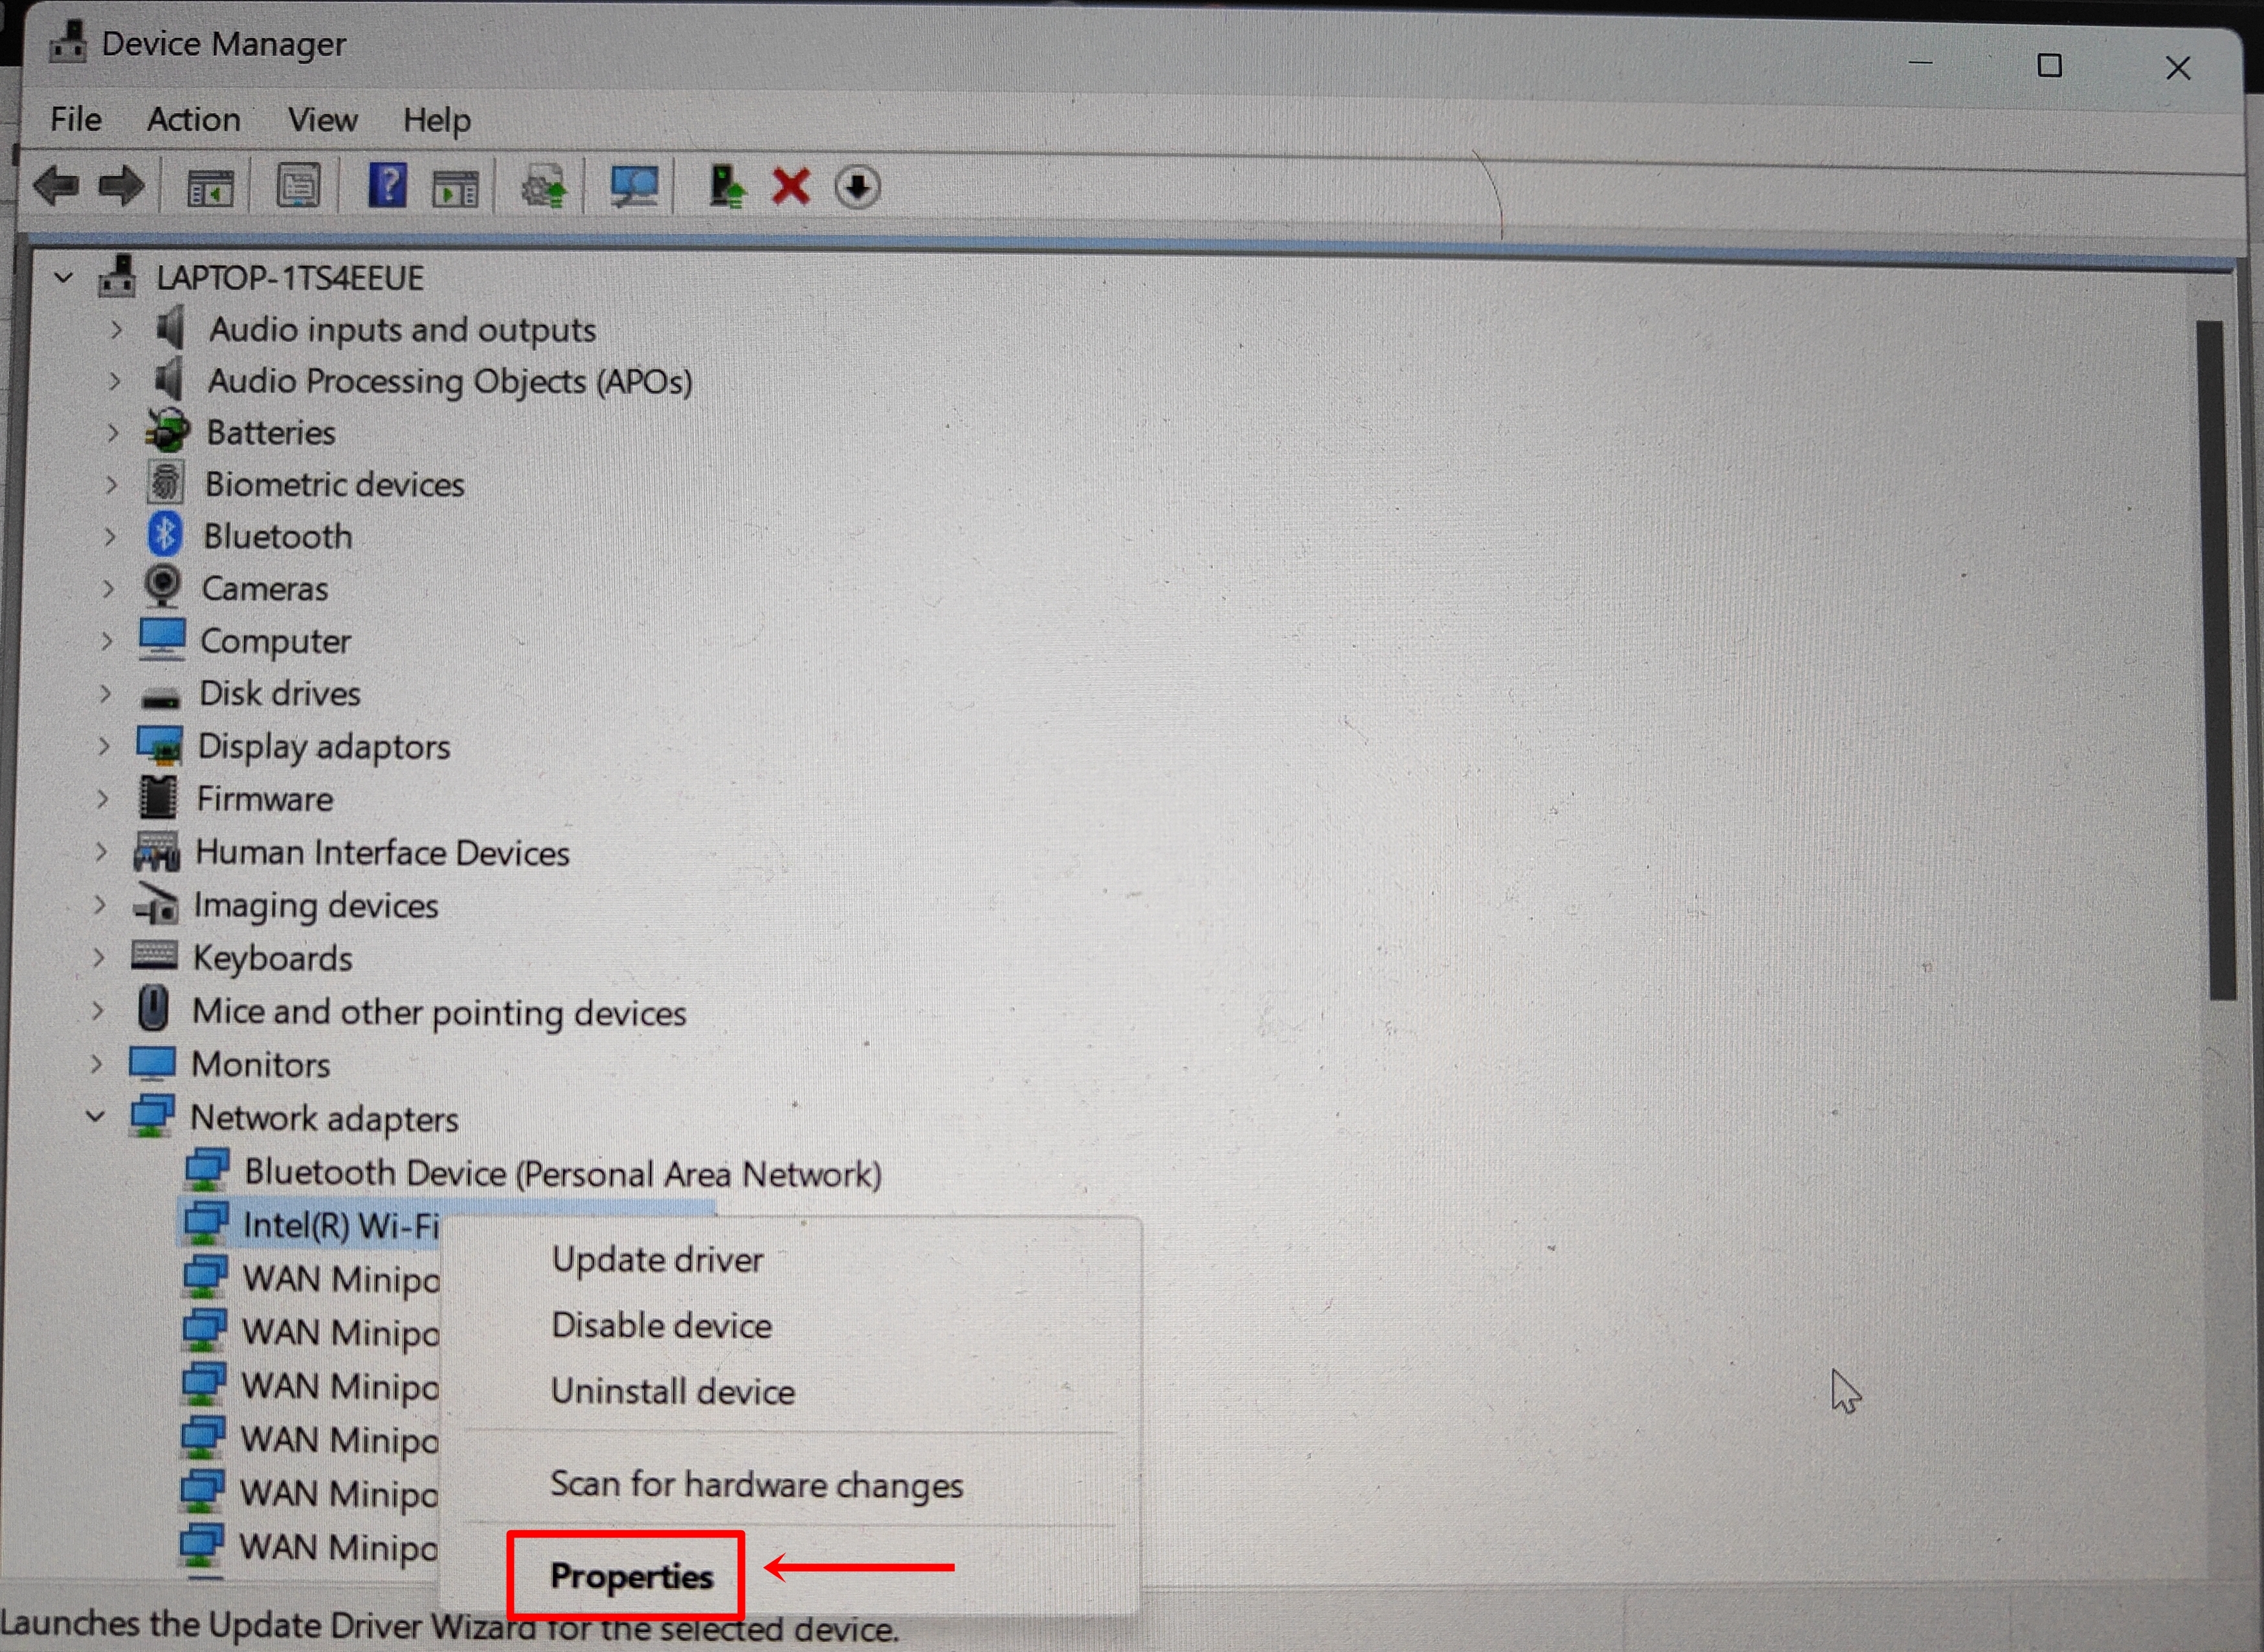
Step 2: Once the ‘Device Manager‘ window opens, scroll down to ‘Network adapters‘
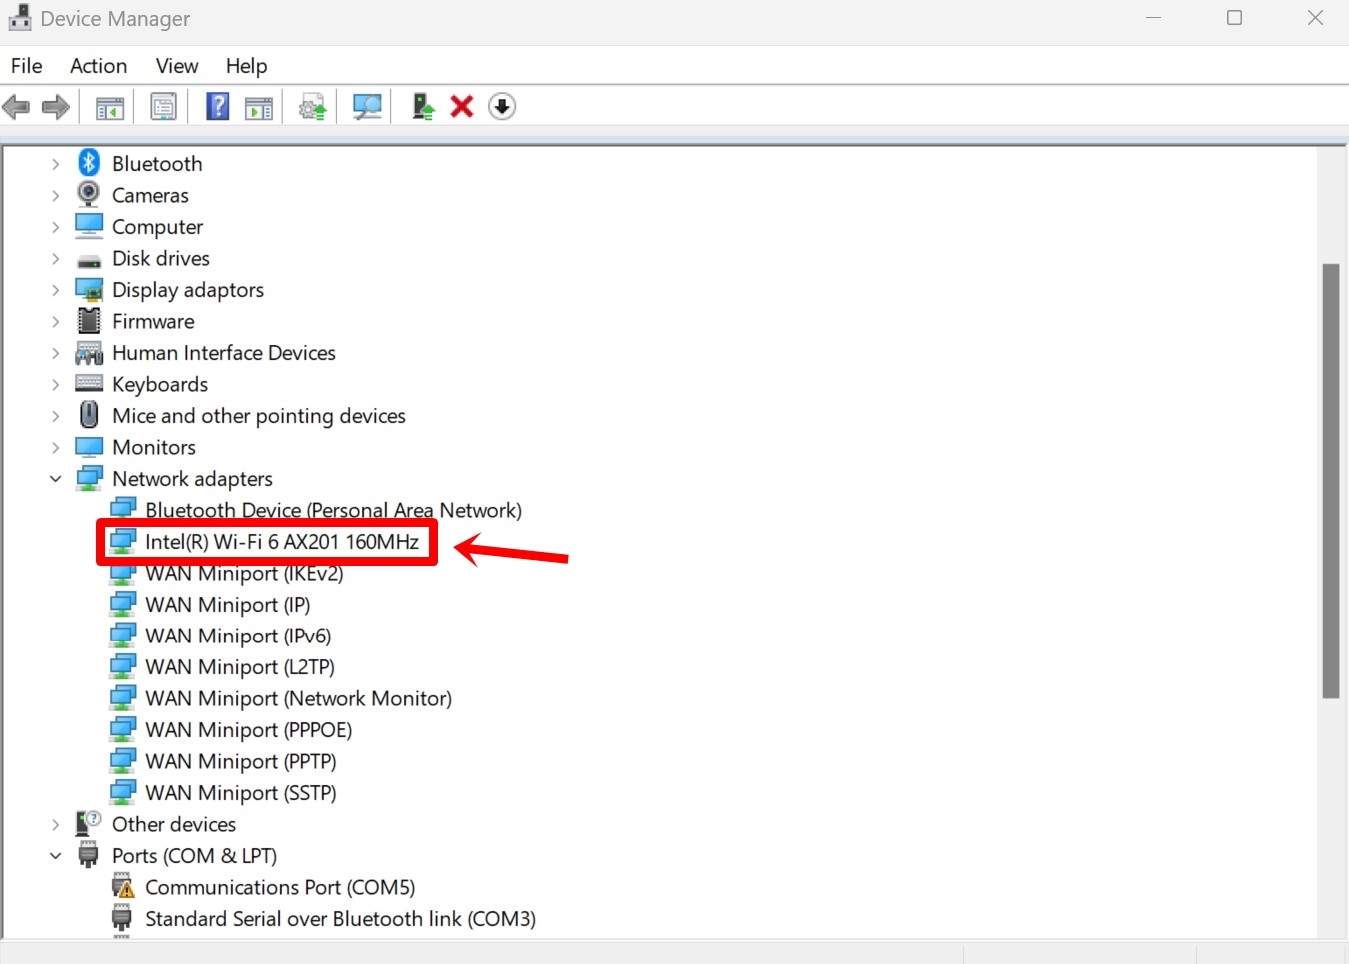
Step 3: Press the ‘arrow‘ icon beside the option to expand the menu
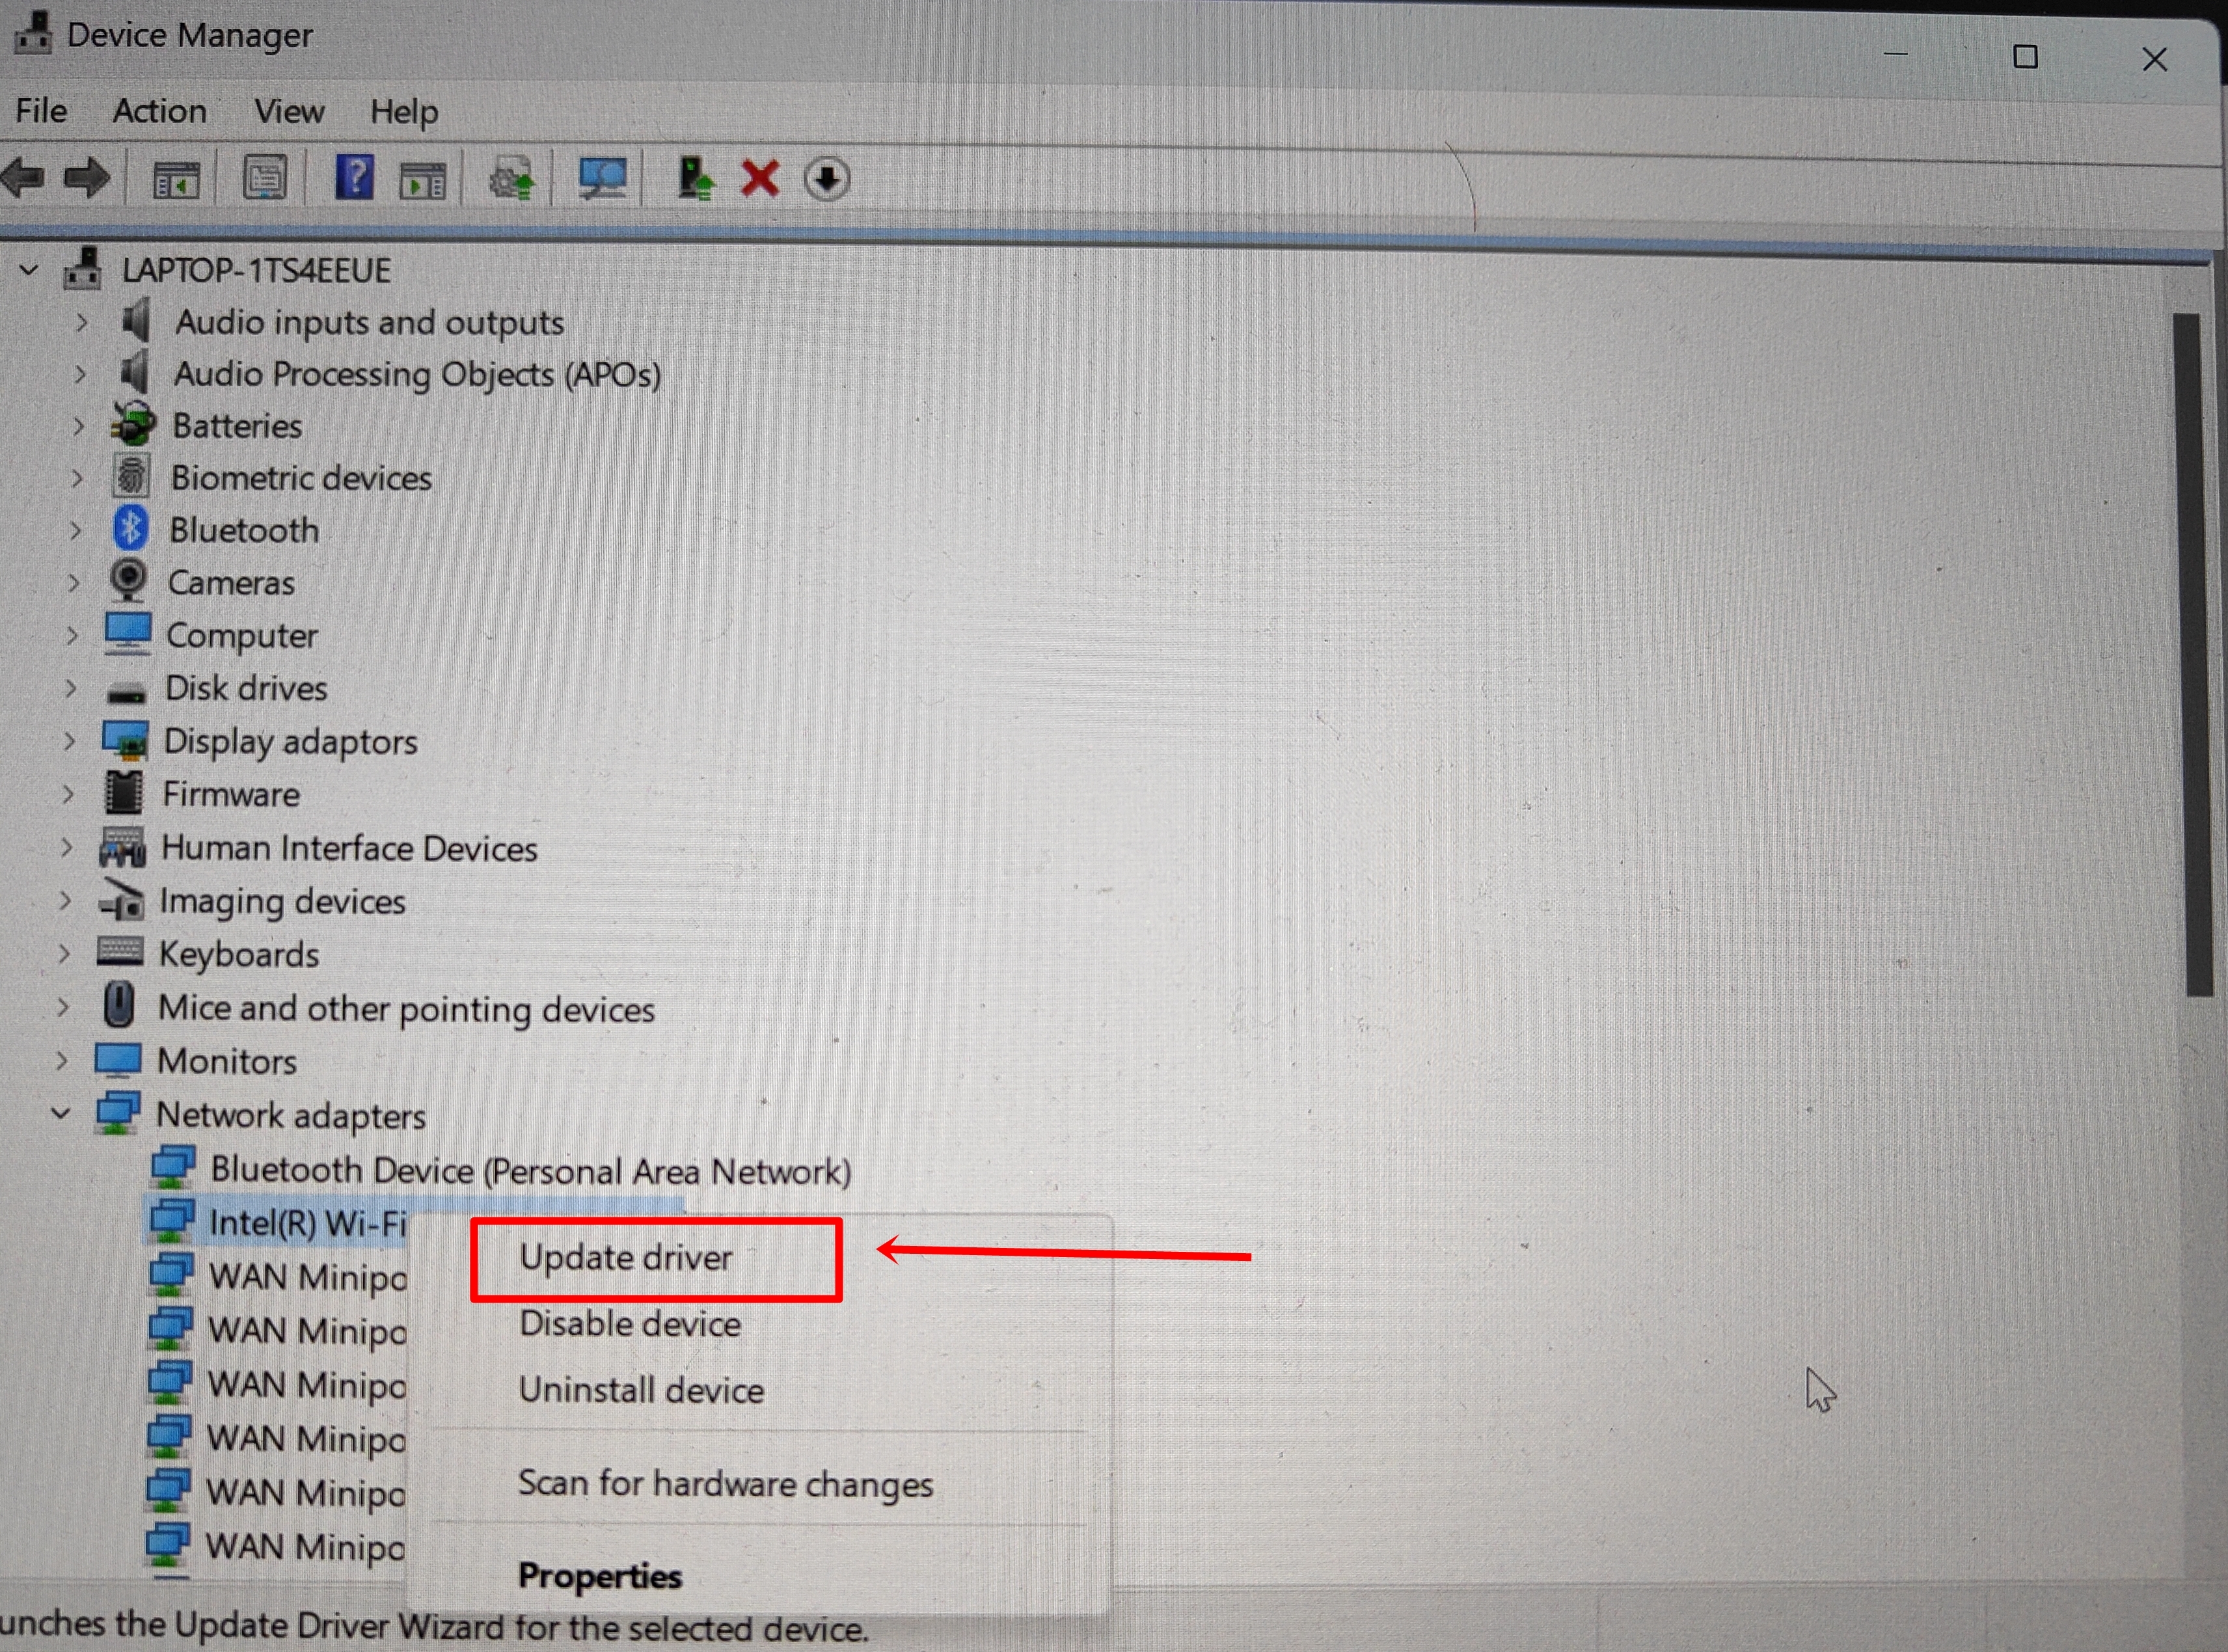
Step 4: From here, right-click on your Windows device’s network adapter and hit ‘Update driver‘
This will update the drivers to the latest version, if available and possibly get rid of the internet connection failures you have been facing.
Toggle NIC (Network Interface Card)
A network interface card (NIC) is a hardware component that enables your Windows computer to connect to a network for data sharing and communication. If the “can’t connect to this network” persists, go ahead and try toggling the NIC of your computer.
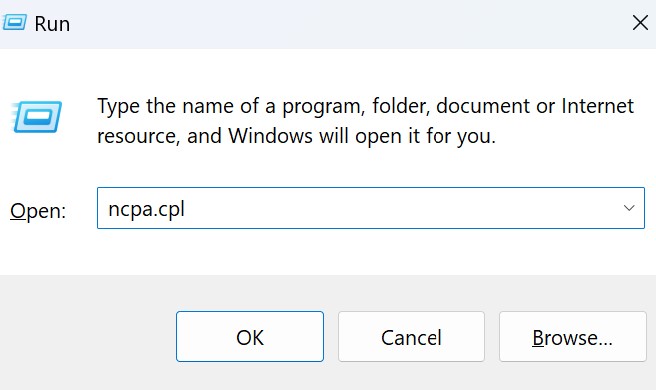
Step 1: Firstly, press the’ Windows + R’ keys together to open the Run command window
Step 2: Now type in “ncpa.cpl” and press ‘Enter‘
Step 3: A new window will open. Right-click on the WiFi network you’re connected to
Step 4: Select ‘Disable‘. Enter your Windows password if prompted

Step 5: Now enable the network again by right-clicking and selecting the ‘Enable‘ option
Reset DNS cache
Resetting the DNS cache not only has the potential to fix connectivity issues but also resolves HTTPS errors on websites while browsing. Here’s how to go about it.
Step 1: To get started, search ‘cmd‘ from the taskbar and open ‘Command Prompt’
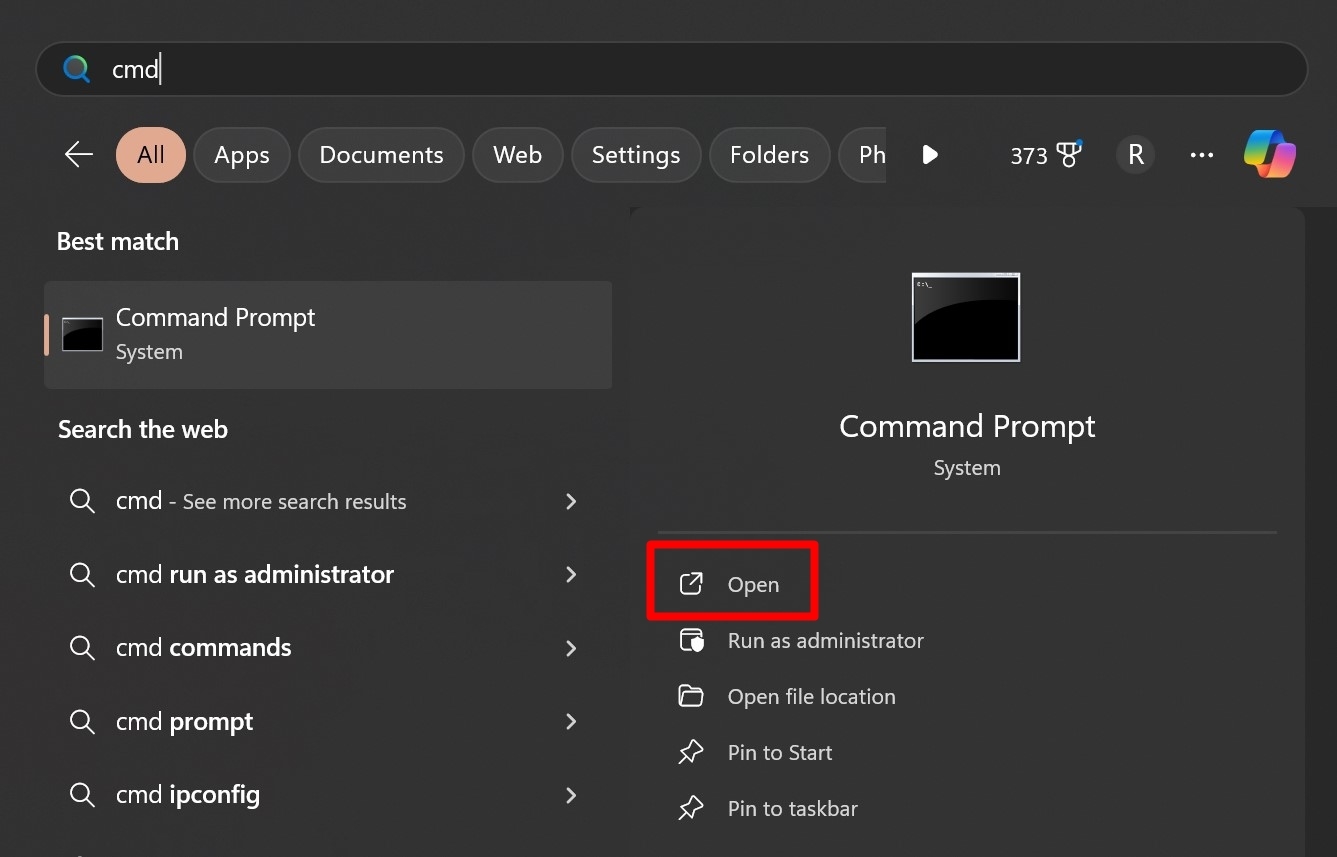
Step 2: Now enter “ipconfig /flushdns” in the given field and hit ‘Enter‘

Step 3: This will clear all the DNS cache
Now go ahead and try browsing a few websites to see if the “can’t connect to this network” problem has been resolved or not.
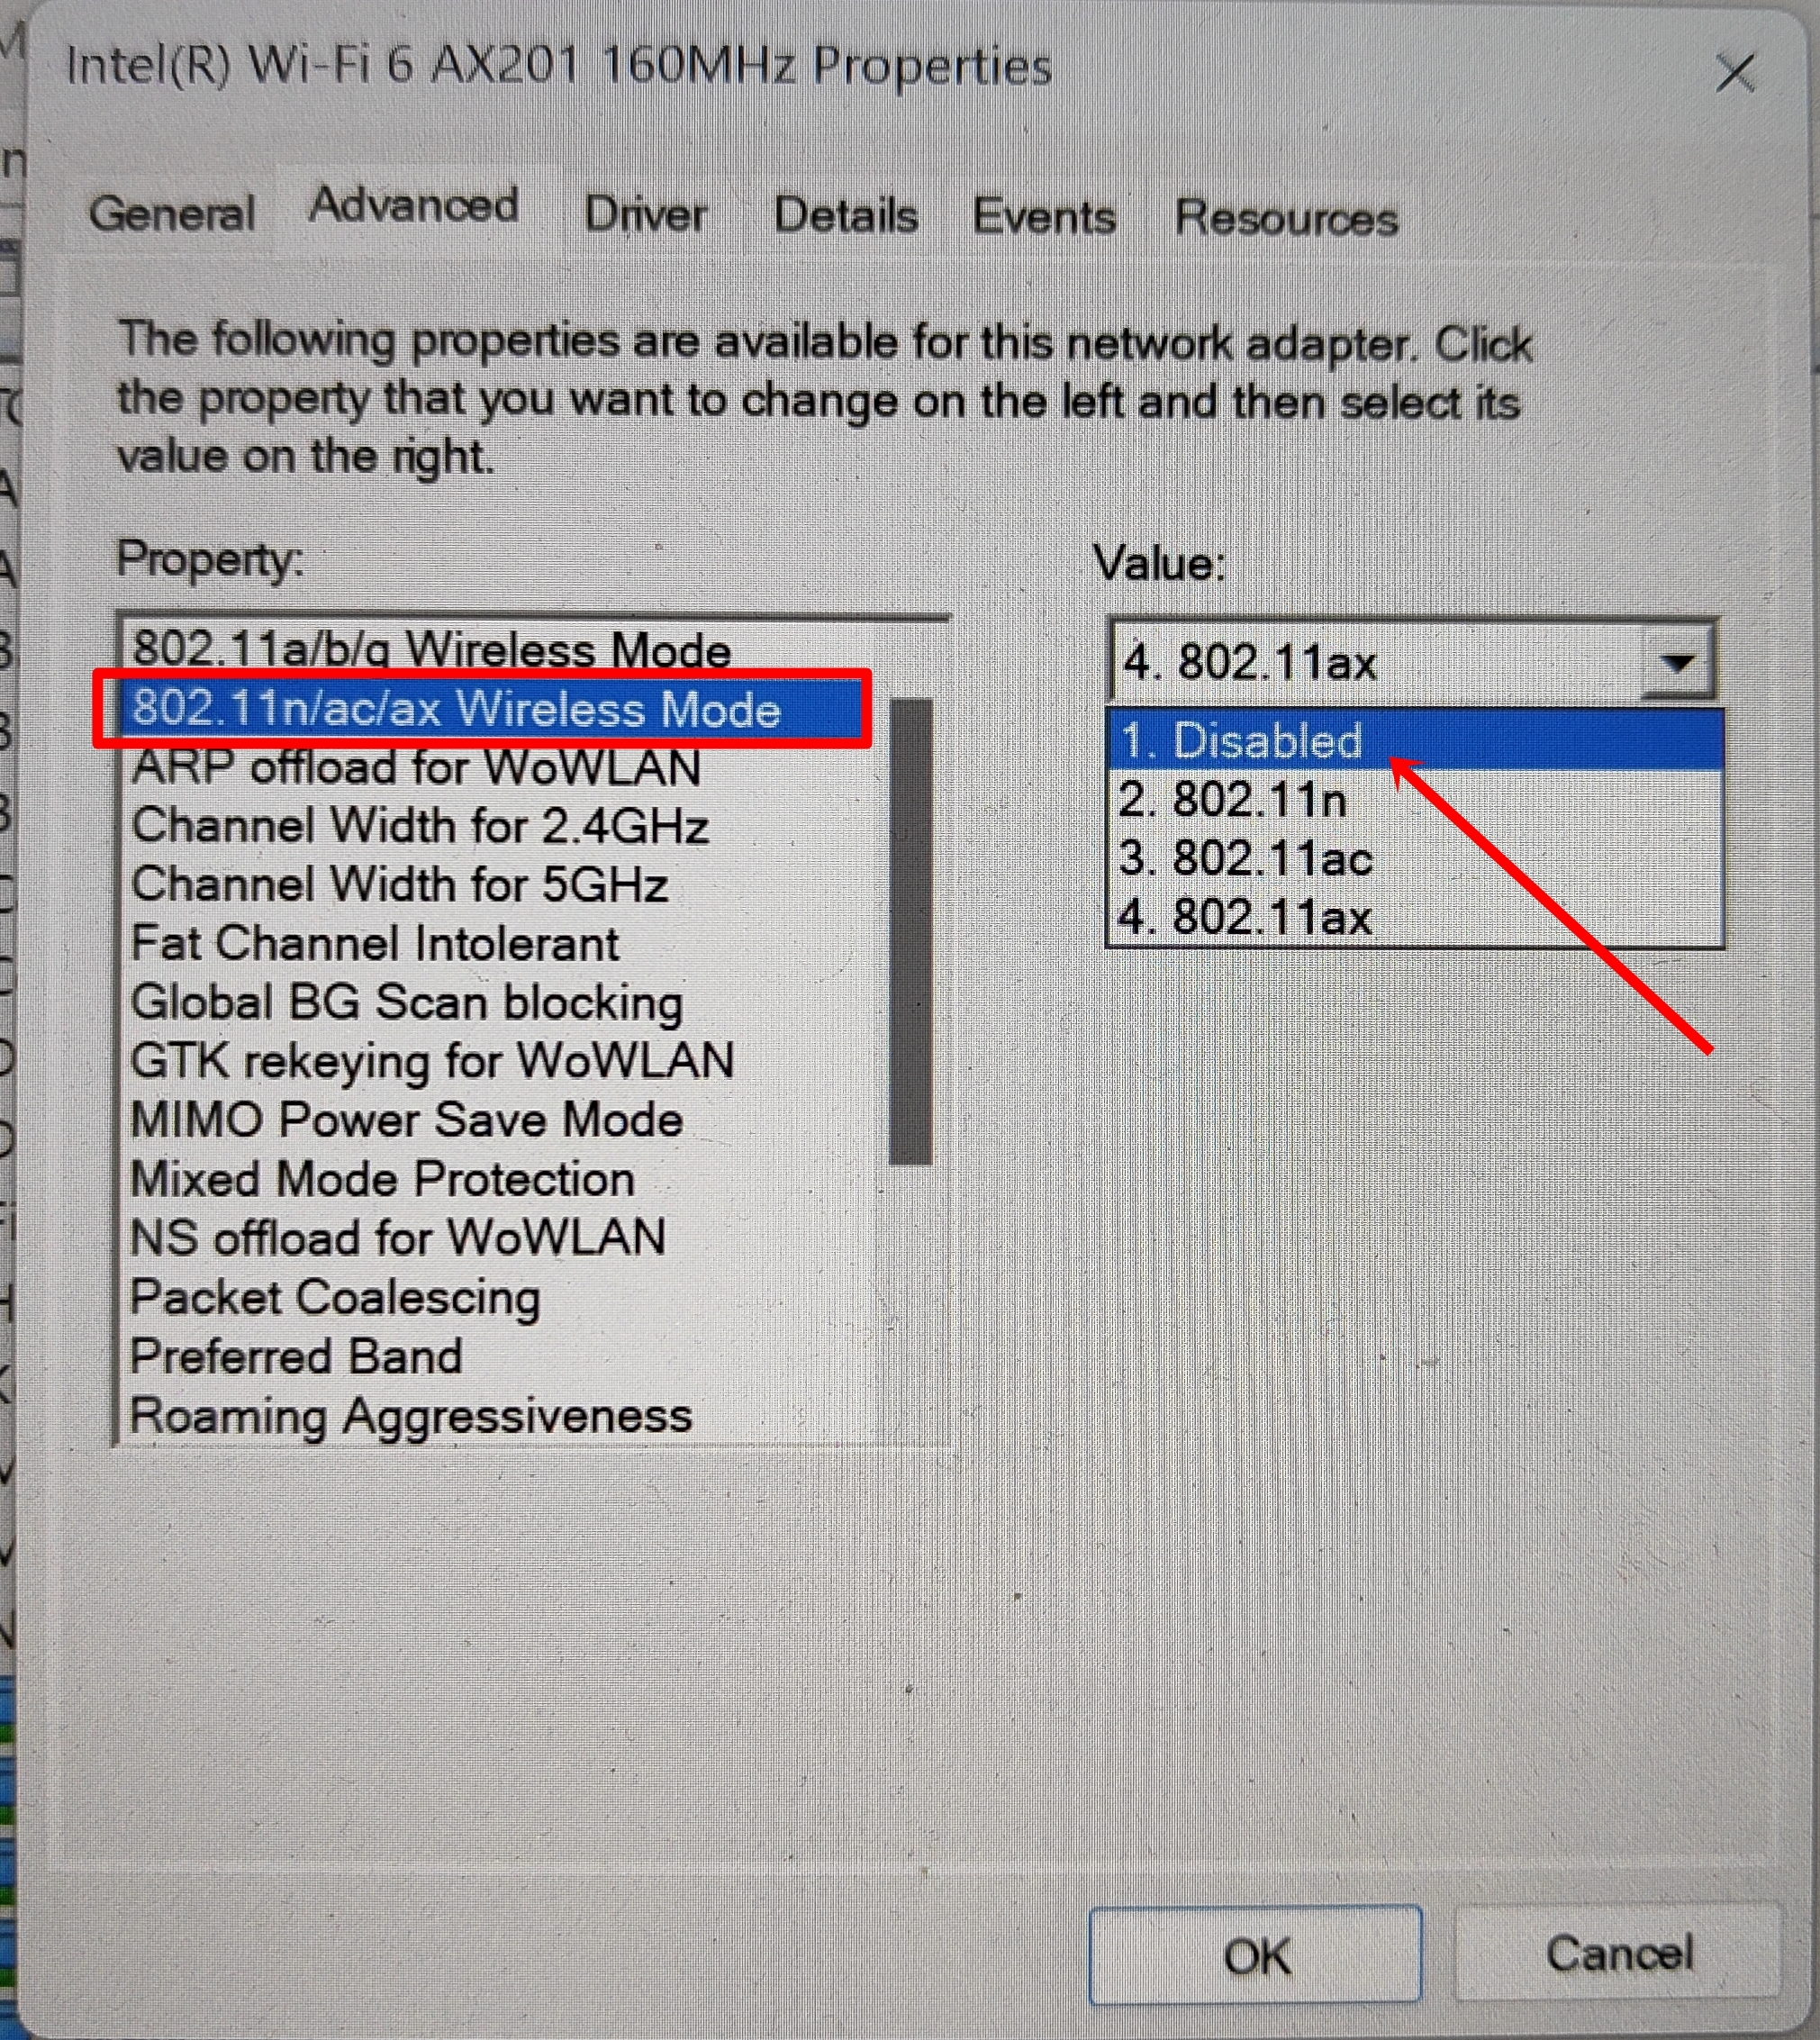
Disable 802.11n mode
If you’re still unable to mend the internet connection on your Windows laptop, proceed with disabling the 802.1n mode under Device Manager settings.
Step 1: From the search bar, search for “Device Manager” and open it
Step 2: Now scroll down to ‘Network adapters‘ and select the ‘arrow‘ beside it
Step 3: Right-click on your device’s adapter and choose ‘Properties‘
Step 4: From here, go to the ‘Advanced’ tab and select ‘802.1n…‘ option
Step 5: Open the ‘Value‘ dropdown menu and select ‘Disable‘. Then press ‘OK‘
Step 6: Wait for a couple of seconds and enable that option


FAQs
What should I do if `cant connect to this network` error is not fixed?
If none of the methods mentioned above don’t resolve the internet connectivity issue, all you can do is contact your Internet Service Provider (ISP) to look into the matter and provide a prompt solution.
Why is there a Wi-Fi authentication problem?
Such errors may appear if the internet connection is unstable or unable to connect to the servers. This may cause hindrances in accessing websites or sending information to other devices via apps over the internet.


: price, unlimited Wi-fi offers, OTT benefits and more")


 review: sunny side up")


 India-special edition to be unveiled on April 29th, teased on Flipkart")
