Knowing the RAM on your laptop/ PC, be it Windows or Mac, helps you manage your workload more effectively. It provides a fair understanding of your machine’s capability to handle tasks. The greater the RAM, the more tasks it can manage simultaneously. You can check the RAM on your Windows laptop/ PC and Mac boasts directly from the machine itself. In case you are wondering ‘how?’, follow our step-by-step guide.
Table of Contents
How to check RAM on your Windows 11 and 10 laptop
Let’s look at some methods to check the amount of RAM your laptop carries:
Method 1: Using System Information (Start menu)
One of the easiest ways to check the RAM on Windows is through the Search bar within the Start menu.
Step 1: Click on the ‘Start‘ menu
Step 2: Now on the search bar present at the top, type “RAM“
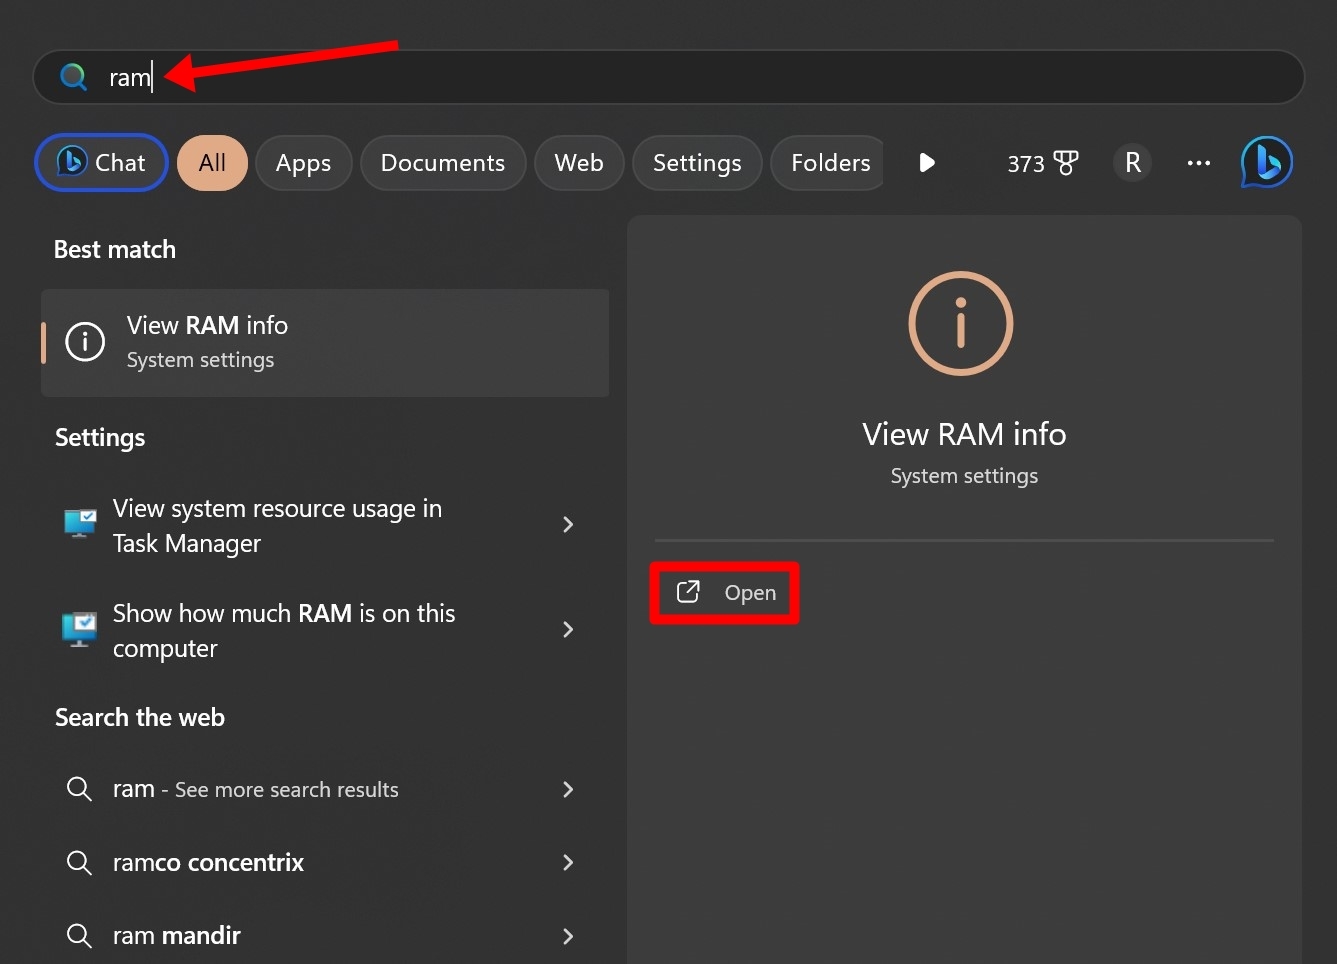
Step 3: Select ‘Open‘ under the ‘View RAM info‘ section
Step 4: The total installed RAM on your Windows laptop or PC will be displayed along with actual usable storage
Users who have enabled the Search bar within the taskbar can directly search for ‘RAM’ to open the Settings.
Method 2: Using Task Manager shortcut
If you want to view the amount of RAM your laptop comes with along with the memory usage, that can be done through a shortcut key.
Step 1: From any screen, press Ctrl + Shift + Esc
Step 2: The Task Manager should open. From here you can view all the processes that are currently consuming RAM on your laptop
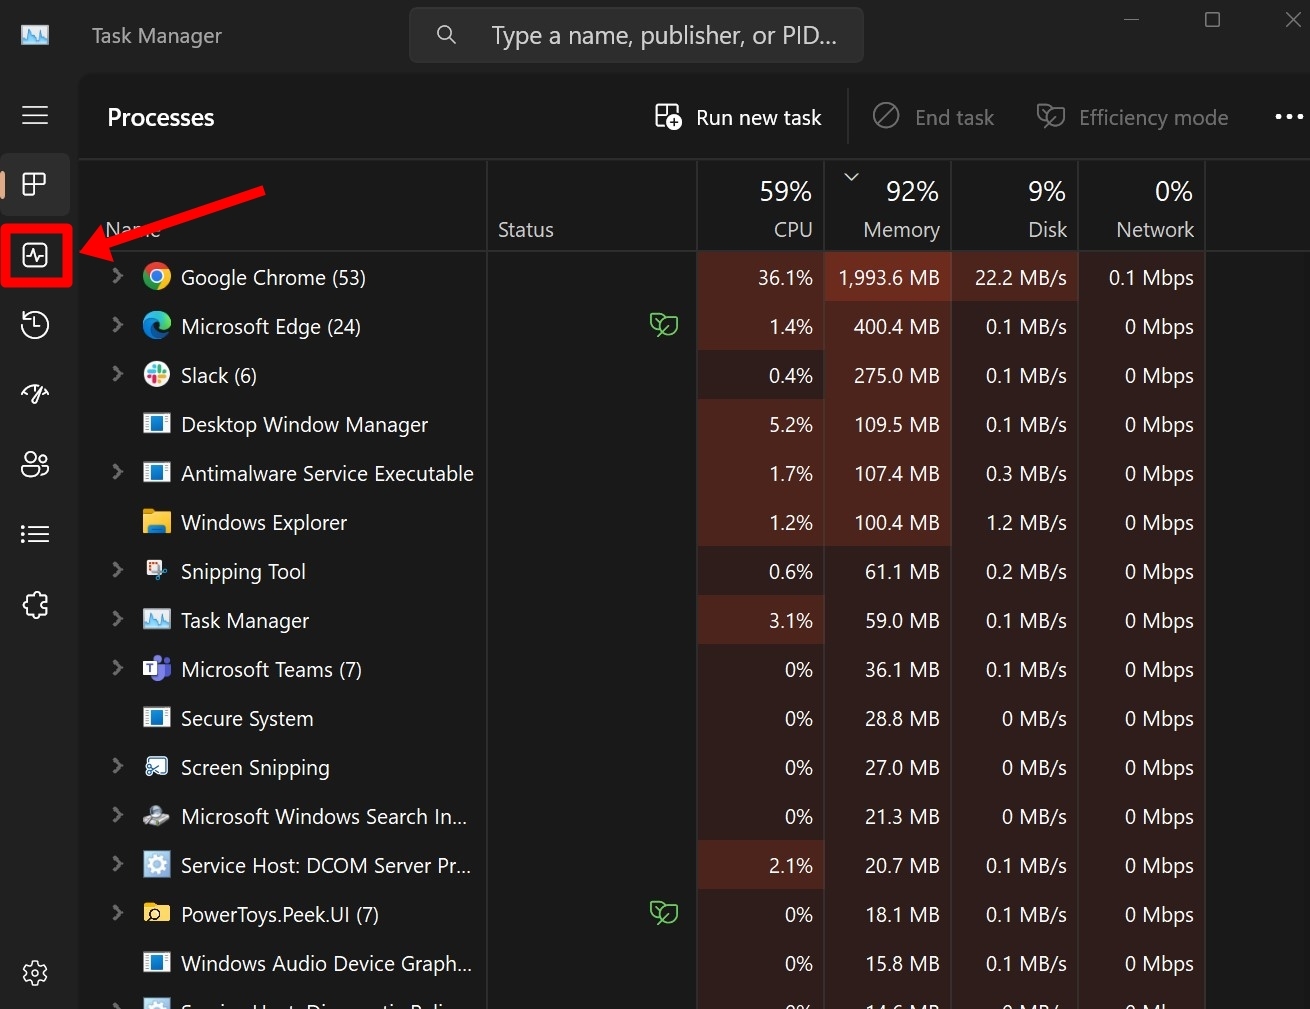
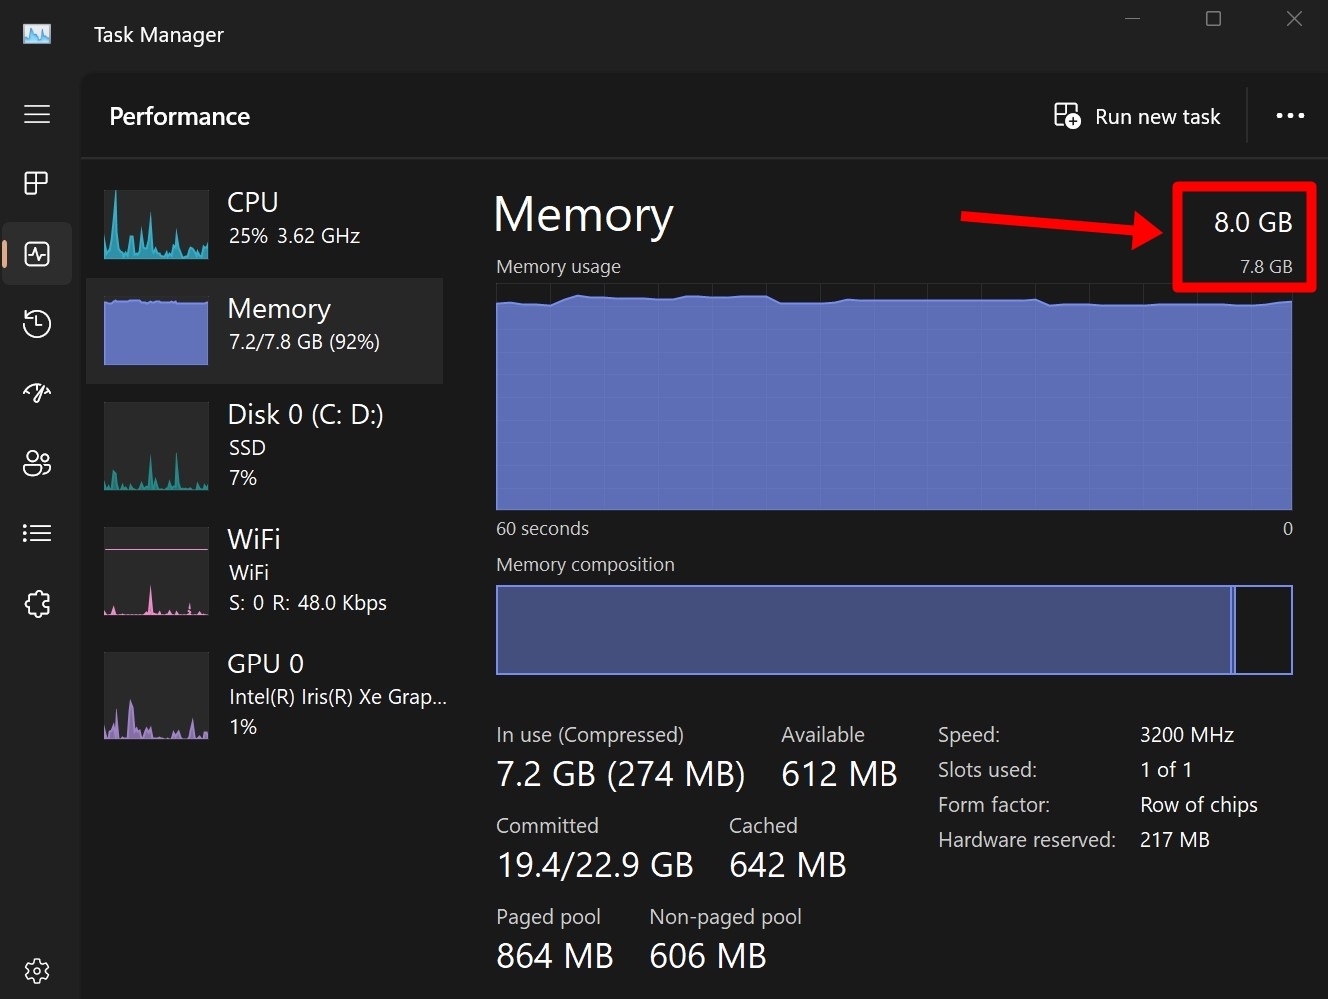
Step 4: This section will indicate your laptop’s RAM at the top right corner along with the memory that is free to use
Method 3: Using Settings app
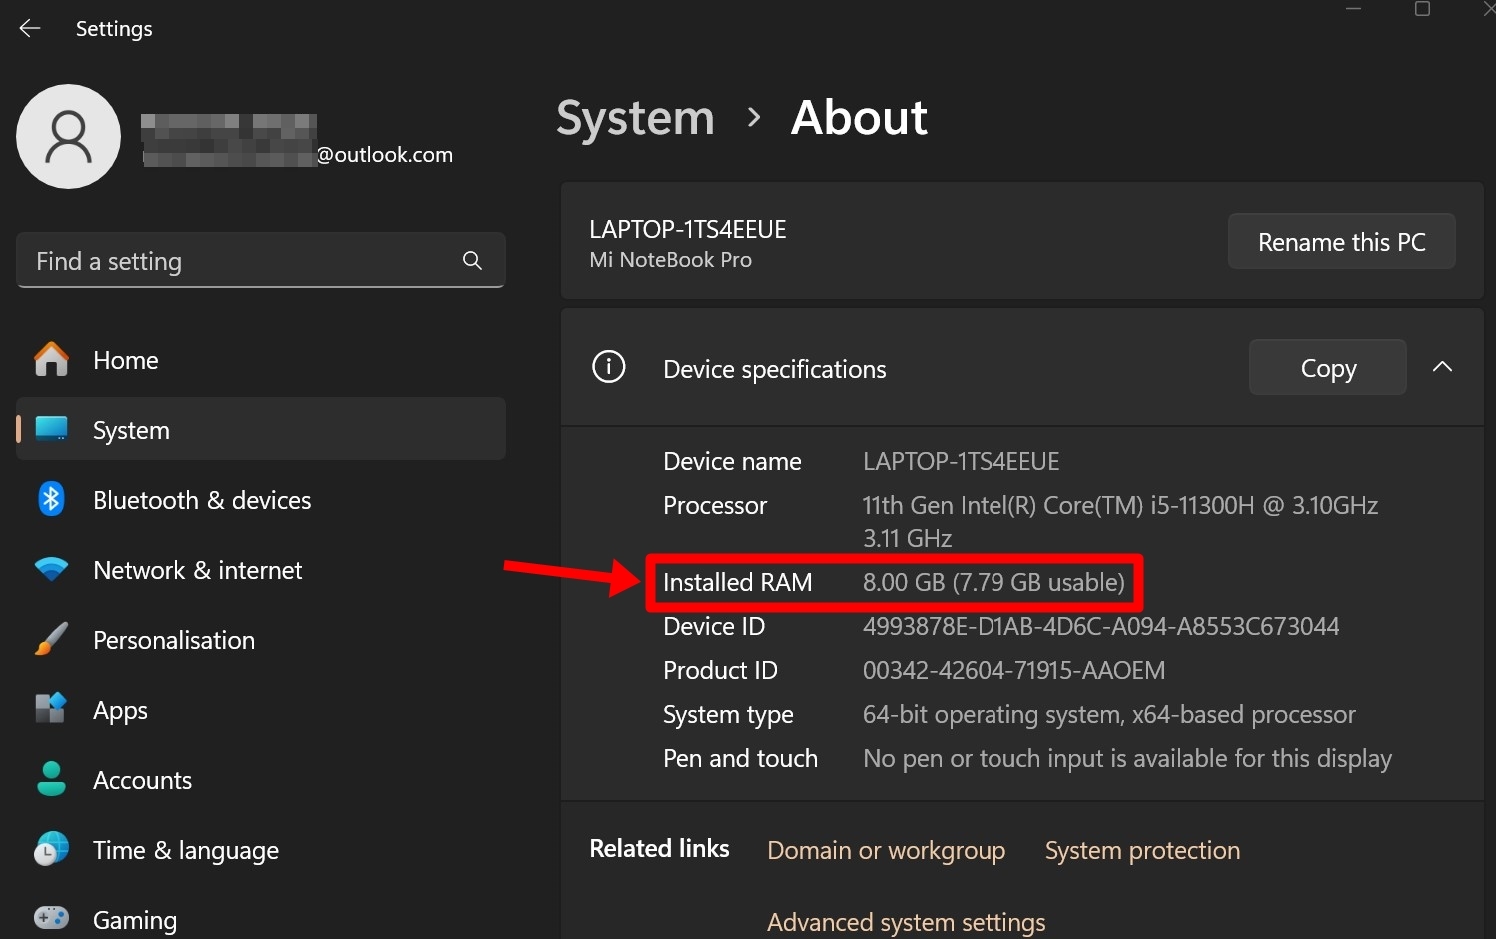
You can also check your Windows 10 or 11 laptop’s RAM by making your way through the Settings app.
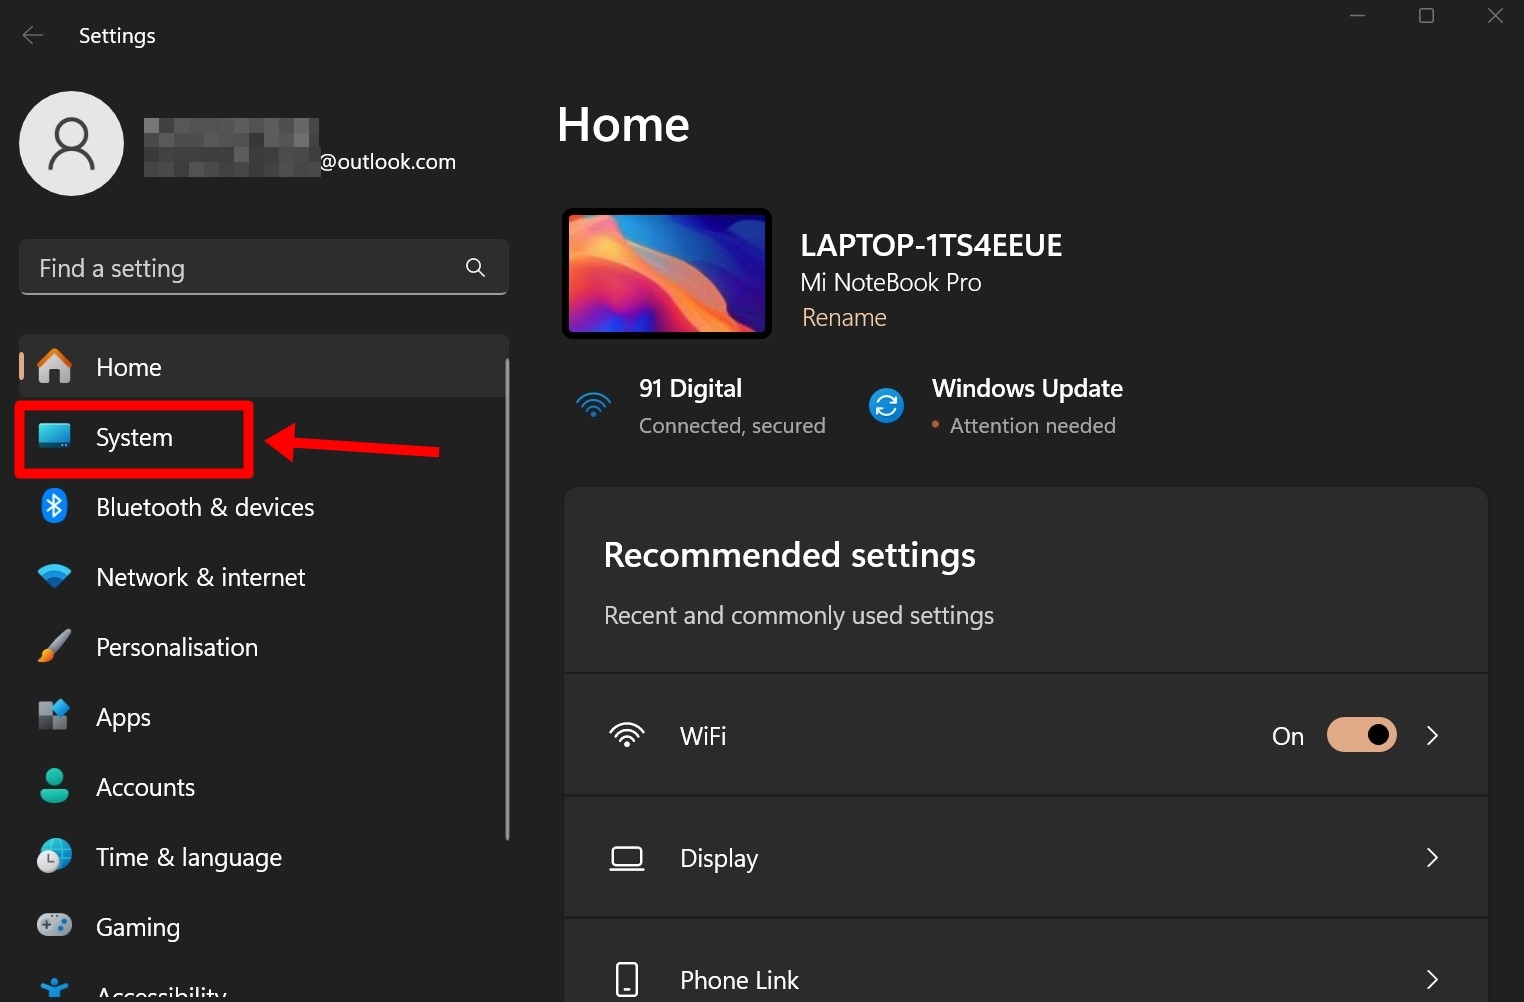
Step 1: Firstly, open the Settings app
Step 2: Now select ‘System‘ from the left menu
Step 3: Scroll down and click on ‘About‘
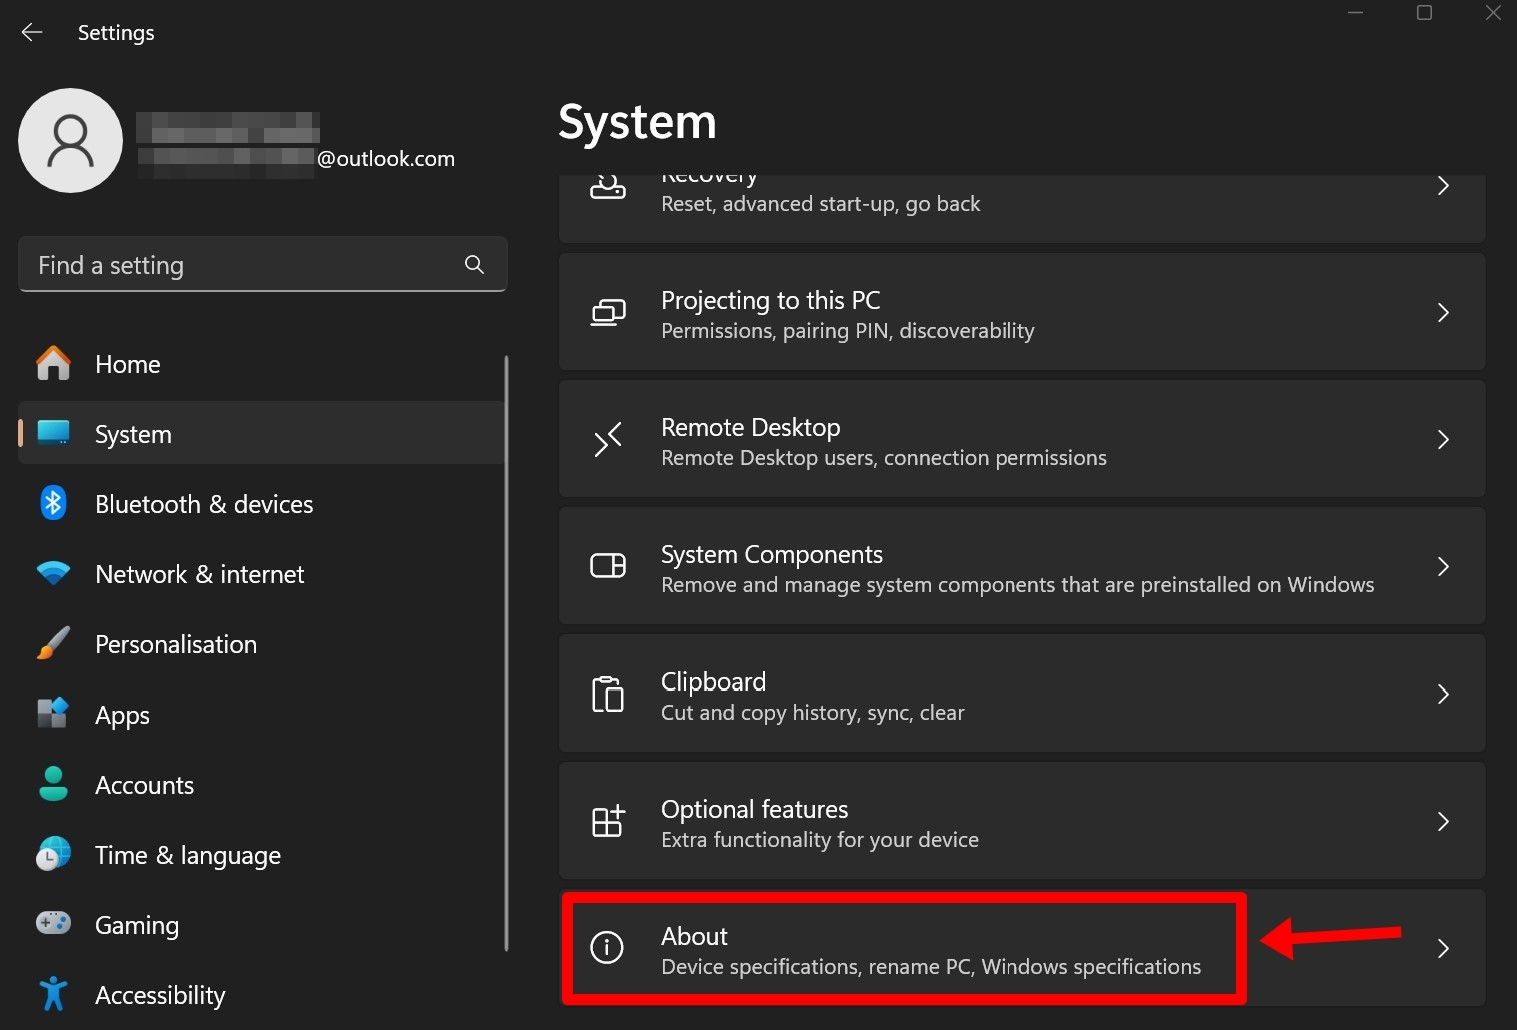
Step 4: The next screen will display the RAM of your laptop. You can also check for other key specifications of the laptop from this screen

Method 4: Using Command Prompt
Users can not only check the total RAM of their laptop but also various other attributes such as RAM serial number, memory type, manufacturer and much more using the Command Prompt window. Here’s how.
Step 1: Firstly, open Command Prompt on your Windows laptop through the Search bar
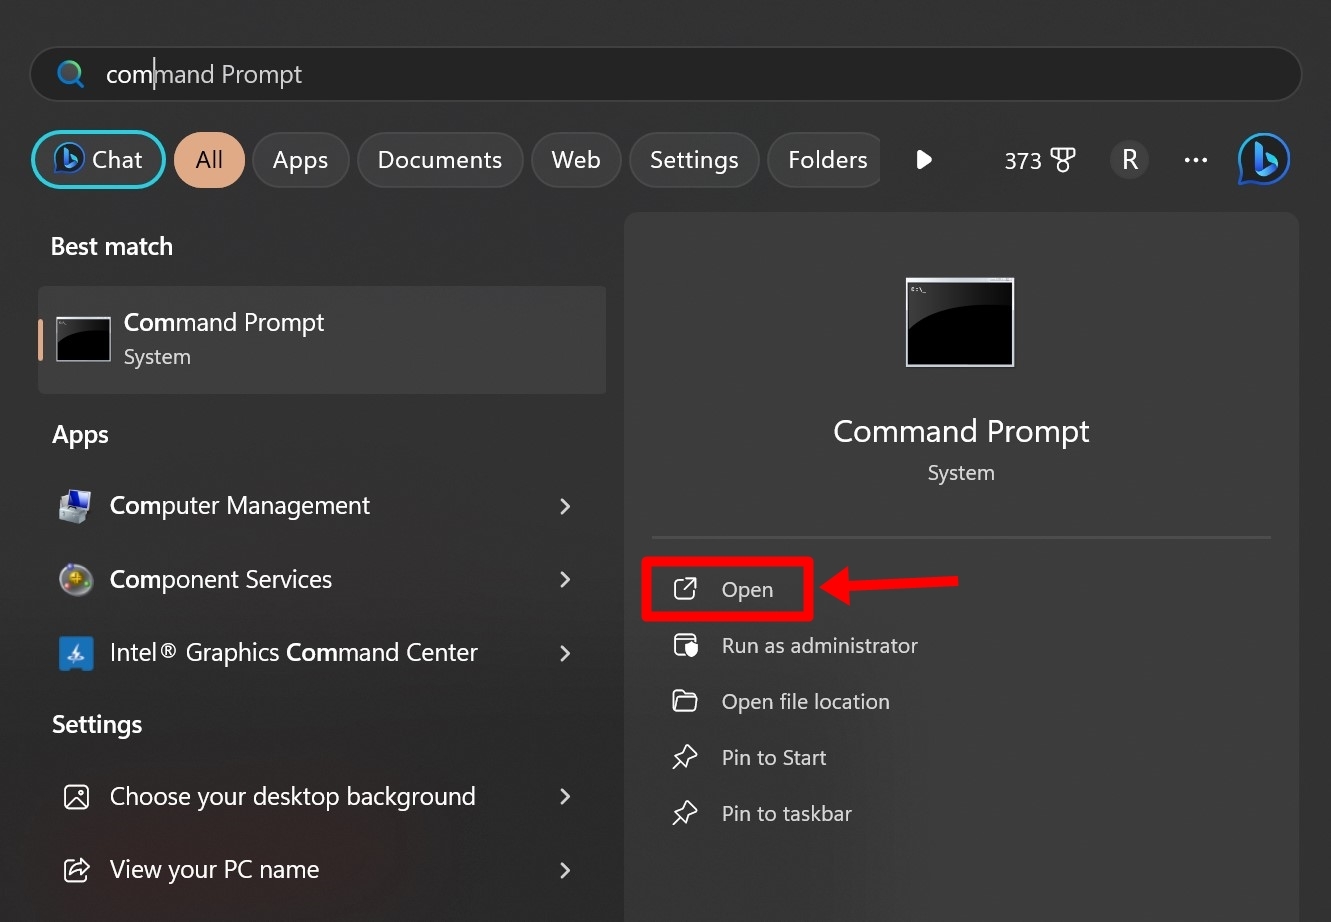
Step 2: If it asks, permit it to Run as Administrator
Step 3: Now go ahead and type “wmic memorychip list full” and hit Enter
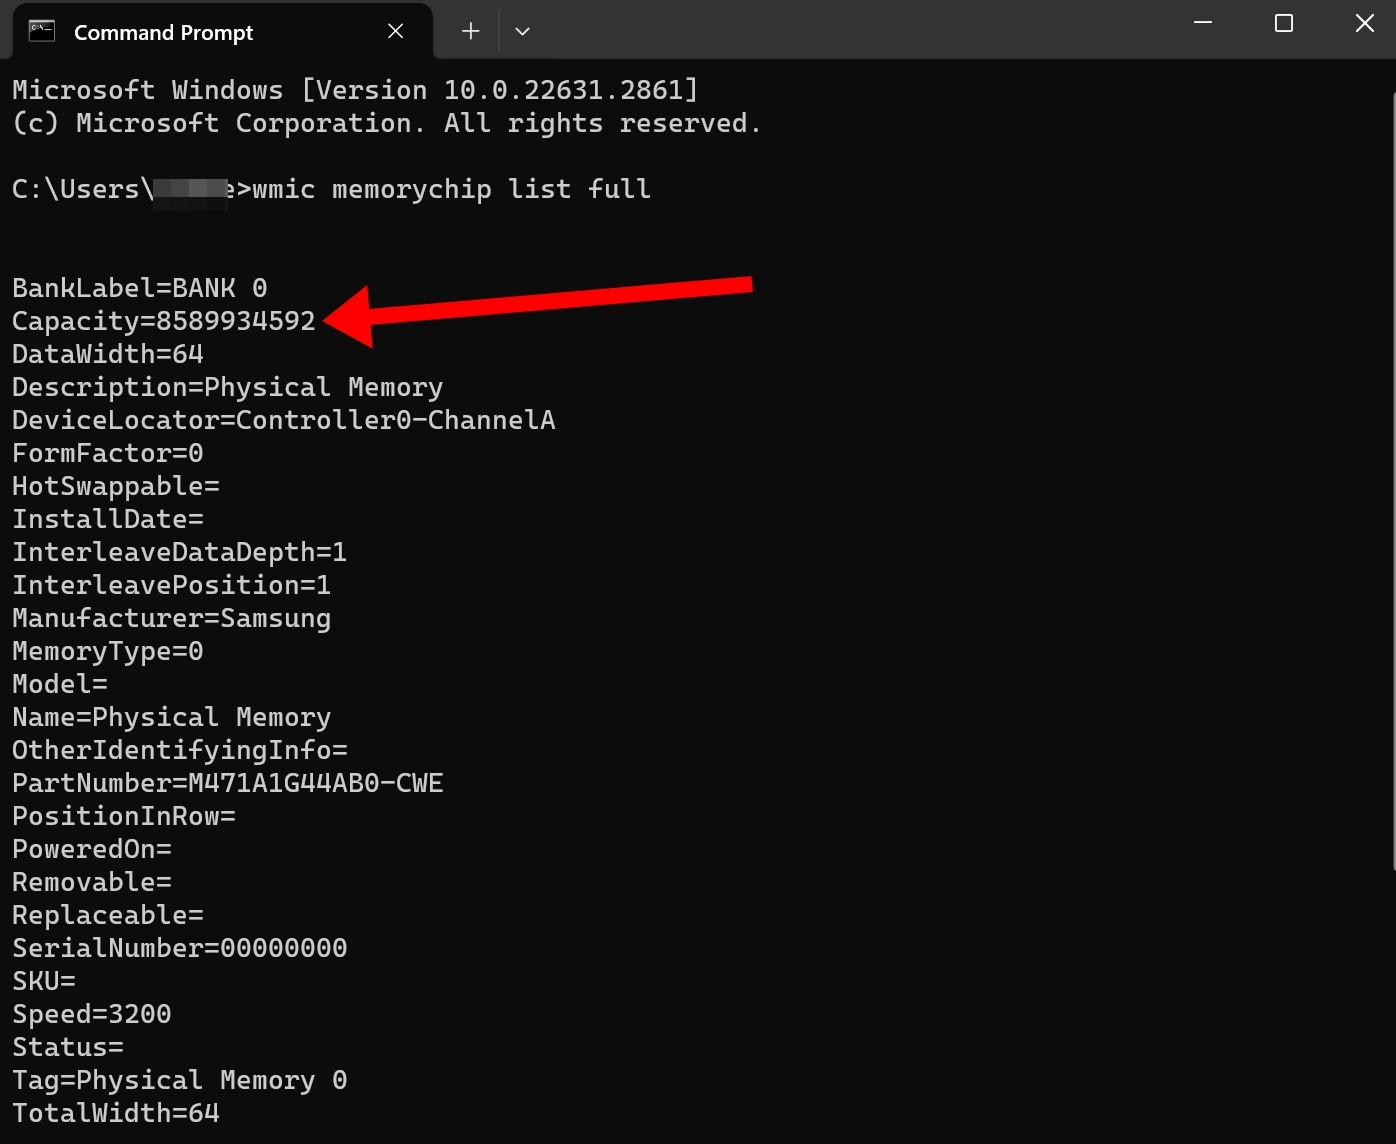
Step 4: You will get a full list of the specifications of your laptop’s RAM
Step 5: To identify the RAM’s capacity, divide the value of “Capacity” by 1,073,741,824 to get the value in GB
Method 5: Checking laptop’s box
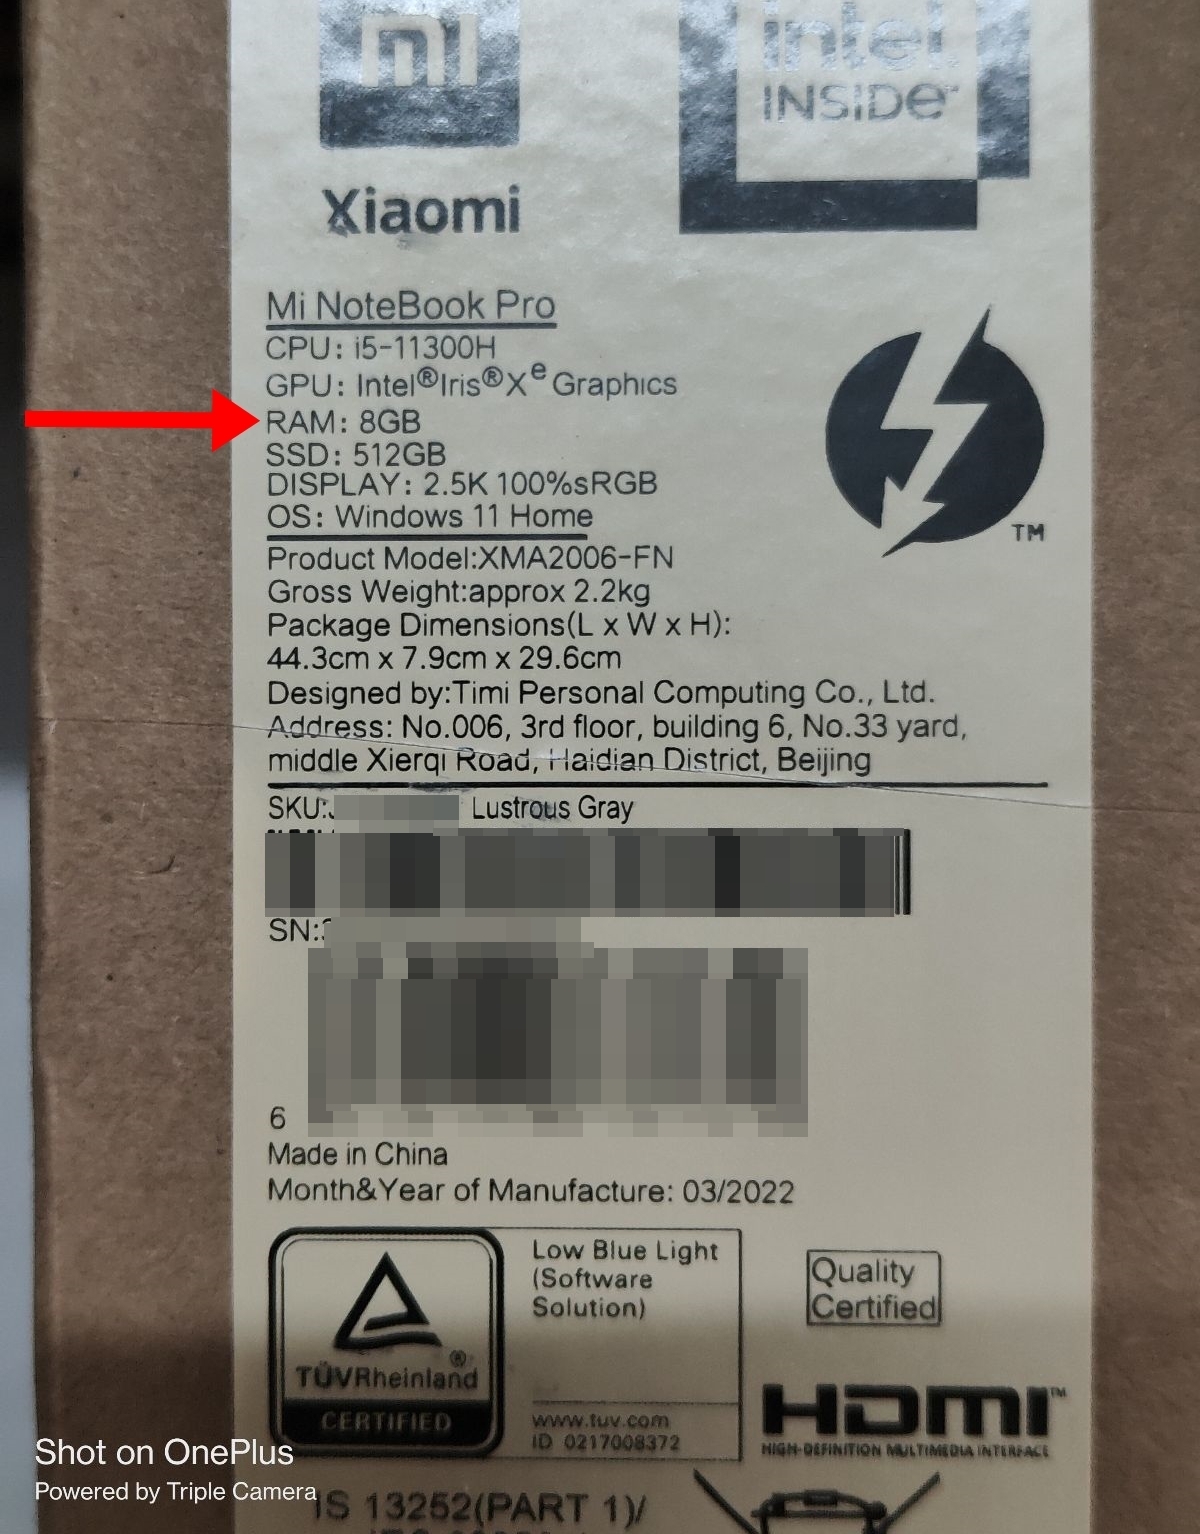
The RAM of the laptop is usually mentioned on the laptop’s retail box. If you have the box around, take a look at the sides or at the back to spot the RAM configuration of the laptop. You can also glance through several other hardware details using this method.
How to check RAM on your MacBook
If you have a MacBook, the methods to check its RAM are as follows.
Method 1: Using ‘About This Mac’ option
This is the simplest way to view the memory of a MacBook. Here’s how to go about it.
Step 1: Go ahead and select the Apple logo at the top right corner
Step 2: Now select the ‘About This Mac‘ option
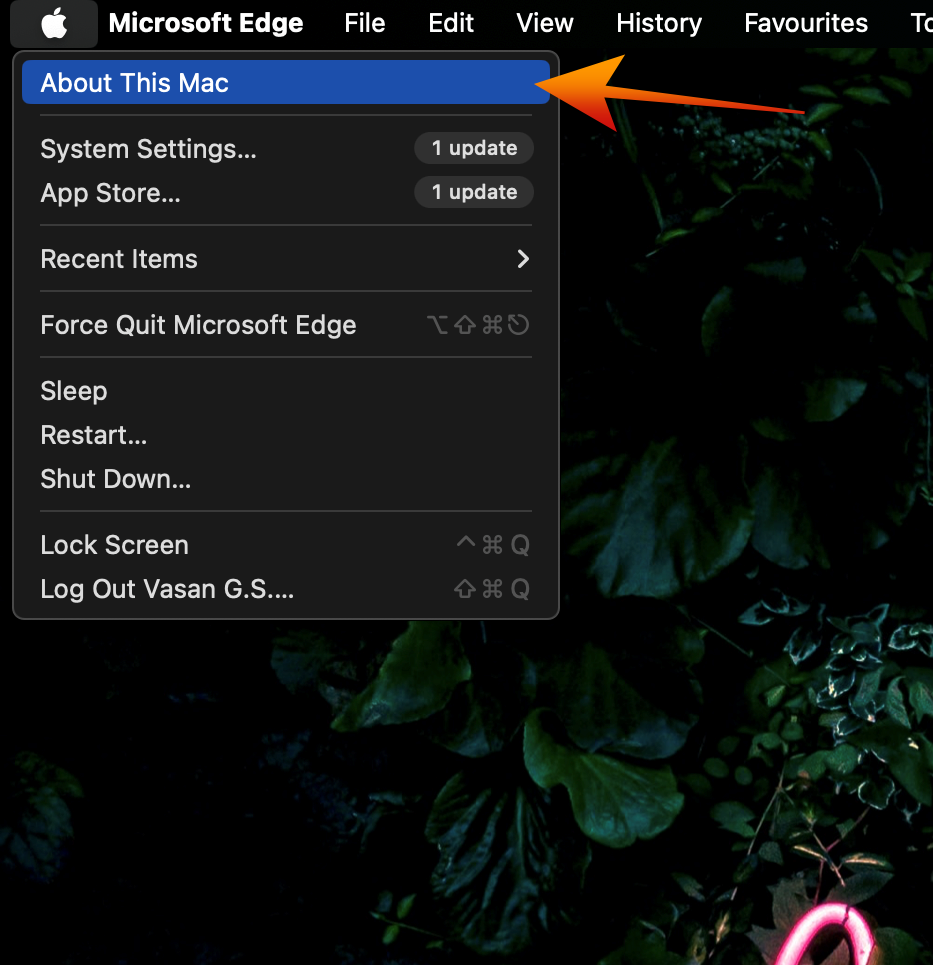
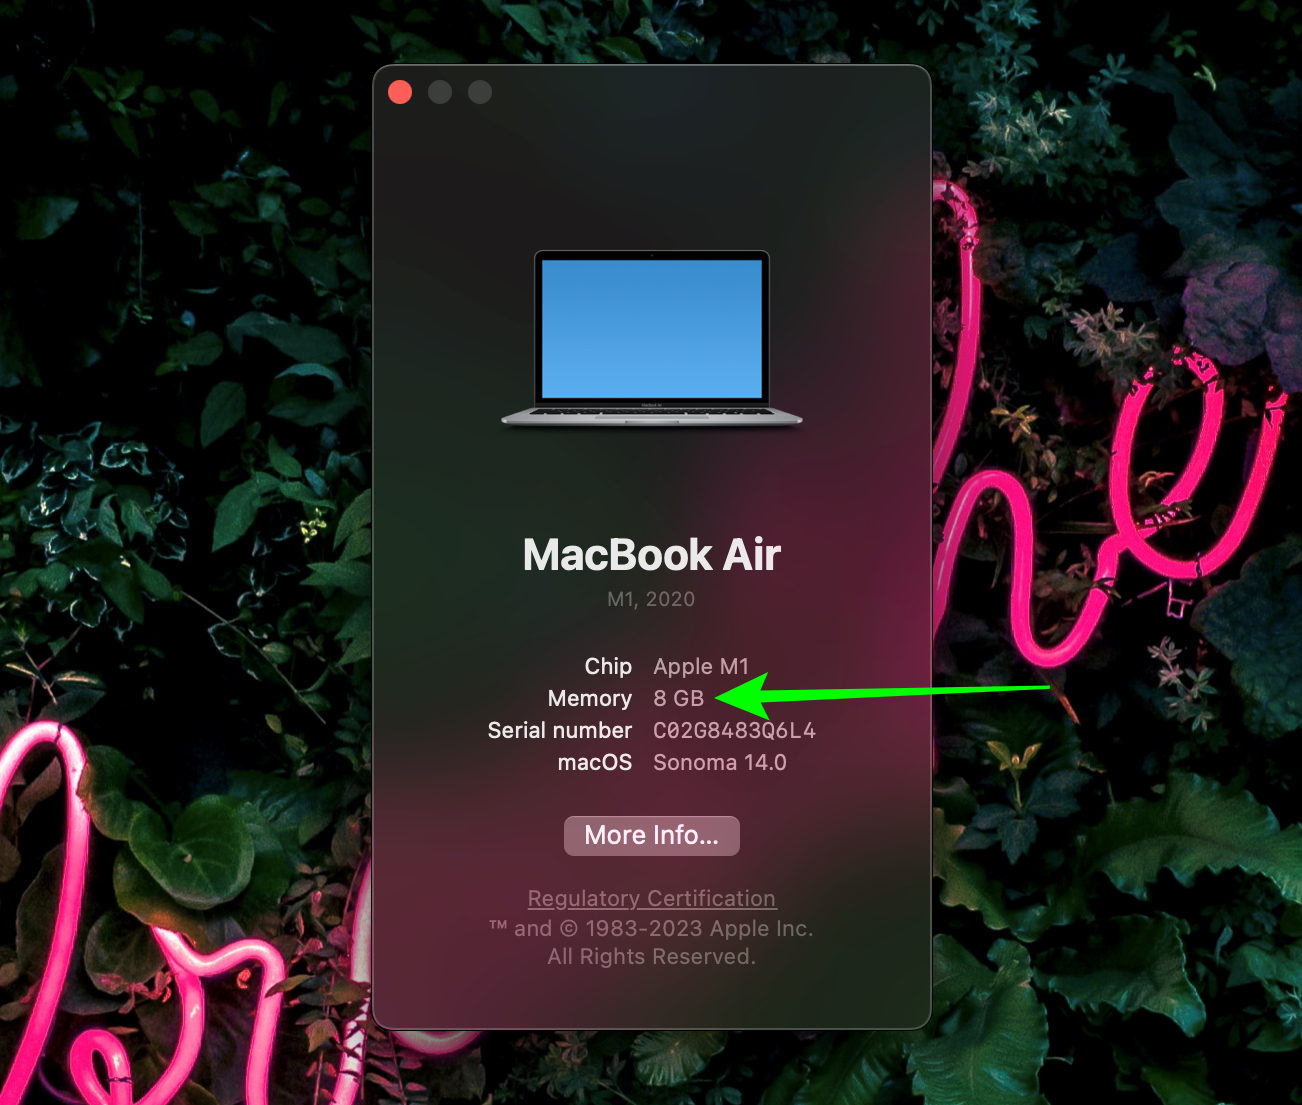
Step 3: On the next screen, you will be able to view the total RAM of your MacBook
Method 2: Using Spotlight Search
The Spotlight Search is a one-stop hub to find anything on macOS.
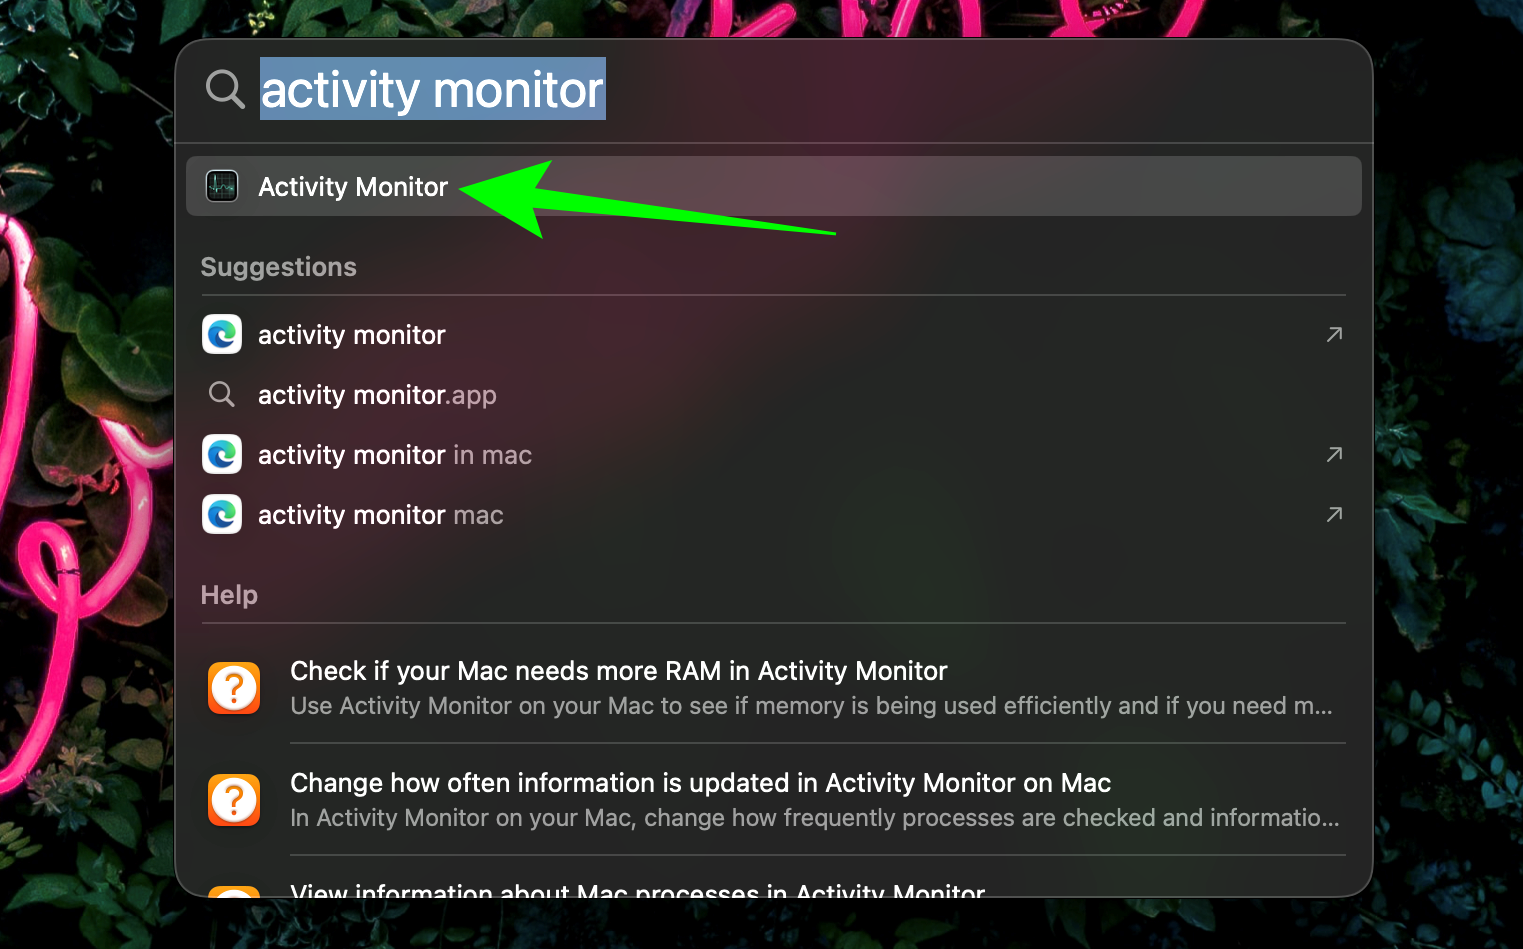
Step 1: Press Command + Spacebar keys together
Step 2: Now search for “Activity Monitor” and open it
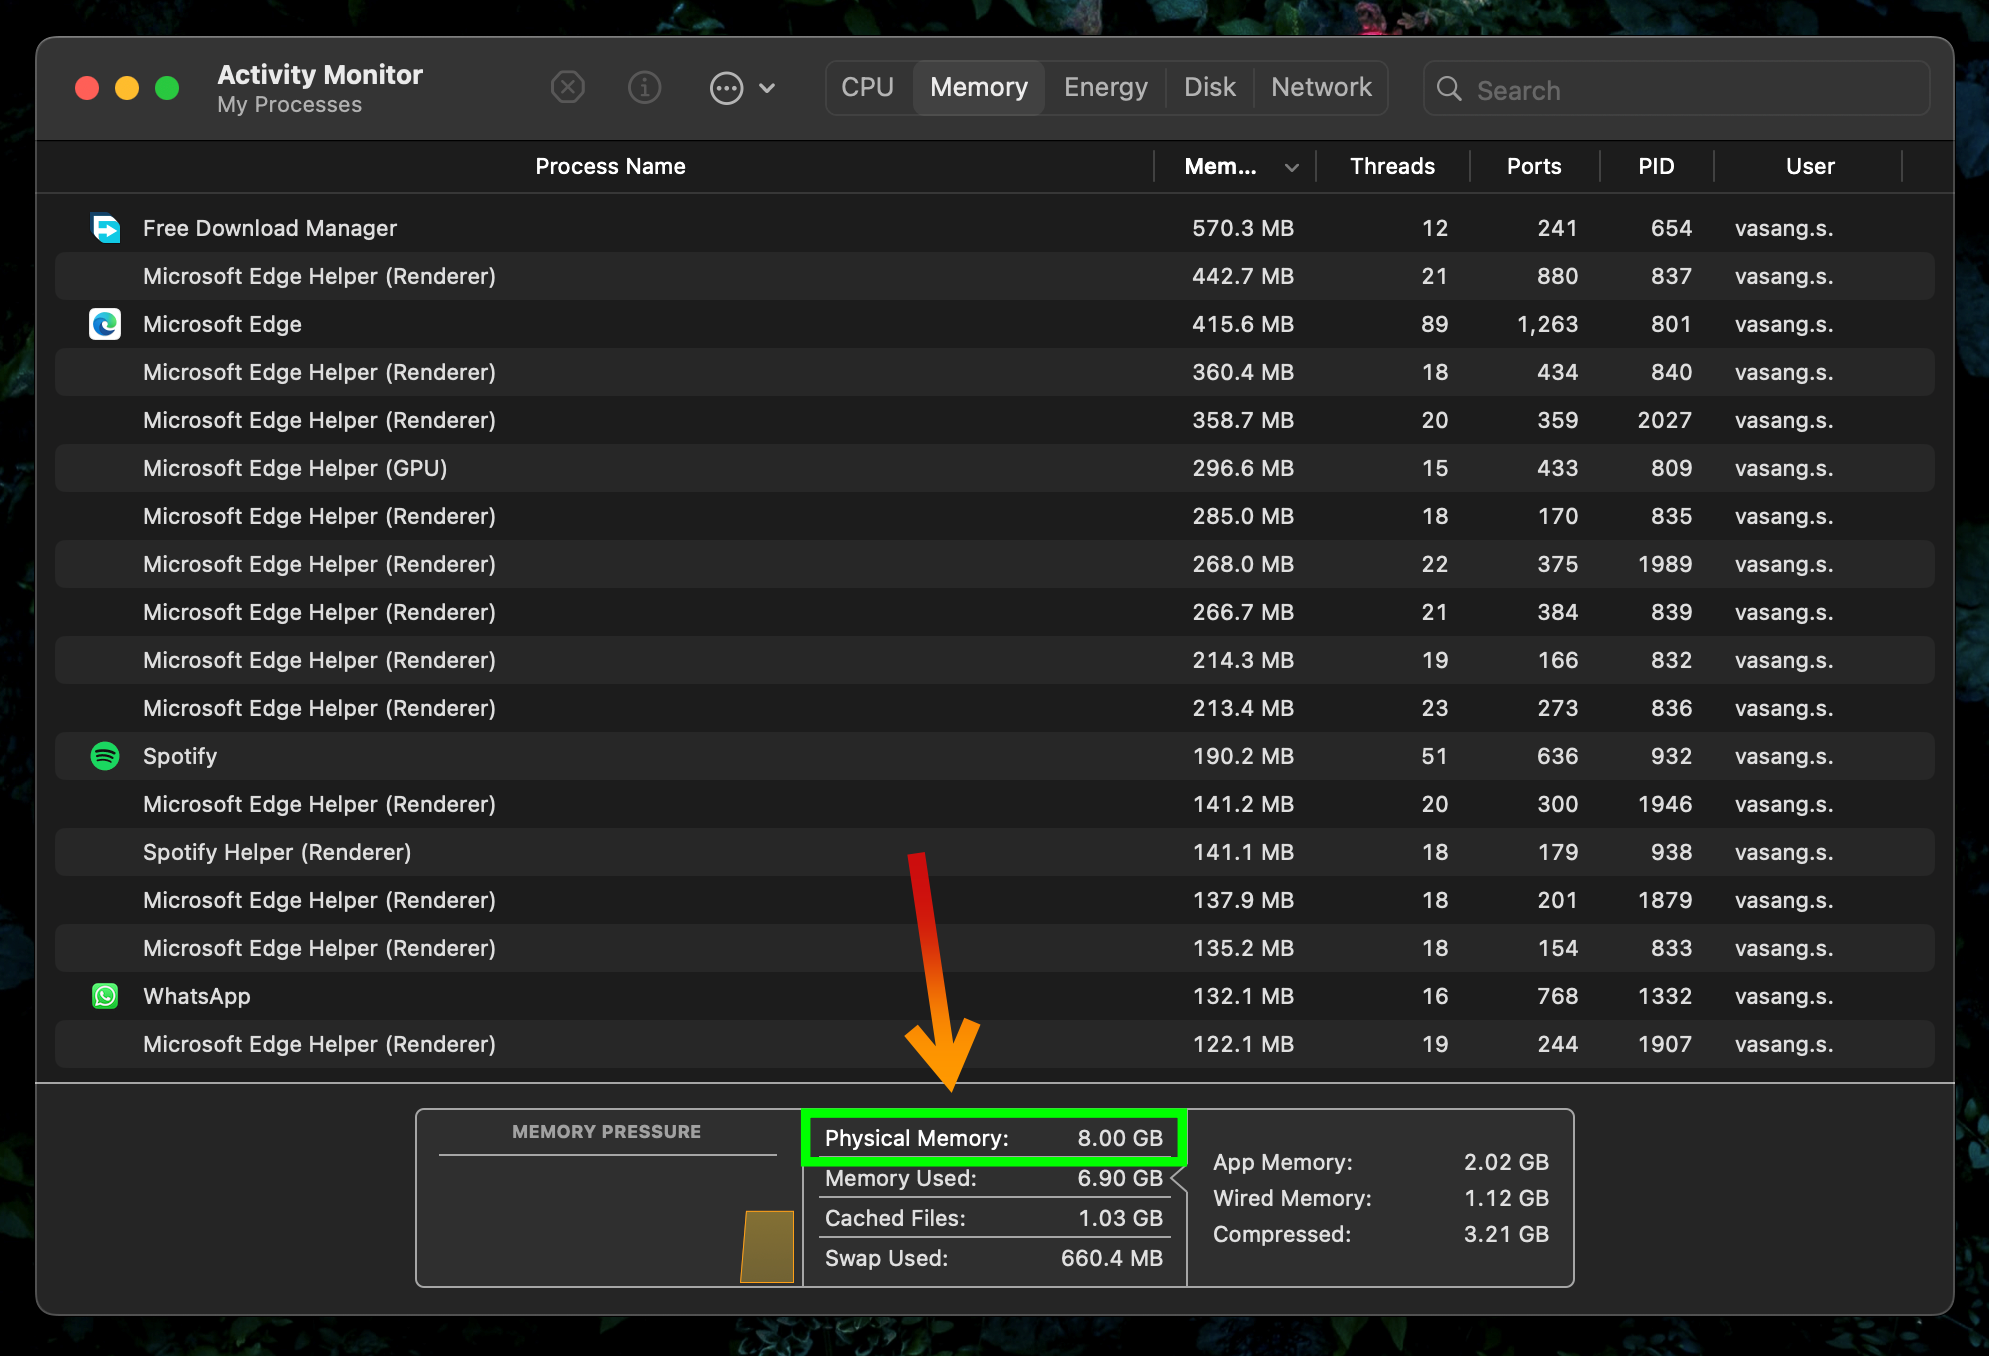
Step 3: Once Activity Monitor is launched, select the ‘Memory‘ tab to check the total RAM of your MacBook
Method 3: Using Activity Monitor
Here are the comprehensive steps to view a MacBook’s RAM configuration using Activity Monitor along with the memory usage.
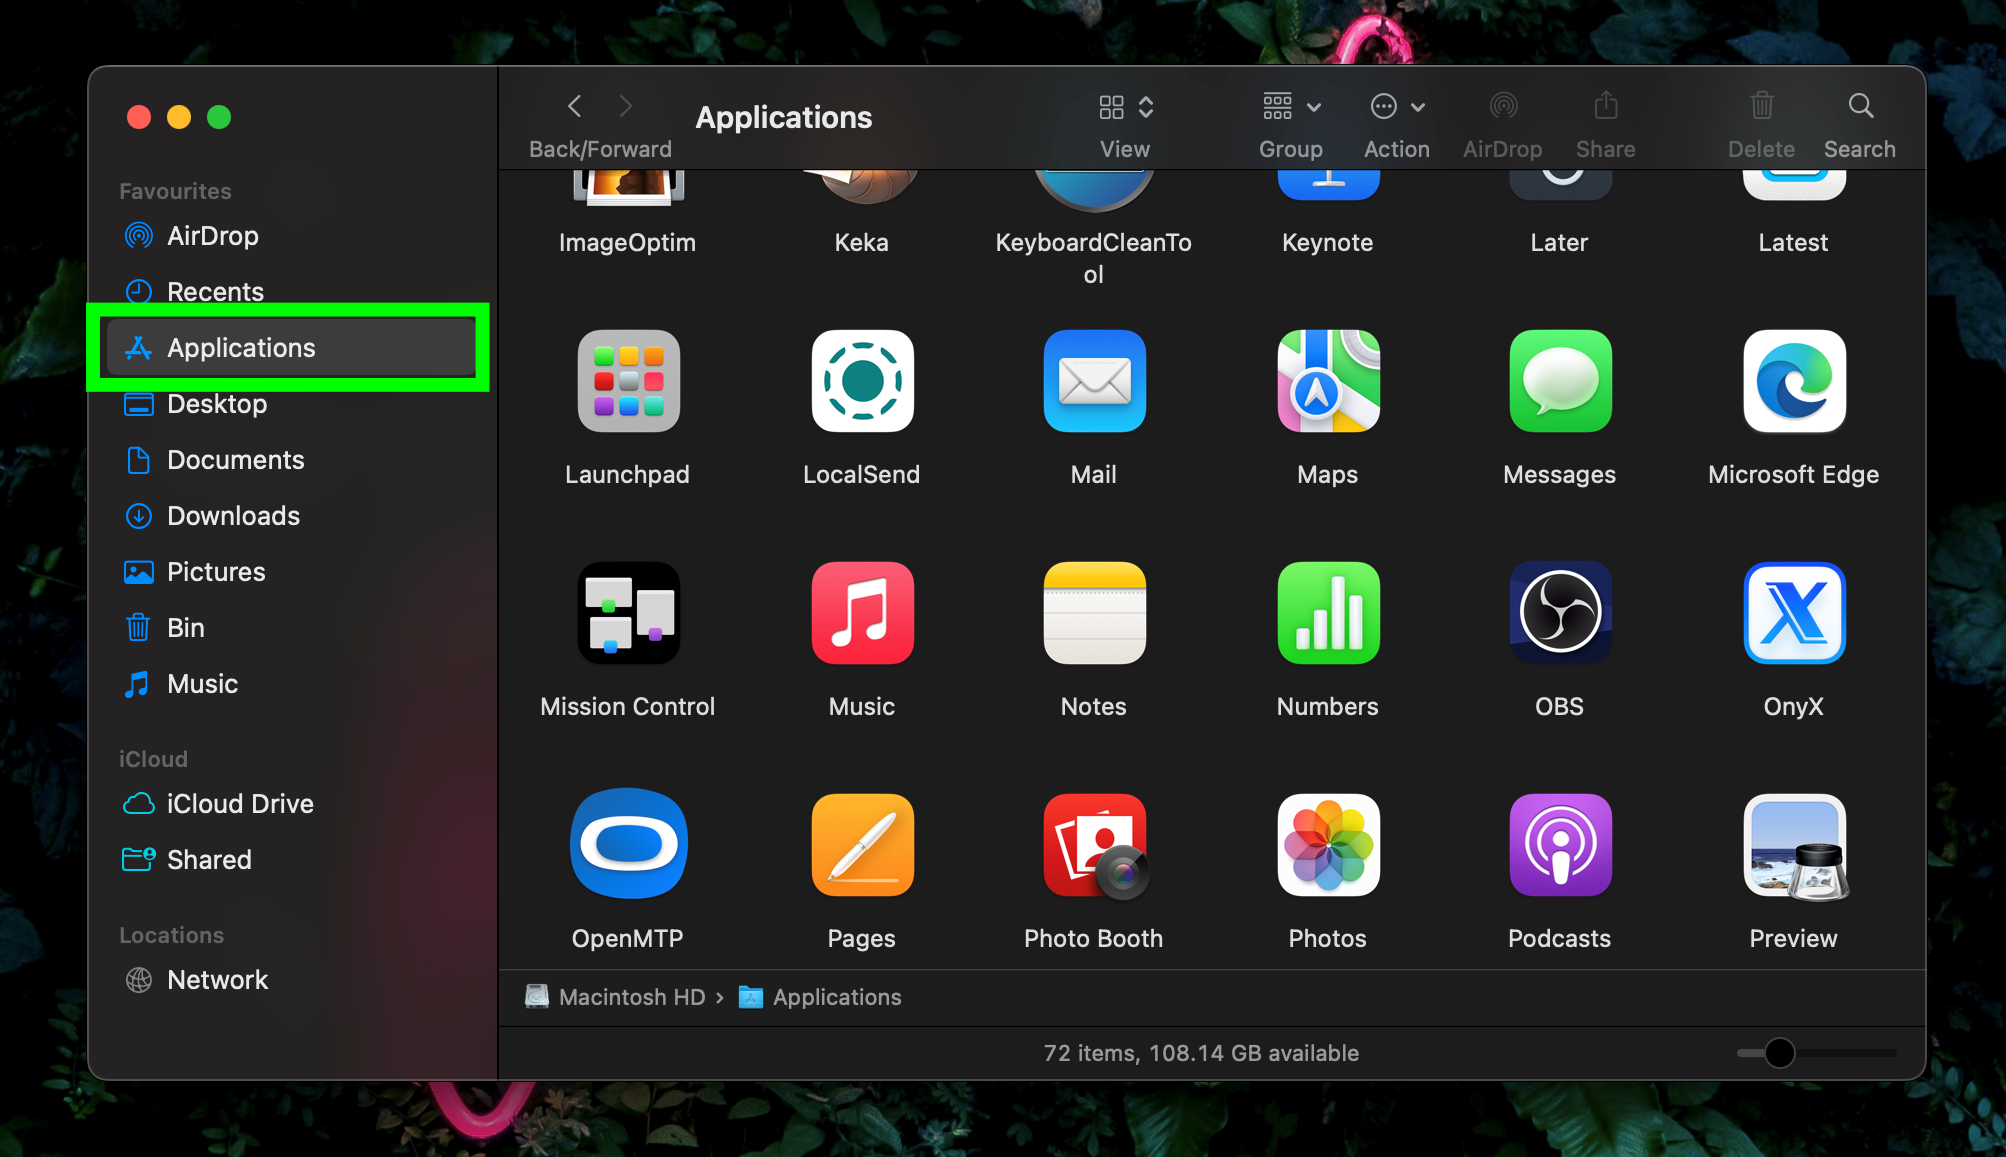
Step 1: Open ‘Applications‘ and then select ‘Utilities‘
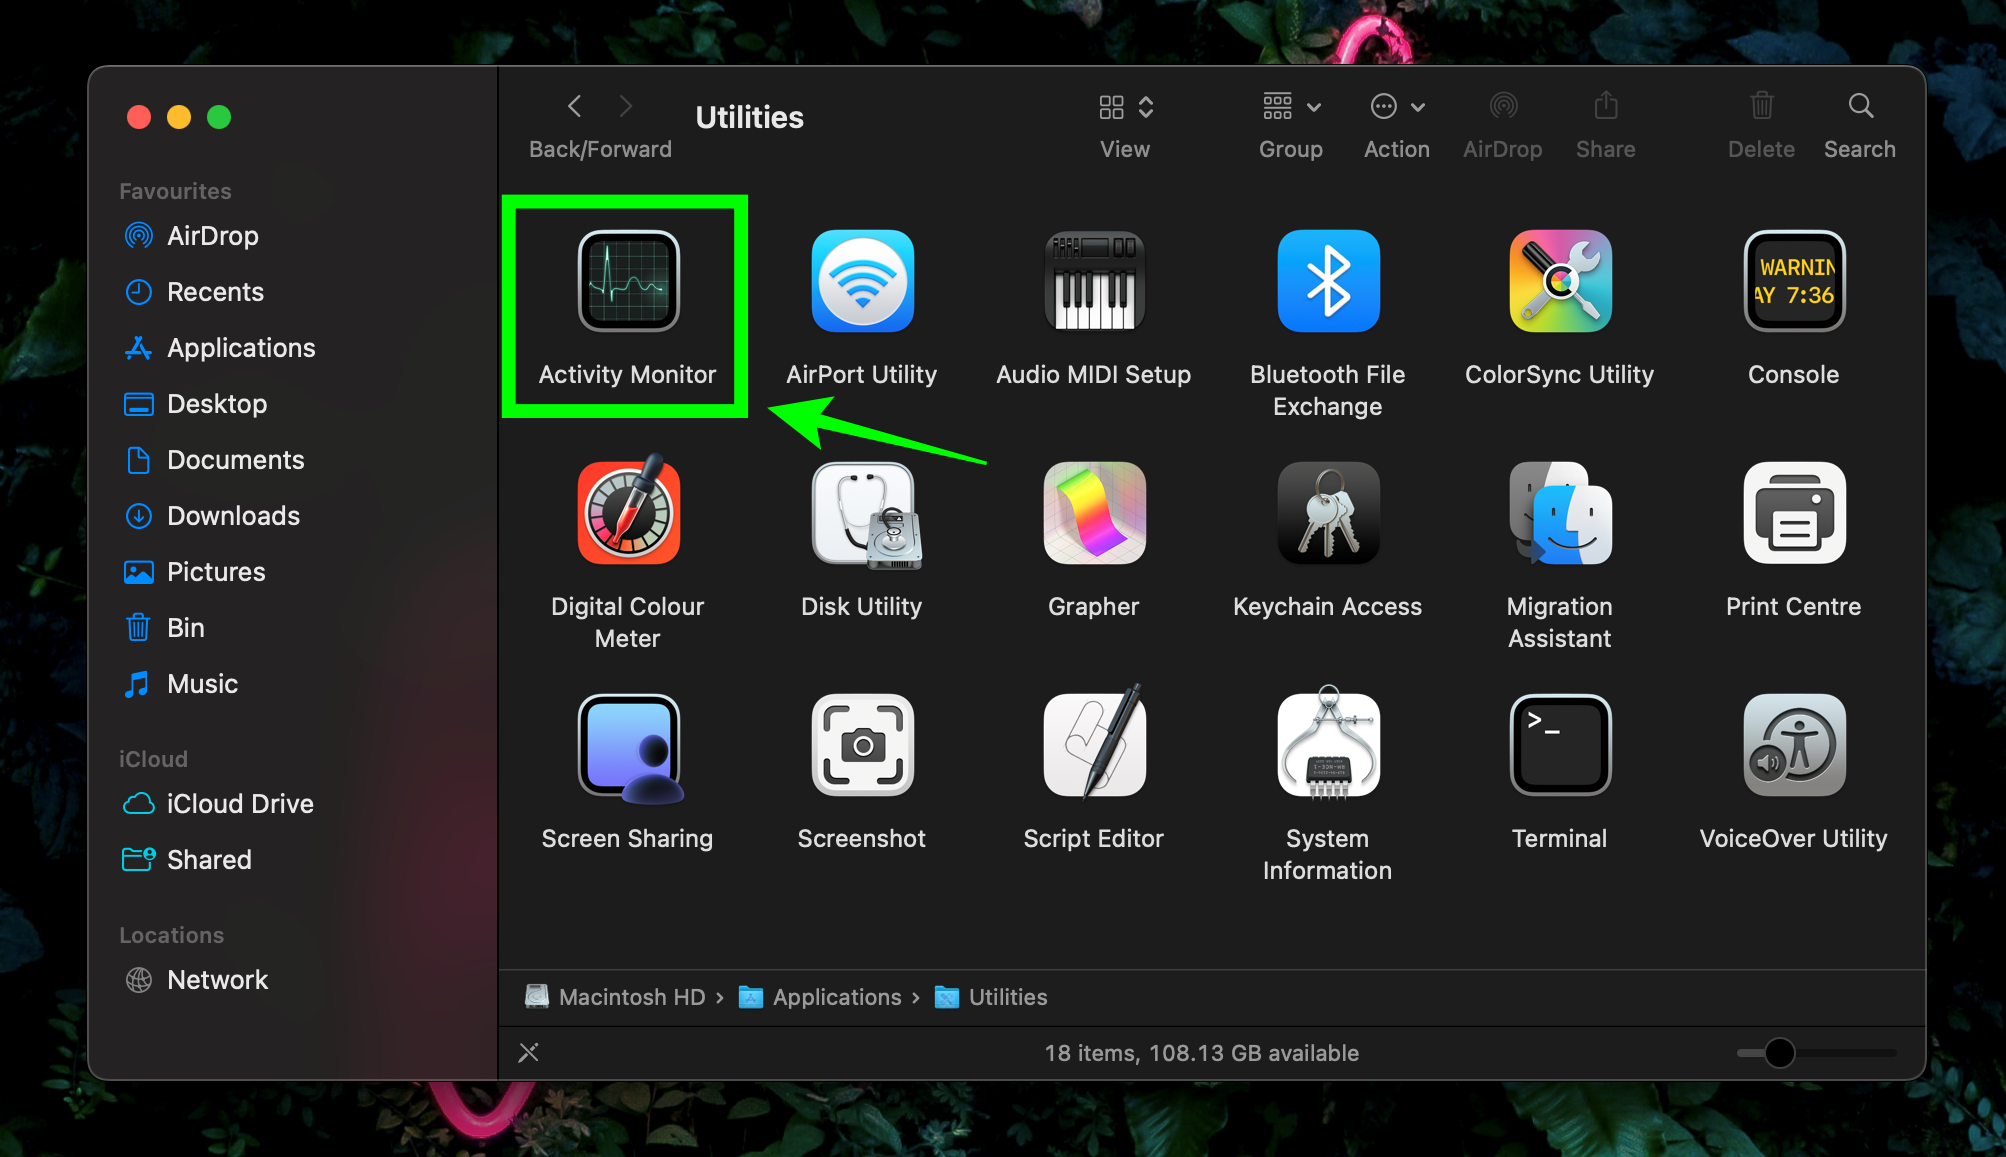
Step 2: Here you’ll find ‘Activity Monitor‘. Tap on it
Step 3: Now select the ‘Memory‘ tab to view memory consumption details and the total amount of RAM of the MacBook
These are the methods you can use to check the amount of RAM your Windows 10/11 laptop or MacBook ships with.


FAQs
Is there any way to clear RAM on my laptop?
To clear the RAM of your laptop in one go, close all the apps and restart it. This will clear the memory and provide a smooth experience the next time you start using the laptop. This is applicable for both Windows and macOS-based laptops. Apart from that, you can force close the apps running in the background using Task Manager or Activity Monitor to clear RAM.
Can I upgrade the RAM on my Windows laptop or MacBook?
Yes, if your Windows laptop comes with additional RAM slots, you can upgrade the RAM up to the maximum capacity per the specifications. In the case of MacBooks, only specific models launched before 2013 allow users to upgrade the RAM configuration.
How do I identify the type of RAM?
One can easily identify the type of RAM on Windows using the Command Prompt – wmic MemoryChip get MemoryType. The resulting number will mean the following memory types – 20 is DDR memory, 21 is DDR2, 24 is DDR3, and 26 is DDR4. If the resulting value comes out to be 0, replace “MemoryType” with “SMBIOSMemoryType” in the given command to know the RAM type.
Will 32GB RAM be faster than 16GB?
Laptops with 32GB RAM may not necessarily be faster than 16GB laptops in general and casual usage. However, higher RAM will allow you to run more apps or tasks at a time. Subsequently, if you engage in heavy work like video editing or editing, more RAM will go a long way to enhance your experience by making the laptop operate smoother.


 review: sunny side up")


 to get improved transparency mode via new update")
