Users can password-protect important files and folders on Windows laptops/ PCs to keep confidential information away from prying eyes. This added layer of protection complements the lock screen password, preventing unauthorised access by others using the same machine. Below is a quick guide on how to password protect or lock files/ folders in Windows 8, 10, and 11 using encryption, third-party apps, and more.
Table of Contents
Method 1: Using folder encryption
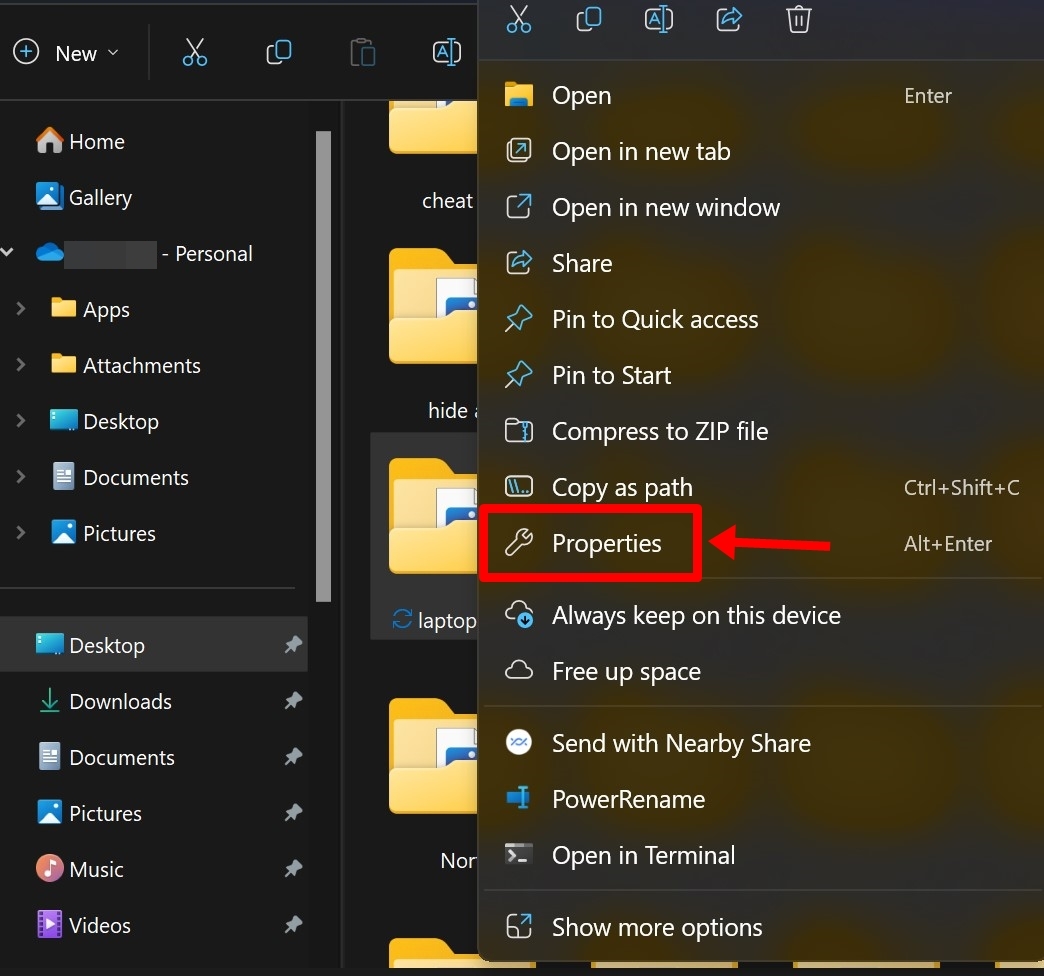
Step 1: Firstly, right click on any file or folder you wish to lock
Step 2: Now select ‘Properties‘. If you don’t fine the option, tap ‘Show more options’
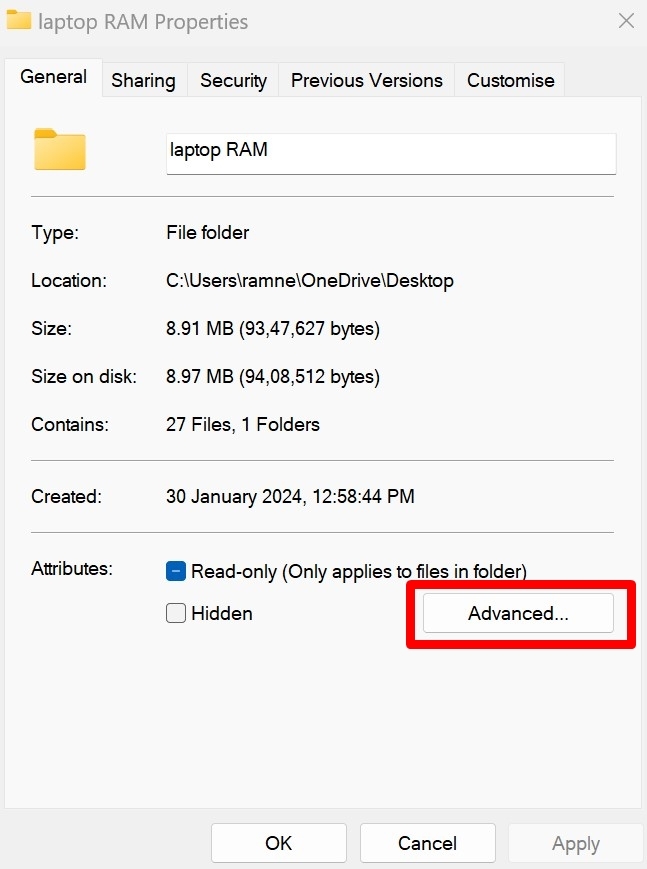
Step 3: A pop up window will appear. Select the ‘Advanced‘ button
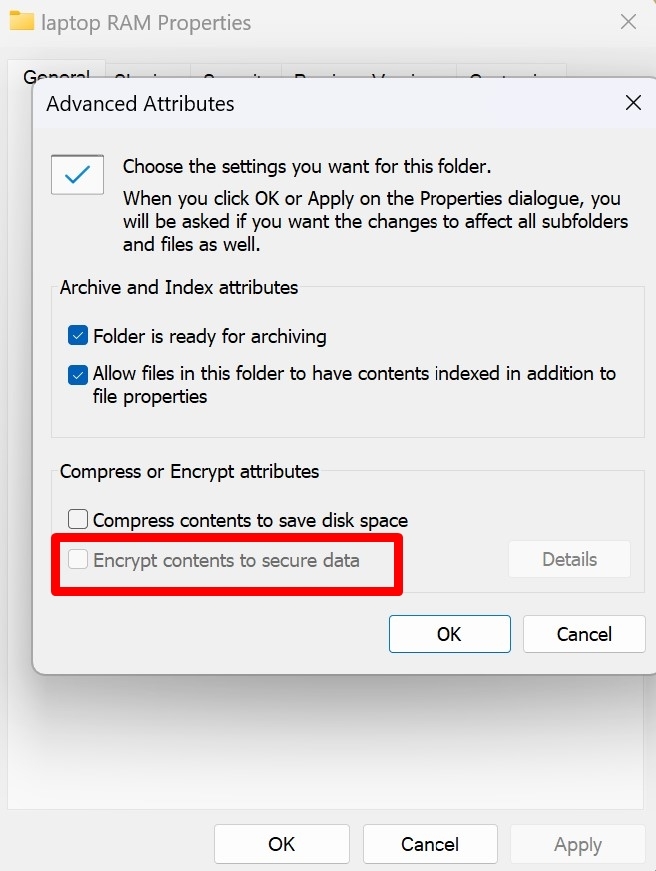
Step 4: Now select ‘Encrypt Contents to Secure Data’ option and click ‘Apply’
The file or folder will now be encrypted and accessed only using your laptop/ PC’s lock screen password. New files added to an encrypted folder will also be locked automatically.
Note: The ‘Encrypt Contents to Secure Data’ option under Advanced settings cannot be selected on Windows 10 or 11 Home versions.
Method 2: Using third-party software
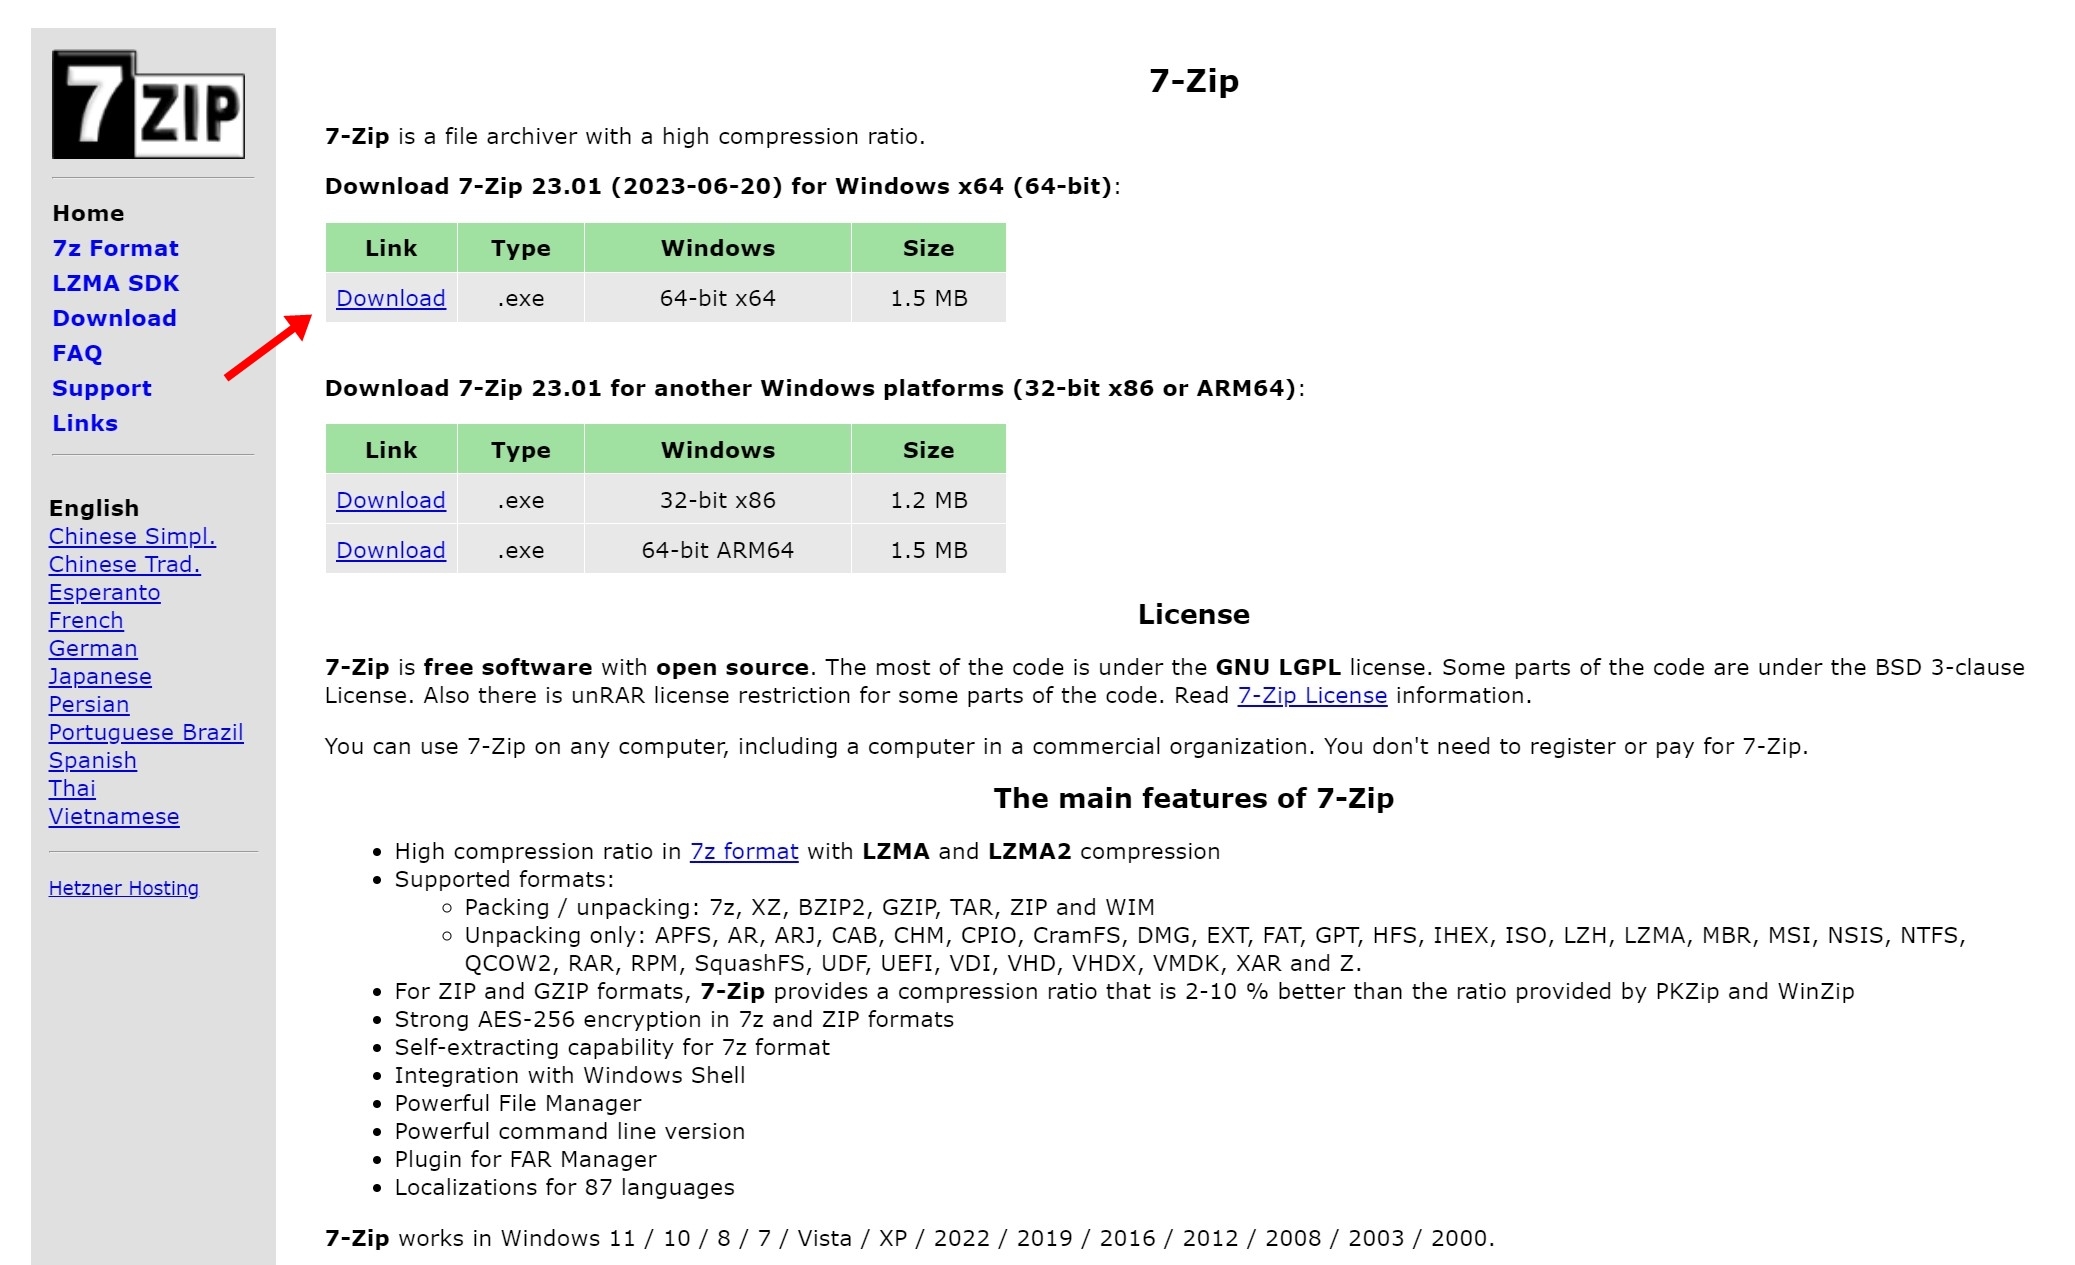
There’s an app called 7-Zip File Manager that creates a zip of the folder you wish to lock using a password. The zip files can only be extracted using the app itself in order to view its content. Here’s how to go about it.
Step 1: Download Z-7 Zip File Manager from your laptop’s browser
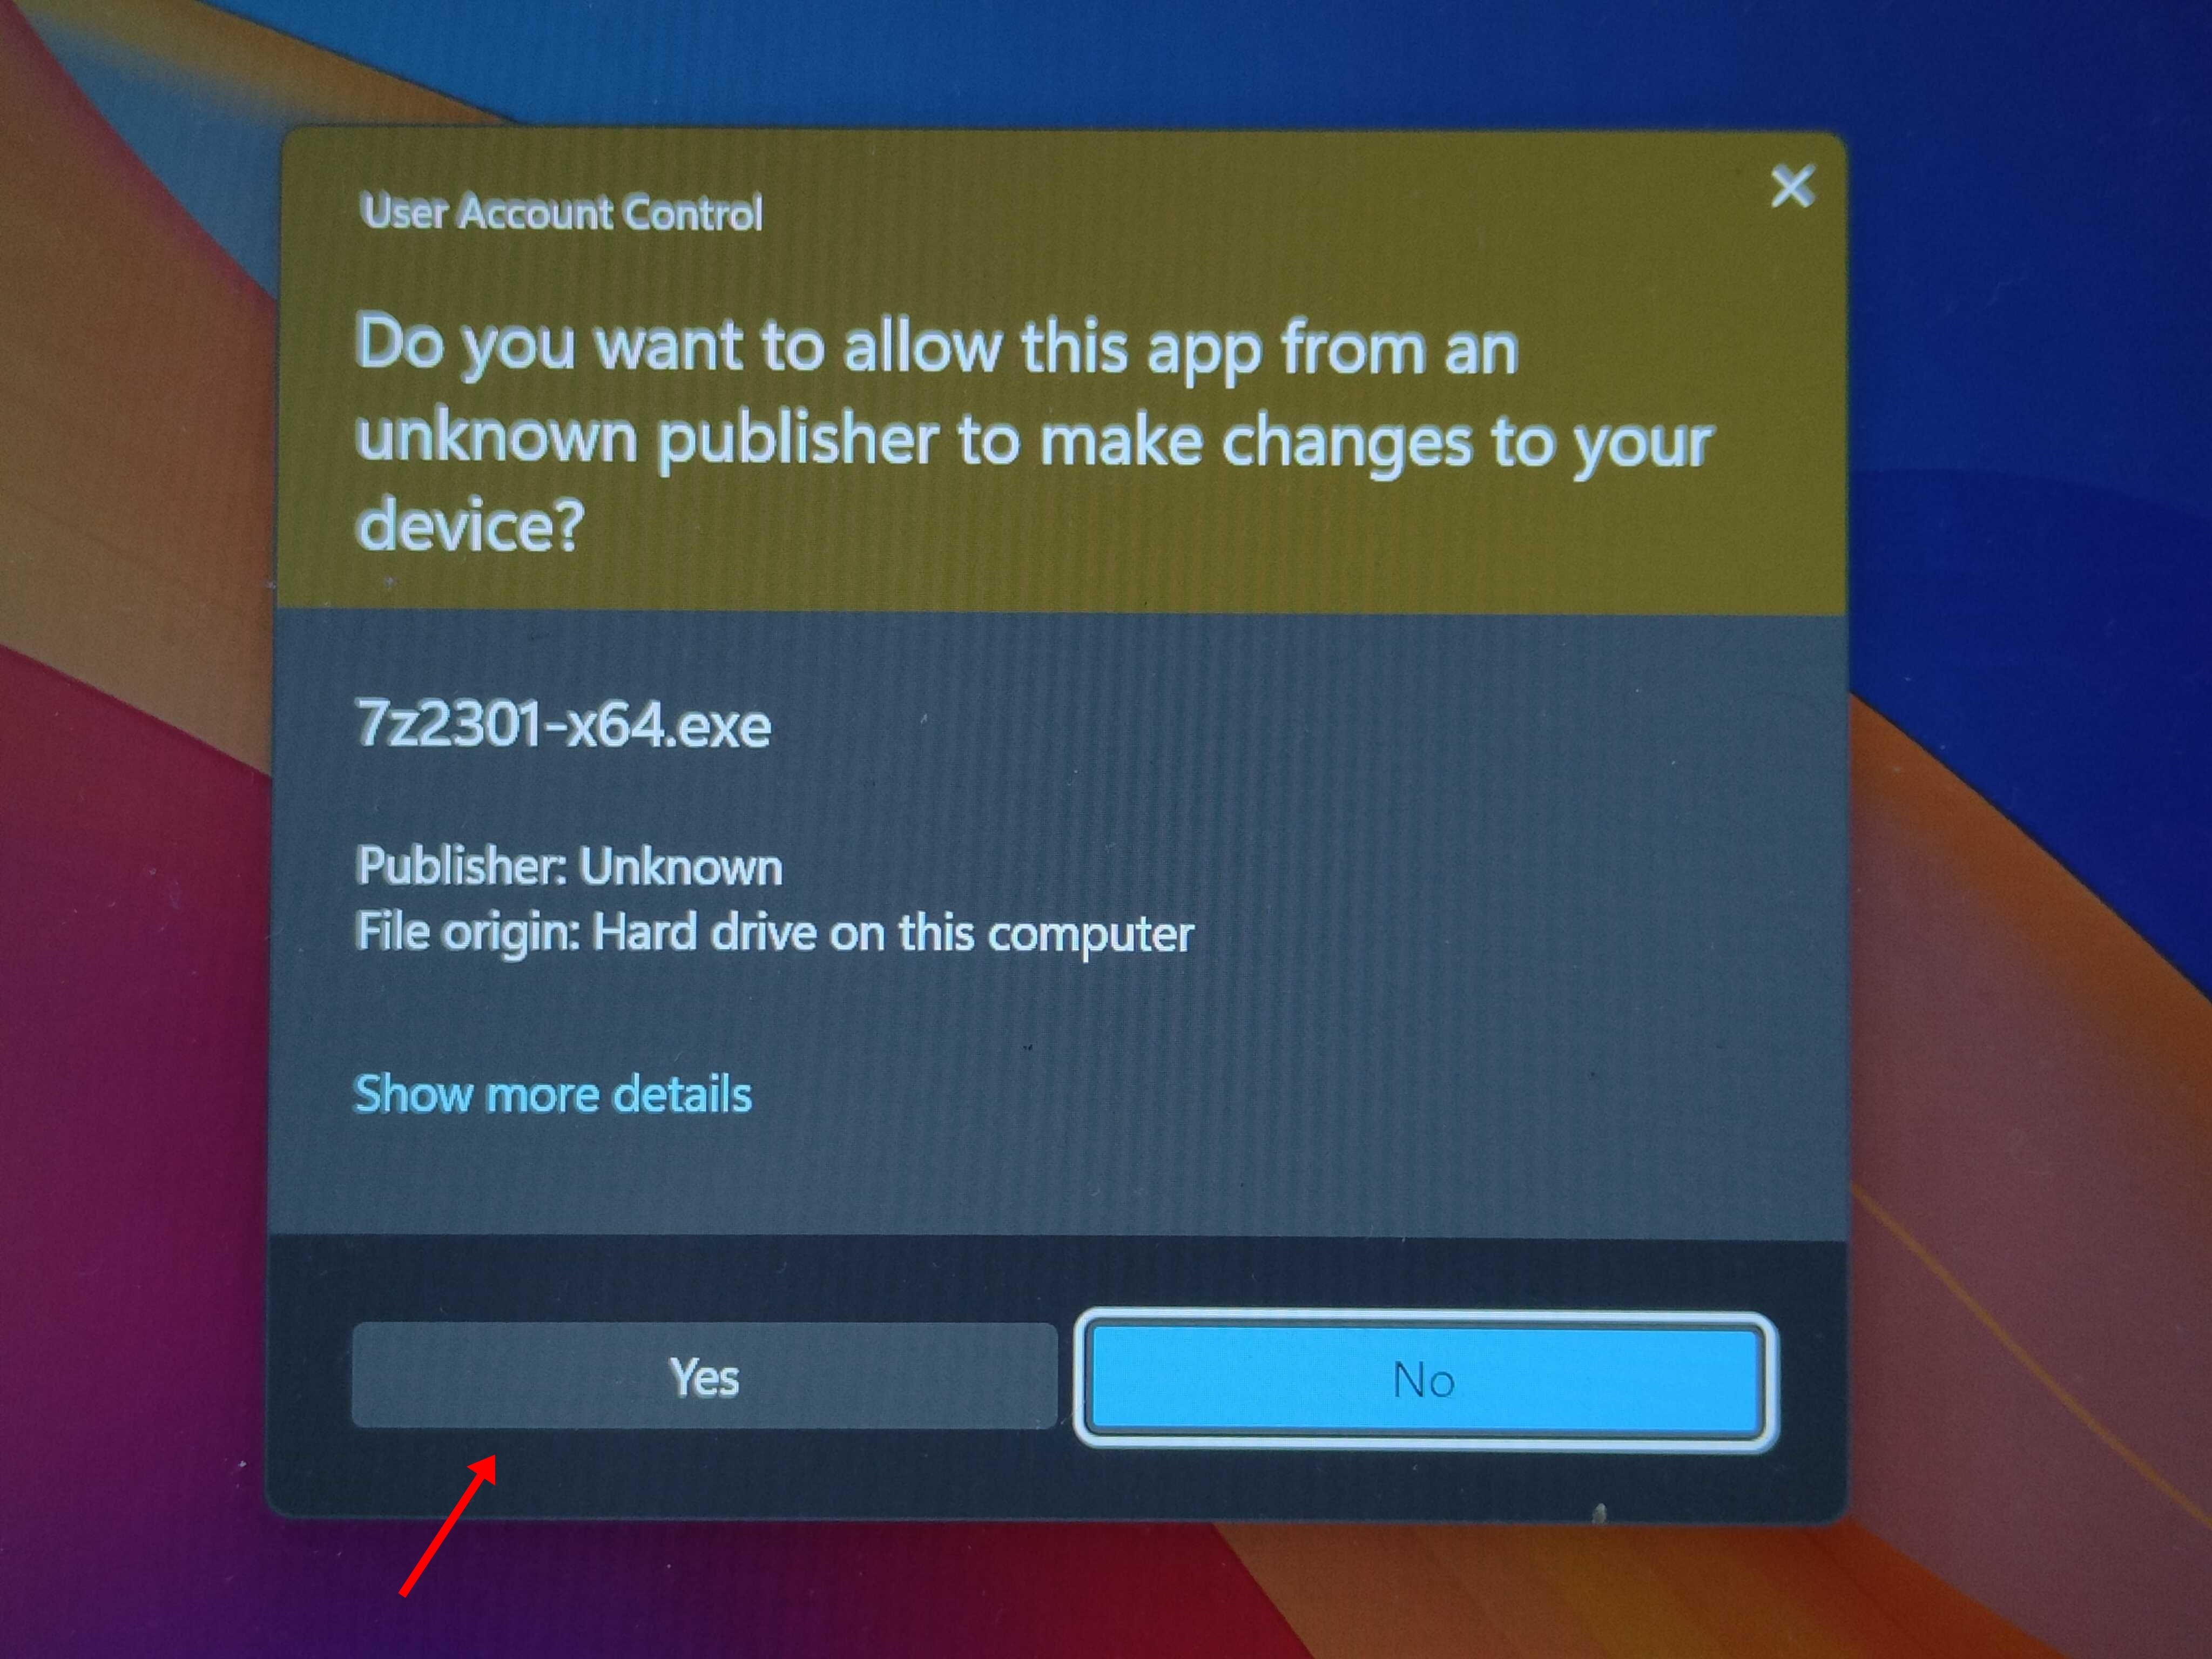
Step 2: Now open the .exe file and permit it to run as administrator
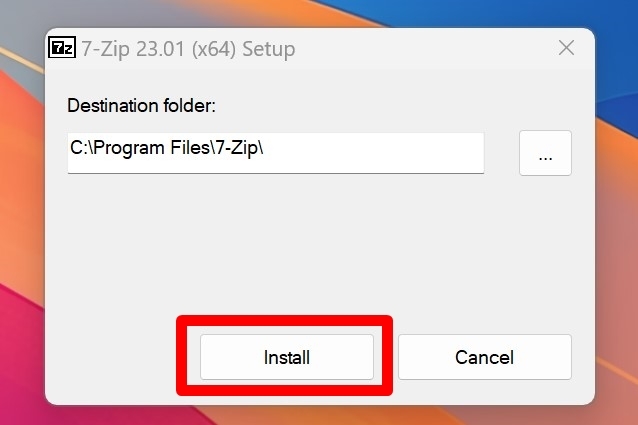
Step 3: Then select the directory where you want to save the app
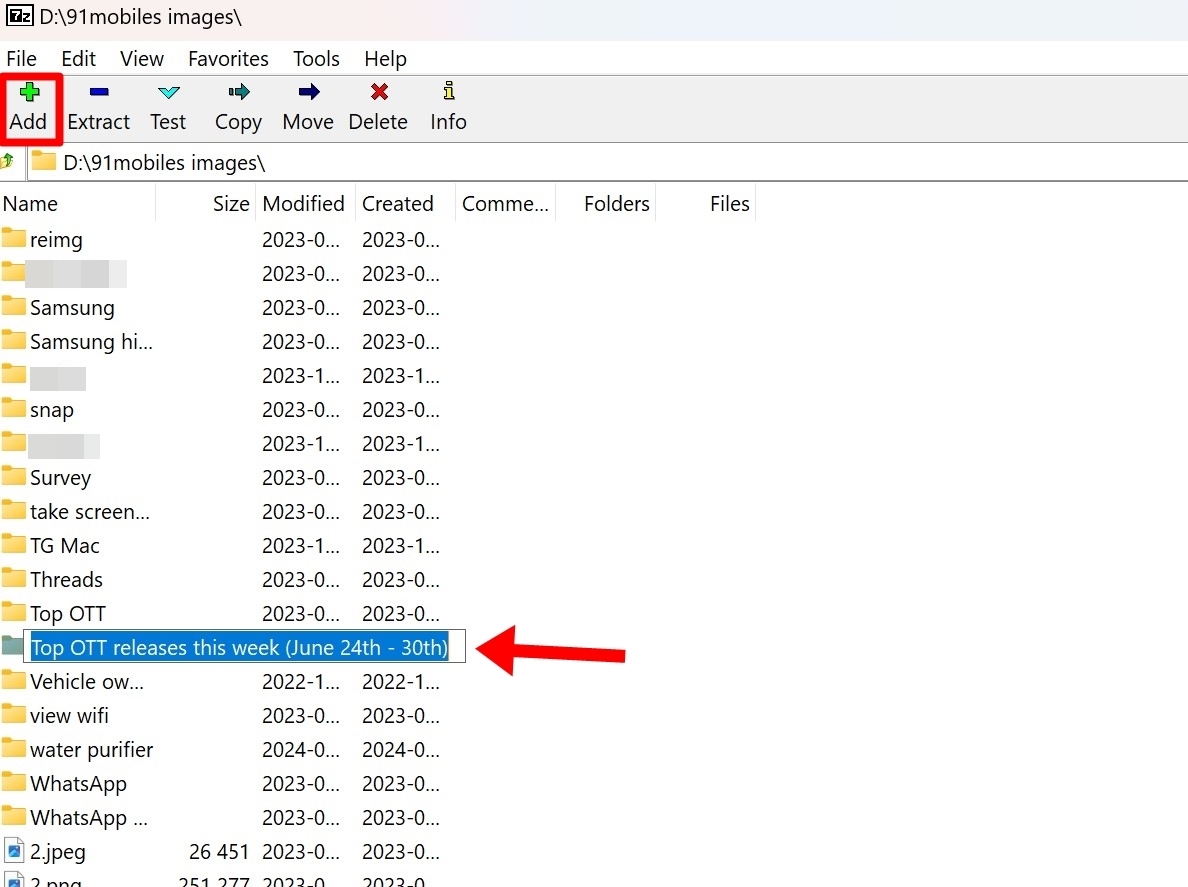
Step 4: Once the app is completely installed, navigate your way through the file manager and locate the file or folder you want to lock
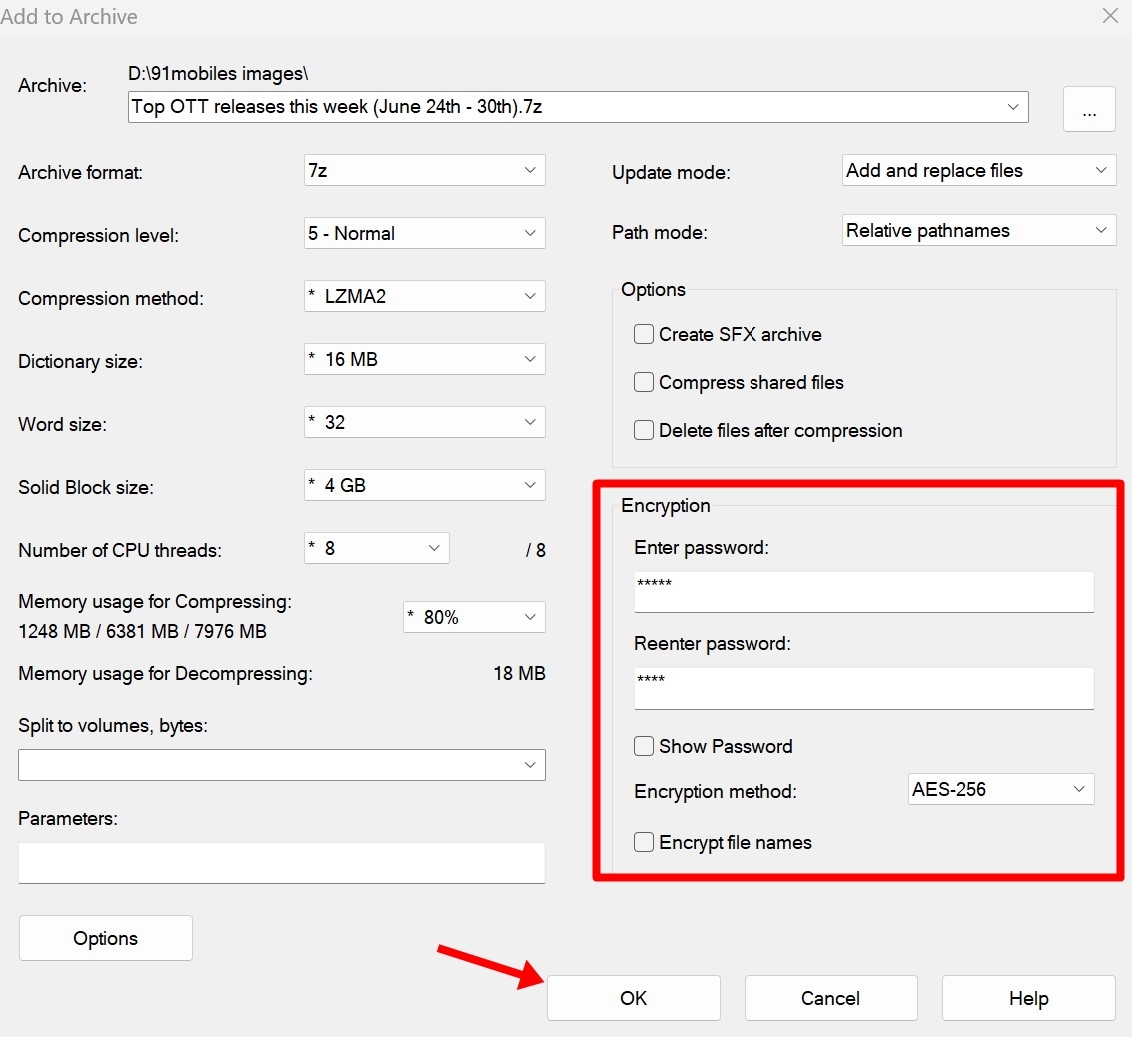
Step 5: Select the item and click on the ‘Add’ button present at the top left corner
Step 6: A small window will open. Under the Encryption section, enter a strong password two times and hit ‘OK’
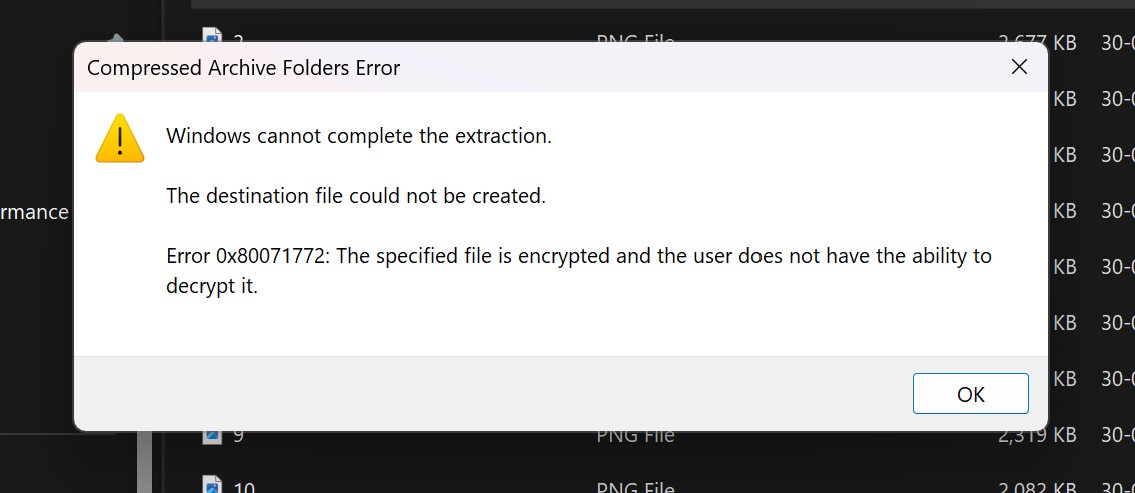
Step 7: A zip file will be created within the same directory. To unlock this zip file, again open Z-7 File Manager and locate the file. When you try to open or extract it from Windows’ native file manager, it’ll give an error
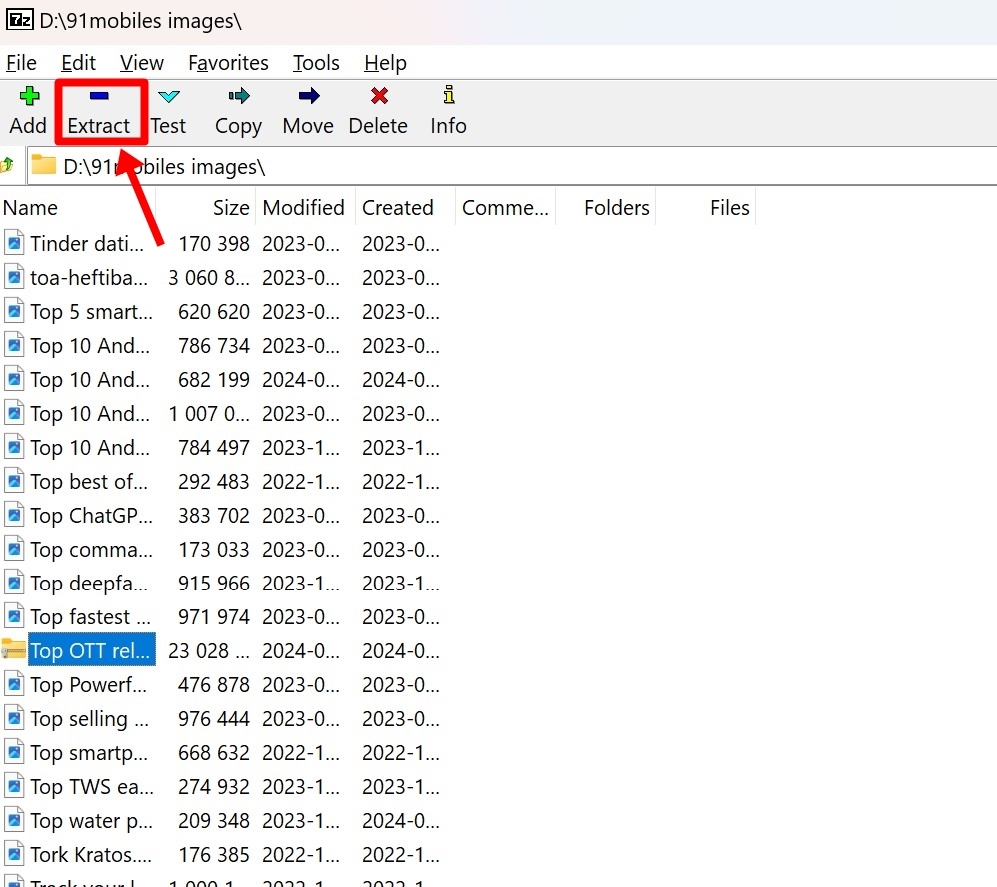
Step 8: Select the locked zip file and click on ‘Extract’ button from the top
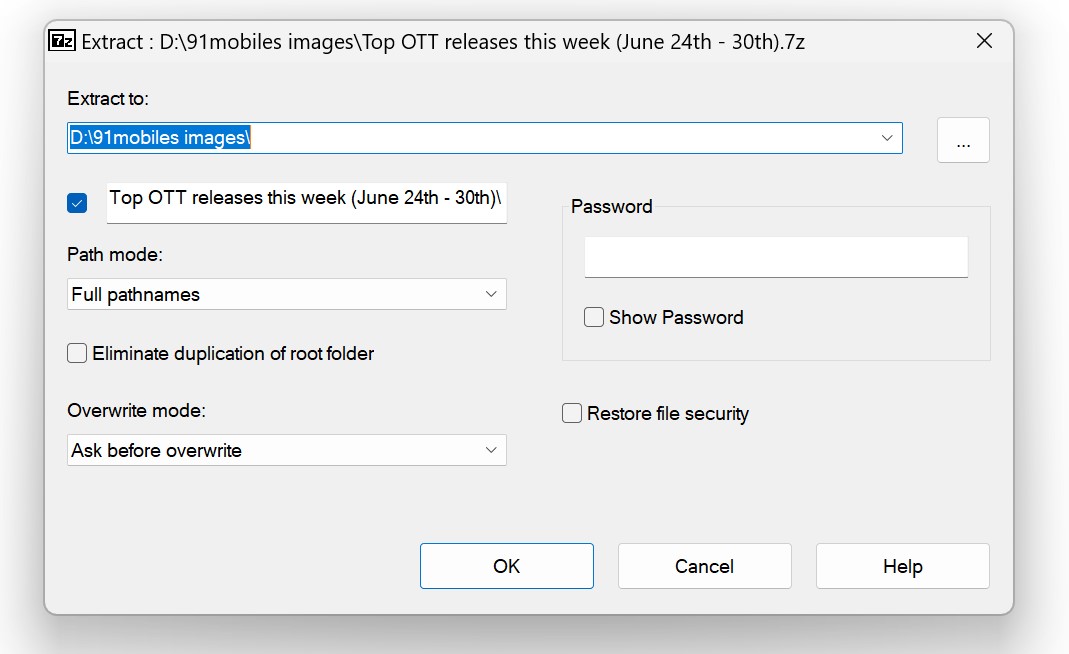
Step 9: Now proceed to enter the password which you had set when locking the file/folder
Step 10: Once done, a new folder will be created through which you can access the locked content contained in it
Step 11: Now to lock the file/folder again, follow the whole process again using the Z-7 File Manager app
Method 3: Using password protection on files
All Microsoft Office apps like MS Office, Excel, and PowerPoint Presentation come with the ability to lock the file through encryption. Here’s how it works.
Step 1: Open the MS Word, Excel, or PPT file you wish to password protect. Or create a new one
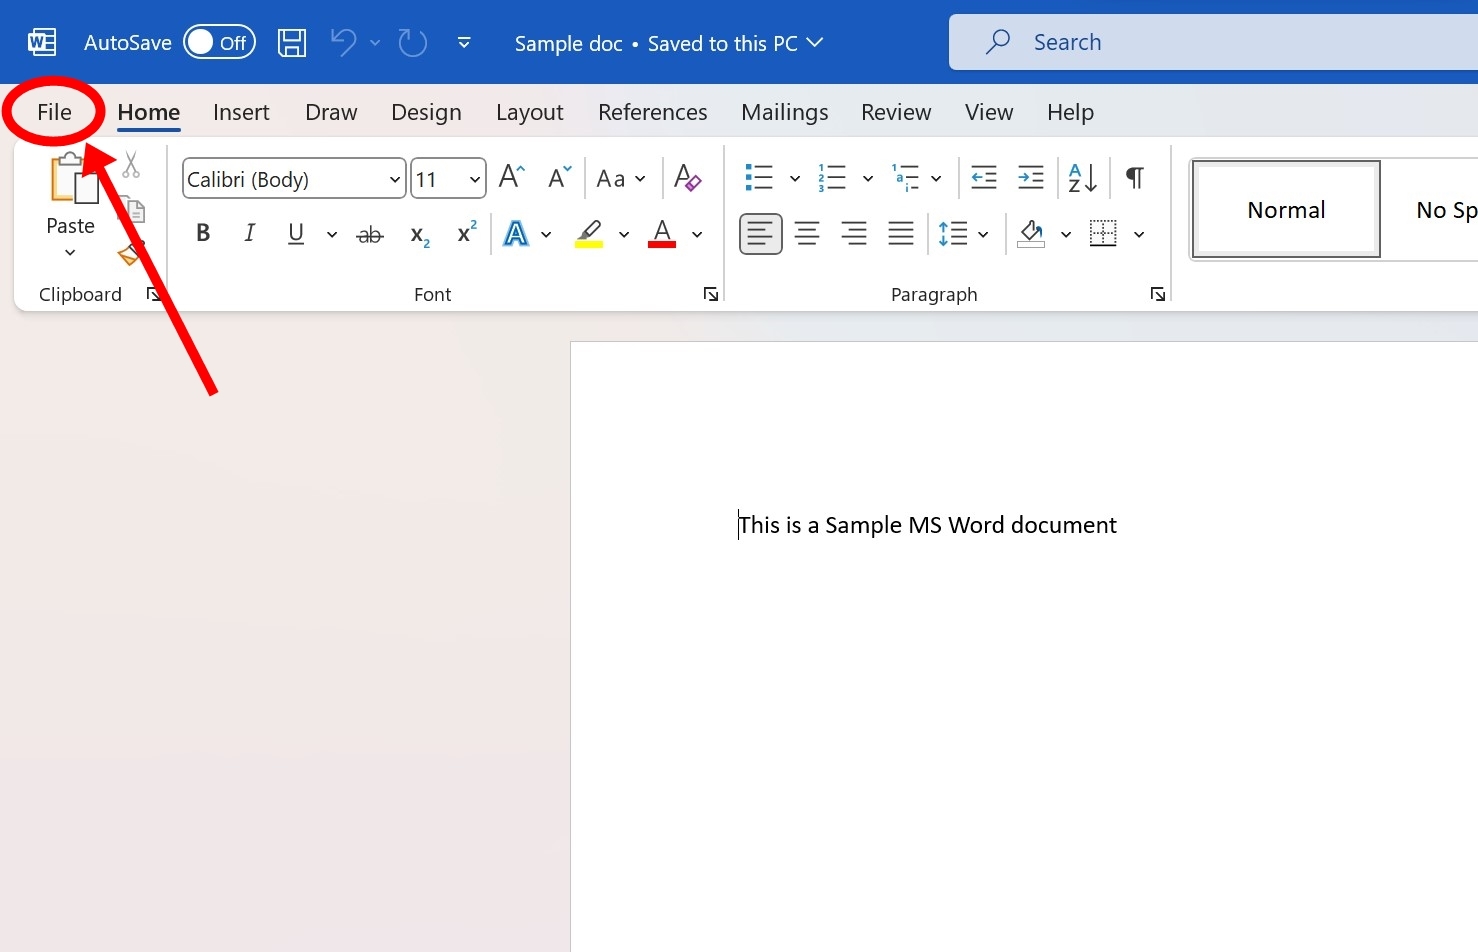
Step 2: Now select the ‘File‘ option from the top left corner
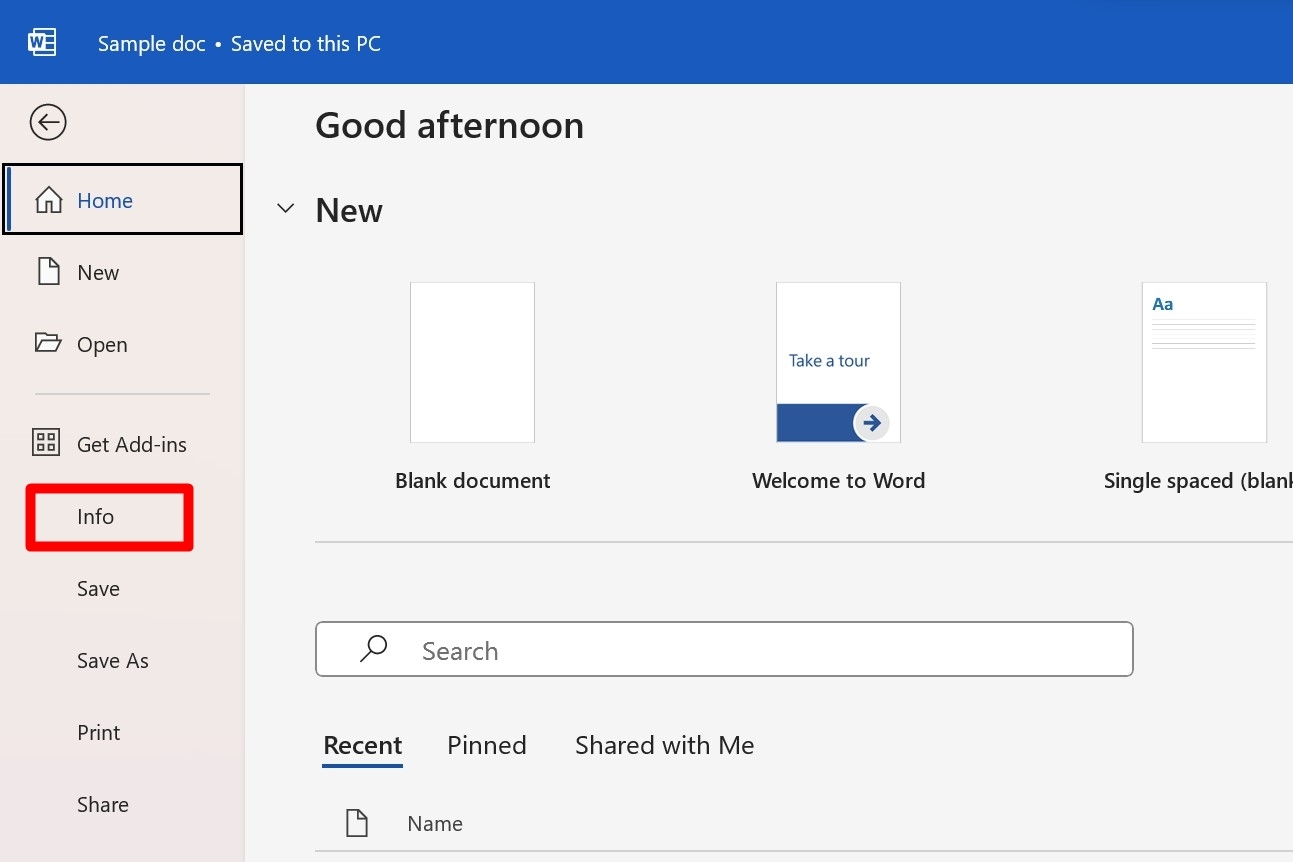
Step 3: Proceed to select ‘Info‘ from the left menu
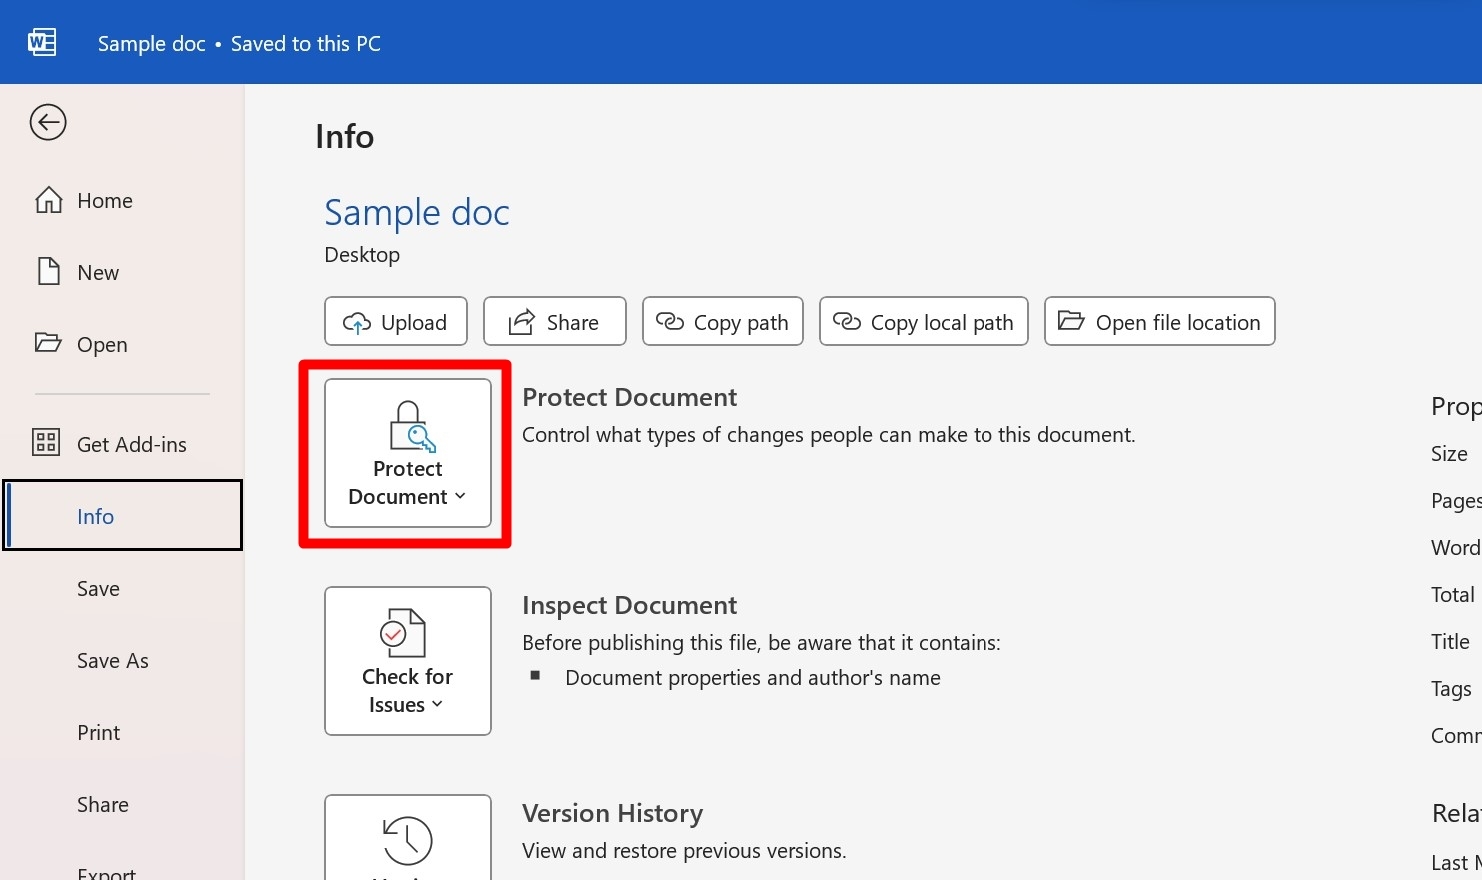
Step 4: Click the ‘Protect Presentation‘ button
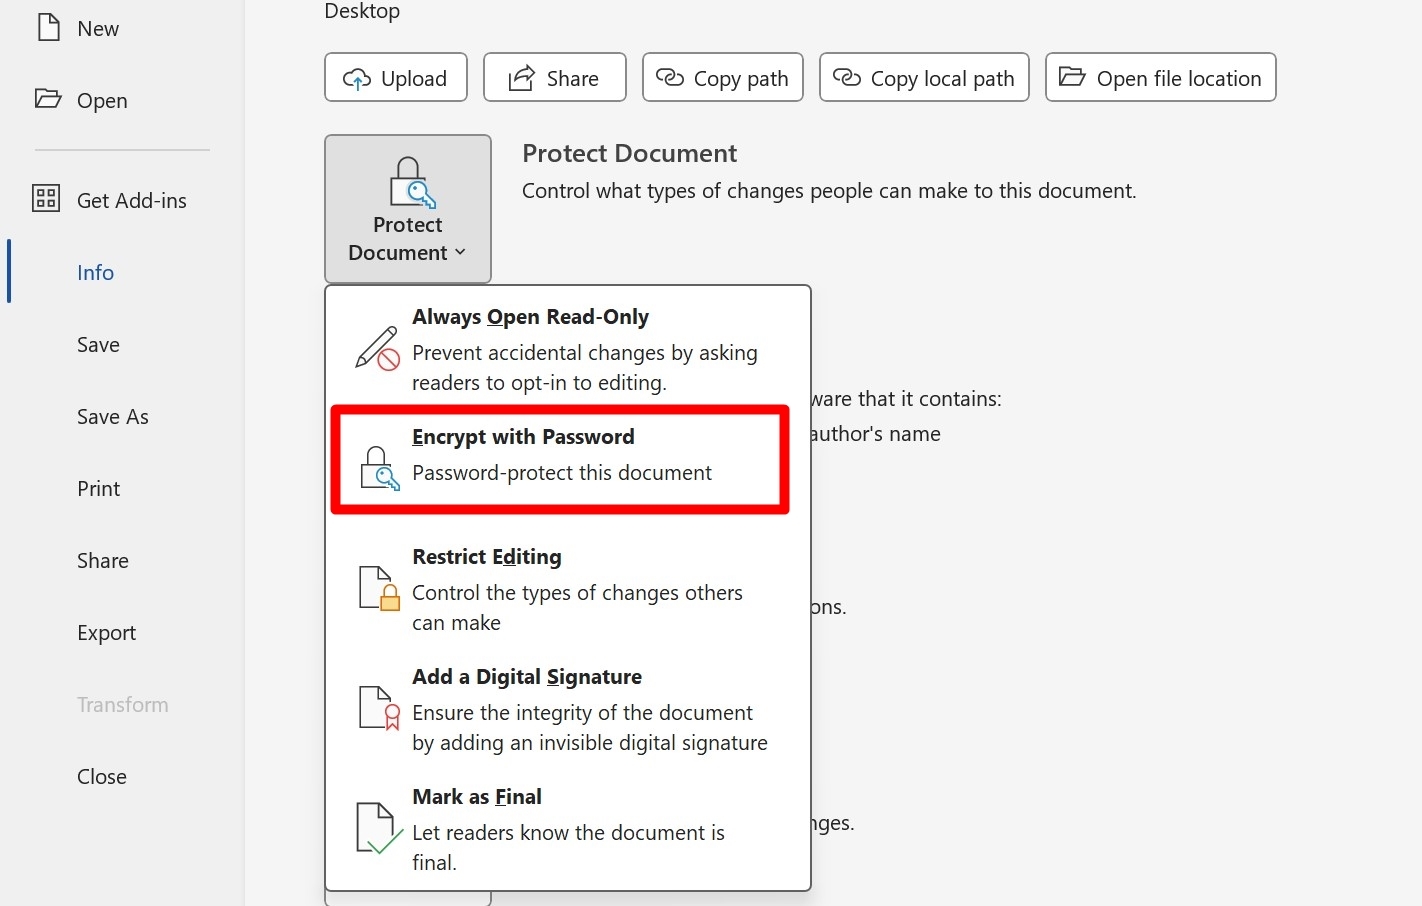
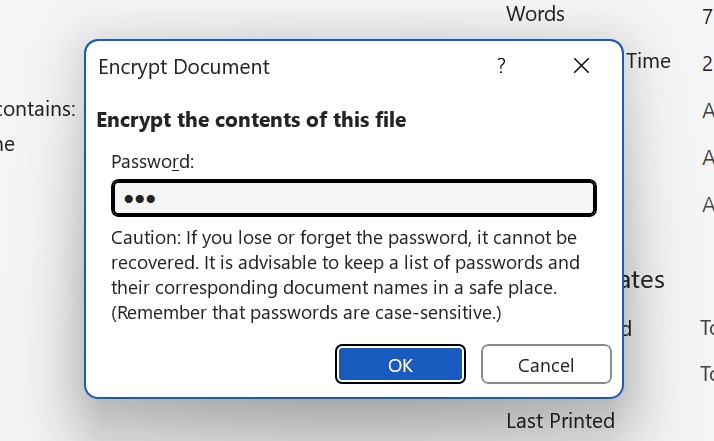
Step 5: Now tap ‘Encrypt with Password‘ option
Step 6: Enter the password you wish to keep and hit ‘OK‘
Step 7: Lastly, save the document and close the file
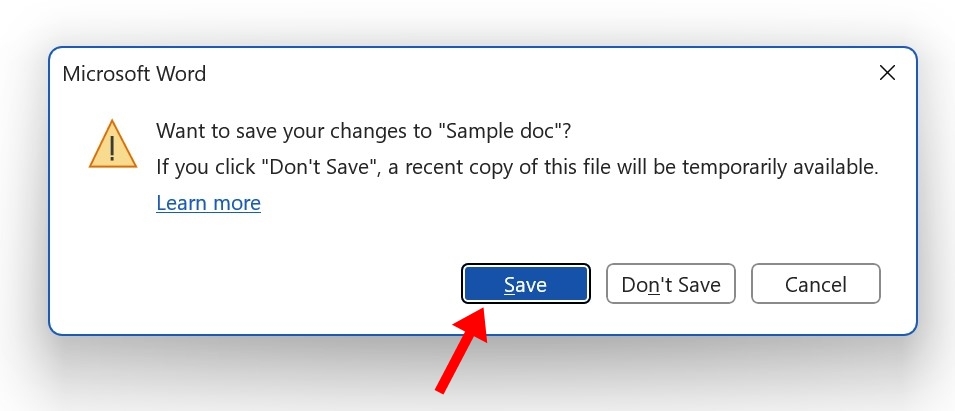
When you open the file next time, it will prompt you to enter a password to access it.
How to remove encryption from a folder on Windows
To remove the password from an encrypted folder, here’s what you need to do:
Step 1: Locate the folder you have protected using password
Step 2: Now right click on it and select ‘Properties’
Step 3: A pop up window will appear. Select the ‘Advanced‘ button
Step 4: Now unselect ‘Encrypt Contents to Secure Data’ option
Step 5: Enter the password and hit ‘OK‘
The folder will be decrypted and the password will be removed.


FAQs
Can I lock files or folders on my Windows laptop using built-in lock?
Unfortunately, Windows currently doesn’t offer any native way to password protect files or folders apart from encryption. There’s a Personal Vault feature within OneDrive that allows users to backup the files to the cloud and protect them using a password.
Can I password protect the folders on my Windows laptop to prevent them from deletion?
Yes, to do that, locate the folder and right-click on it. From the options, select Properties and then tap Advanced from the Security tab. On the next screen, select the Disable Inheritance button and the basic permissions to modify the folder will be removed and only the laptop administrator will be able to delete the folder.


 review: sunny side up")


 to get improved transparency mode via new update")
